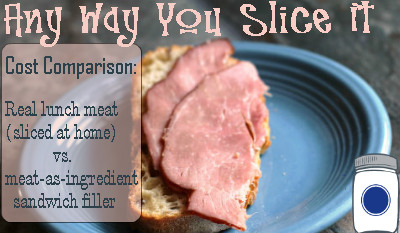
Any Way You Slice It: Lunch Meat, Cold Cuts, & the Deli

Cold Cuts Cost Comparison 

As a family, we (mostly) follow a traditional foods diet.  Living in Montana, we are somewhat meat-heavy in our diet (no apologies—we are far healthier than ever before).  We are busy, and being a bread baker I often look to the quick sandwich to feed my family while on the go. 

I am going to smash the excuse that real food costs more, or that you do not have any choices.  I have already done the hard work (out of necessity for my family’s health) of pricing out each option ounce-for-ounce and I am going to pass along my “aha moment” to you.

The Local Deli Counter

I asked the lady if I could see the ingredients list for the cold cuts on sale.  No verbal answer, but she stared at me with that look on her face that said, “It’s meat.  Meat.”   The manager understood my plight thankfully, and said, “If you cannot have dextrose or cornstarch, we might not have any deli meat for you.”  Label by label by label, we tediously discovered that ultimately, the delicatessen is off-limits.  We discovered that there is one “safe” and cornless deli meat, pastrami, which probably isn’t “safe” at all by other standards.  On that particular day, I was just trying to feed my kid on a busy trip into town so I bought it (crazy expensive too, I might add). 

I blame a lot of my “lack of real food choices” on the fact that I live in a small town, but I found that is not true.  On a recent trip to an extremely metropolitan East Coast city, I found the local deli still had only a single non-corn meat…pastrami.  They also had the incredulous look of “It’s meat, Lady” on their faces, and the “safe” choice still had an ingredients list at least 5 items long.

 The Solution

Finding pre-sliced lunch meat without all of the corn syrup, msg, food coloring, preservatives, and other unnamed gunk…it can be done but not easily or cheaply.  We have yet to discuss what the animal was fed, it’s living conditions, the use of antibiotics, or genetic modification!  Lest you feel like giving up before you start, there is a solution that only takes minutes of your day—less if you plan ahead. 


My solution was the food slicer (currently $20 off in honor of this blog).  Originally purchased for making our 6-8 gallons of yearly sauerkraut, we find reasons to use it all of the time.  In fact, we find it really helps to make fermented foods like pickles, sauerkraut, and kimchi simpler and thereby, we have increased our intake of those naturally probiotic foods.  I probably use it every bit as often as a companion to my Excalibur dehydrator…zucchini chips, tomatoes, onions, carrots, potatoes…you get the idea.  But back to the meat of the matter.  


I have control over the meat we are eating.  We get our pork semi-locally (2 hours away, and in Montana that is “local”); they even deliver it twice a year.  Grass-fed, no hormones, humanely butchered, and unlike any other pork I have ever eaten in my life.  Try to find those options in your community. 


For comparison’s sake, I will be talking only of ham so that we have a baseline.


Option 1: The Local Producer

Very often, your local producer is using locally-grown feed.  You can usually go to the farm yourself to see the condition of the livestock.  You can ask questions, walk around, smell the roses (so to speak).  There are generally different package deals; if you have adequate freezer space you can even buy ½ an animal, or a whole animal.  Find someone else to split the meat with to get the best deal of all.  


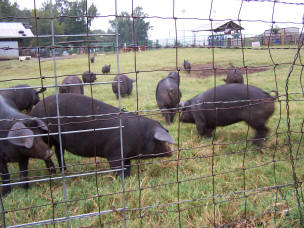
Pigs on Pasture at Falster Farm


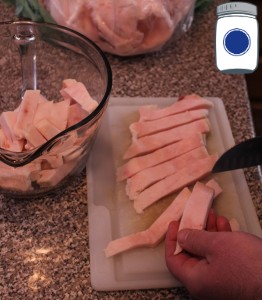
If I buy just a ham a la carte, it will cost $7.49/ lb.   That’s 47¢ an ounce.  A bit too high, but if I buy in bulk, I can bring that cost all the way down to 19¢ an ounce!  As an aside, our local producer will sell sliced ham to you for $1.50 more per pound.  That food slicer is paying for itself.


Option 2:  The Wholesale Box Store

I recently talked to a friend who lives in the Washington DC area who said that the Costco/Sam’s Club style store is the “only way we can stay within a food budget around here”.  I know that this is a common way to shop, and so here was my price comparison.
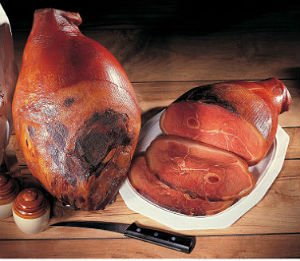
 

Sam's Club Smoked Ham

 25¢/oz.  for this smoked ham, cured 4-6 months.  No information whatsoever was given about the farm, farming methods, antibiotics, feed, animal treatment, and so on.  The ingredients list was acceptable (salt, sugar, pepper, that type of thing).  


Option 3: The Local Health Food Grocery Store

Having recently emptied my bi-annual supply of pork, I purchased this one at a large, full-selection health food store.  I was pleased with the ingredients (the lack thereof), the flavor is delicious, and I know that this is a quick, safe meal for a family on-the-go.  I sliced the whole thing and put most of it into the freezer for another day. 
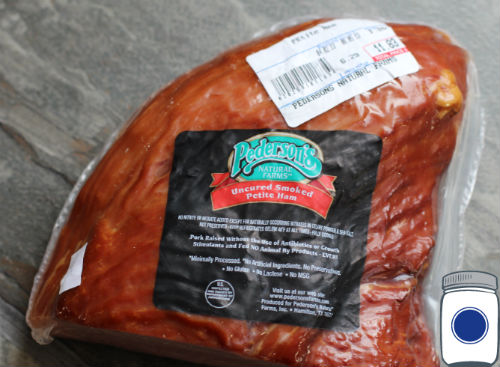
Ham from health food store


39¢ an ounce.  Your health food store might be cheaper—we live in a food-expensive area because everything must get trucked in over the mountains. 


Conclusion

Plan a family trip out to your local farm (use Farmmatch, Local Harvest, or Farmplate to find one).  Make a day of it, have an experience and reconnect with your food.   Then the next day, slice up your meat and put it all into your freezer for later convenience. 


Oh, and as an aside—here is the ingredients list for a Hillshire Farm product, very typical of everything out there.


Thick Sliced Virginia Brand Ham

Water Added, Caramel Colored ● Made in Kentucky

Ingredients:

CURED WITH WATER, SUGAR, DEXTROSE, CONTAINS 2% OR LESS OF: SODIUM LACTATE, SALT, SODIUM PHOSPHATE, CLOVE, SODIUM DIACETATE, SODIUM ERYTHORBATE, SODIUM NITRITE, CARAMEL COLOR.

Don’t forget to make a panini for me,

Chaya 

 P.S.– The Nesco food slicer is $20 off right now!  No coupon needed; we just want to encourage you to produce, prepare, & preserve–your own lunch meat! 


Proviso:

Nothing in this blog constitutes medical advice.  You should consult your own physician before making any dietary changes.  Statements in this blog may or may not be congruent with current USDA or FDA guidance


Photo Credits:
Box Store Ham was from the Sam’s Club website, link given below the picture.
The pigs on pasture are from Falster Farm.  Learn more about this wonderful farm here.

All other pictures are property of Pantry Paratus.  Feel free to pin or share the photos as long as you give proper attribution.  Thank you.

Unpronounceable: Azodicarbonamide on the Ingredients List


Unpronounceable: Azodicarbonamide

A Closer Look at the Ingredients list


Azodicarbonamide.


Say that three times fast.


azodicarbonamide


Who knew modern food would require a degree in chemistry?  I figure that if you cannot pronounce it, you should think twice about putting it into your system.  In fact, it is also known this way: E927. 


They often put   azodicarbonamide in store-bought bread products.  I had never heard of it.  I did not even remember reading the name before Rebecca from DieFoodDye.com mentioned it to me.  She said that children with sensitivities to food coloring often have sensitivity to azodicarbonamide, too.  After she mentioned it, I started label reading store- bought breads and she was right, it is common. 


<Yeah, I’m just keeping the word “Azodicarbonamide” on my clipboard & hitting “paste” on my keyboard when I want to say it. Azodicarbonamide.  Azodicarbonamide.  Much easier.  >


Why They Use It

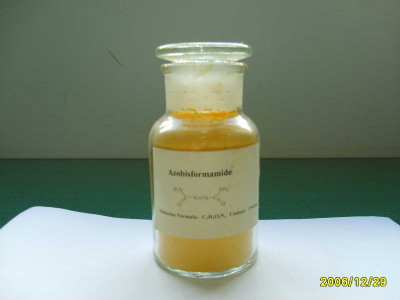
So azodicarbonamide is an orange powder that supposedly extends shelf life and a bleaching agent.  How does something orange have a bleaching effect?  Azodicarbonamide chemically reacts with the carotene in the bread.

 azodicarbonamide


Where & The Where-Not

You will not find azodicarbonamide in your croissant as you sip your cappuccino outside that quaint French café.  Illegal.  Not approved.  You will not have azodicarbonamide in Europe or in Australia. The United States has capped it at 45 ppm.    It is actually a bit worse than this, even, because Europe will not even allow the common use of azodicarbonamide in plastics, due to the respiratory effects on the workers (World Health Organization, 1999).

 azodicarbonamide

Bread, With a Side of Carcinogen

According to Wikipedia (yes, I have been reduced to citing Wiki on this one—so sorry), one of the byproducts of azodicarbonamide is the urea.  Urea has a secondary reaction of ethyl carbamate, which is not only a carcinogen, but a “pure carcinogen” that was once thought to have medicinal qualities—until the test rats starting dying.  


You do not have to search out all of the secondary reactions of this chemical to realize it is unnatural and unhealthy (although the FDA claims that it is “GRAS”—“generally regarded as safe”); if the testing overseas is to be believed, it can cause respiratory distress (World Health Organization,  1999).


Because Everything You Read on the Internet is True

While researching this, I found multiple blogs that claimed azodicarbonamide is the same thing as “bromide,” another common filler.  Avoid bromide, too, but they are not the same chemical compound. Someone made the mistake and it has been perpetuated in blogdom until it nearly becomes a known-fact.


The Takeaway Value


If the information on L-Cysteine did not gross you out, if the BTHQ article didn’t scare you, or the bleaching process alert you to their tampering,  then maybe learning about one more unpronounceable additive is what it will take to convince you—what you are buying at the store is not whole grain, it is not what grandma fed you, it is not the nourishing bread that is referred to as life-giving in many ancient pieces of literature and the Bible itself.  


I would like to encourage everyone to seriously look at what you purchase—become a label reader.  Not everyone thinks that they can learn bread baking—but I promise that if you are eager to learn and willing to invest some time into it, you can do it!   Your kids will have memories of baking day scents (and of sneaking a piece of raw dough when you weren’t looking).  Your boring morning toast will transform into something nourishing, filling, and delicious.  You will not regret learning to bake your own bread—and forgoing the carcinogenic azodicarbonamide.


Pronounceably Yours,
Chaya
(“kai-yah” –helping you out, there)


Proviso:

Nothing in this blog constitutes medical advice.  You should consult your own physician before making any dietary changes.  Statements in this blog may or may not be congruent with current USDA or FDA guidance.


Sources:

World Health Organization (1999).  Concise International Chemical Assessment Document (CICAD)#16. Found at: http://www.inchem.org/documents/cicads/cicads/cicad16.htm

 Wikipedia Links:

http://en.wikipedia.org/wiki/Azodicarbonamide

http://en.wikipedia.org/wiki/Ethyl_carbamate


Photo Credits:

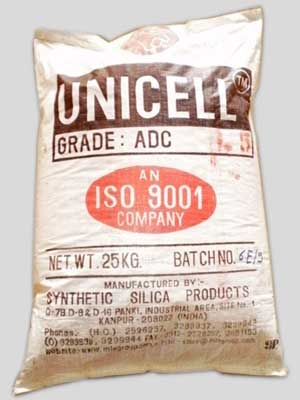
Bag of azodicarbonamide


www.Hypersmash.com

Pre-ferments, diving a bit deeper into how they work

Pre-ferments: How They Work


Saccharomyces cerevisiae, a yeast by any other name 


The eyes in swiss cheese and the pockets in French Bread are both caused by trapped gasses—however the first is caused by bacteria (Monera Kingdom) and the second is from yeast (Fungi Kingdom).  In bread, it is possible to leverage both through the use of pre-ferments. 


 How Preferments Work


If you read our other blogs on pre-ferments you are likely sold on them and you are already on your way to making great bread.  I just wanted to fill you in on a bit of the “how it works” behind the scenes with the smallest parts of nature doing all the heavy lifting.  Enzymes do so much for us and eventually to us.  Need to make cheese?  Enzymes can help you do that.  After I am put in the ground one day to make compost, it will be enzymes doing the hard part of converting me to soil.  Hand-in-hand with enzymes, are bacteria recycling everything in nature.


Enzymes typically end in “-ase” and are named for the sugar that they consume which typically ends in “-ose.”  For example, amylase is the enzyme that converts the sugar in a bruised or freshly cut apple to the brown color we observe.  The amylase enzyme is acting on the amylose sugars in the apple, of which fructose is one kind of amylose.  “Enzymes are complex proteins that act as catalysts in almost every biochemical process that takes place in the body.  Their activity depends on the presence of adequate vitamins and minerals, particularly magnesium” (Fallon & Enig, p. 46).  Great, but what does that have to do with bread? 


An enzyme is what nature uses to break stuff down, whether they are working in your saliva or in huge vats in a Cargill plant in Blair, Nebraska turning long chain corn sugar into short chain high fructose corn syrup—enzymes reduce things.  Typically we would not want to leverage this if it were fruit salad, so we counteract enzymes with acids.  However, in creating a great pre-ferment we are cheering the enzyme process as it is the first step in releasing the grain’s full potential. 


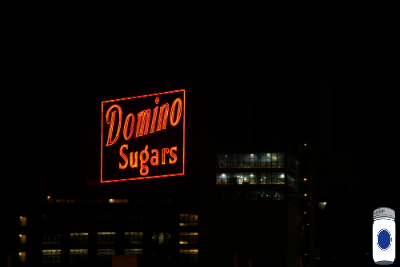
Domino Sugar


Here is an experiment that you can try at home: take a pinch of flour and put it on your tongue—it likely does not taste palatable at all, why is that?  “Flour tastes like sawdust because its sugar components are too complex to differentiate on the tongue” (Reinhart, p. 59).  The tongue is not set up to taste let along fully appreciate the wheat berry or its flour in its raw state because the sugar chains are way too long.  This is why sprouted bread has markedly higher nutrition, because the enzymes have already done so much of the work to make the nutrients available.


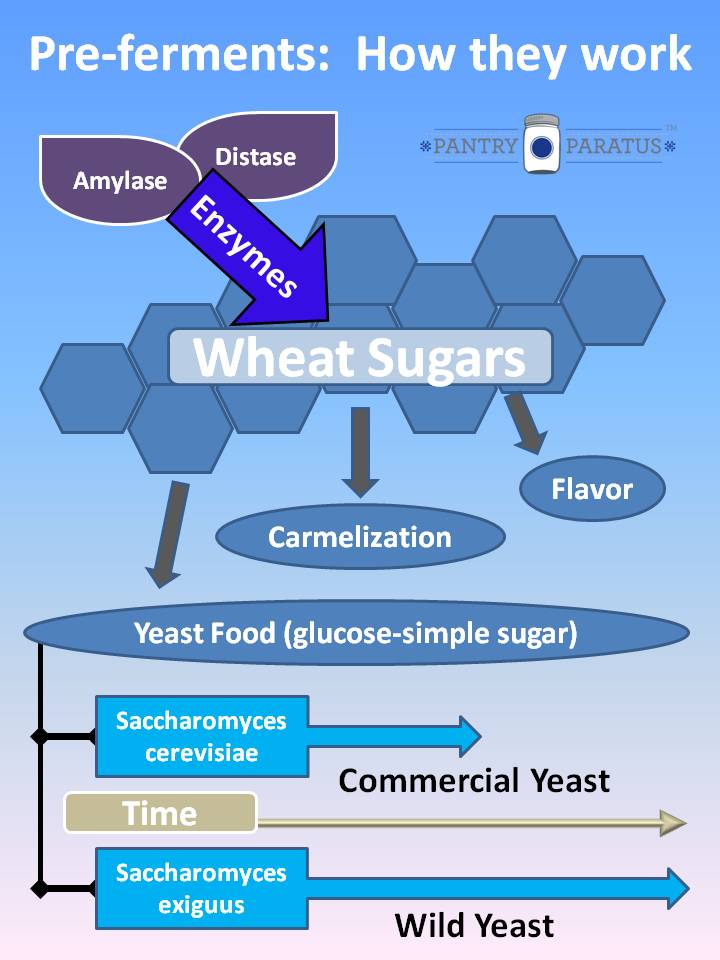
So the bread baker will either use the natural enzymes present in the dough plus time or he/she may wish to add a small percentage (usually .5-1% by weight) of an enzyme such as malted barley to the dough.  The enzyme process will break down the wheat sugars, this much you know, but the follow on processes are what makes bread truly extraordinary.  According to Reinhart, amylase and distase break down the wheat sugars to impart three subsequent effects: color (called “carmelization” by bakers) for the crust and crumb, flavor (the whole reason we are doing this!) and food for the yeast.


There are enough enzymes naturally occurring in flour that it is not always necessary to add them in the form of malted barley, as long as you are able to stretch time long enough to allow them to do their job.  This is, in a nutshell, why pre-ferments create superior bread: they are a way to manipulate time, to stretch it, so that the wondrous chemical activity going on at the cellular level can fulfill its mission (Reinhart, p. 64). 


Hmmmmm, food for the yeast?  I thought that is why we added enrichments to the bread?  You certainly can do that, but in Europe luxuries such as sweeteners were not always available, so pre-ferments were leveraged to embody flavor and develop structure in the bread.  Yeast is a simple organism, a fungus, an eukaryotic microorganism to be exact, and it eats simple sugars like glucose. 


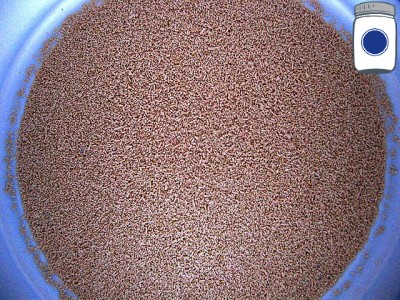
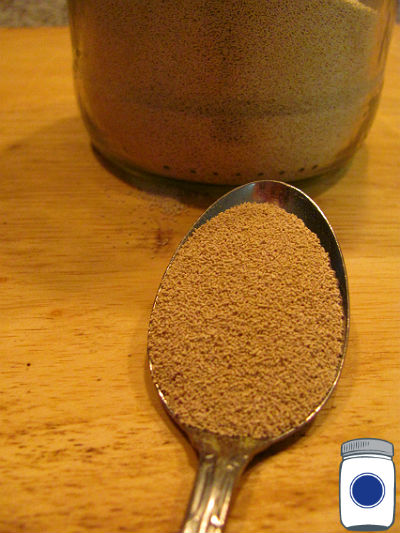
Yeast


But not all yeast is the same, nor does it have the same efficacy.  Reinhart, who prefers instant yeast, gives the following equivalency chart for substituting yeast (p. 60):


100% fresh yeast = 40-50% active dry yeast = 33% instant yeast


Typically all yeast that we buy will be the commercial yeast known as Saccharomyces cerevisiae otherwise known as baker’s yeast or brewer’s yeast—it is the same thing.  Breaking the word down we get from Latin: Saccaro, meaning “sugar,” myces, meaning “fungus,” and cerevisiae, meaning “beer.”  We can otherwise say that as: “sweet fungus of beer” (Volk & Galbraith). This yeast is produced to be reliable and predictable for baking—two things that you definitely want.  Pre-ferments using this kind of yeast are easy to work with and have reproducible results. 


saccharomyces exiguus


The other kind of yeast you really do not need to buy, because it is everywhere.  It is the white powdery residue on the wheat berry, a grape or even a plum—yes, we are talking about wild yeast or Saccharomyces exiguus.  This is typically used in sourdough breads, and the wild yeast works in conjunction with bacteria, notably our old friend Lactobacillus


The complex sour flavor is not created by the wild yeast [alone].  Other bacterial organisms, specifically lactobacillus [sic] and acetobacillus [sic], create lactic and acetic acids as they feed off the enzyme-released sugars in the dough, and these are responsible for the sour flavor (Reinhart, 65).


Remember that we are leveraging time in this process as well, so here is where the road splits off the direct doughs from the indirect doughs (using pre-ferments).  I have friends that are beer brewers and they say that everything has to be spotlessly clean because any bacteria will ruin a batch of beer.  “If bacterial activity creates too much acid, this type of yeast will die and make the bread taste funny, with an ammonia like aftertaste and a weakened gluten structure caused by the glutathione released by the yeast.  Most regular Saccharomyces cerevisiae leavened breads have a pH level of 5.0 to 5.5” (Reinhart, 66).


Saccharomyces cerevisiae


On the decidedly more acidic end of the pH scale is Saccharomyces exiguus which works best in a pH level of 3.5 to 4.0 “and therefore thrives when the bacteria does its work creating lactic and acetic acids.  Since it takes twice as long for the bacteria to create flavor as it takes for the yeast to leaven the dough, it requires a hearty strain of yeast to endure” (Reinhart, 65).  This chart should sum up everything we talked about so far:


Pre-ferments


If you have a recipe, tip or trick for using a pre-ferment—please leave a comment and share it with us.  Also, if you are a US resident, and you are over 18 and you have entered a valid e-mail address—I have a small prize for the first person who posts what a “barm” is in the comment section below (without doing an internet search, please). 


Wilson

Pro Deo et Patria


Works Cited:

Fallon, S., & Enig, M. (2005). Nourishing traditions. (Deluxe Edition ed., p. 4). Washington DC: NewTrends Publishing.

Reinhart, P. (2002). The bread baker’s apprentice, mastering the art of extraordinary bread. (p. 27). Ten Speed Pr.

Volk, T., & Galbraith, A. (n.d.). Retrieved from http://botit.botany.wisc.edu/toms_fungi/dec2002.html


Photo Credits:

Saccharomyces cerevisiae by photo credit: Rising Damp via photopin cc

Yeast and saccharomyces exiguus are taken from the Public Domain

All other photos and graphic by Pantry Paratus and may be used with permission with proper attribution–thanks.  


Proviso:

Nothing in this blog constitutes medical advice.  You should consult your own physician before making any dietary changes.  Statements in this blog may or may not be congruent with current USDA or FDA guidance.


www.Hypersmash.com

Pre-ferments: Choosing Your Method for World-Class Bread


Pre-Ferments

Choosing which kind to use & other factors to consider


So what are the different kinds of pre-ferments? 

Generally, a bread baker will have four traditional pre-ferments divided in two broad categories to choose from: the first being a firm or dry pre-ferment and the second is a wet or sponge pre-ferment (Reinhart, p. 52-53). 


pre-fermentation


Pâte Fermentée (Firm/Dry style) is so named in the European tradition of calling things what they are, “old dough” or “pre-ferment.”   Rossada has this to say about it, “Pre-fermented dough (or old dough) is a fairly new method.  Originally, this preferment had been developed to compensate for the mediocre quality of bread produced by the straight dough process with a short first fermentation.” 


If you are thinking, “Wow, that sounds a lot like San Francisco sourdough starter to me,” you would be (partially) correct.  Before refrigeration, folks had to resort to indirect dough—the good news is that it caught on!  However, sour dough depends on wild yeast or more specifically Saccharomyces exiguus where as San Francisco sour dough starter is made using Lactobacillus sanfrancisco—no, seriously (Reinhart p. 65).   The magic here is in running two processes in series to maximize the effect on the bread with only your time spent in making the bread.


Lactobacillus sanfrancisco


Biga (Firm/Dry style) is a lot like the “old dough” method above, but the Italians gave us this one with the biggest difference being the absence of salt.  The formula for this stiff pre-ferment would be  50/55-1/.5 (flour, water, very little yeast).  Where pâte fermentée can be a leftover scrap added to the fresh dough, biga is made purposely as a pre-ferment or starter dough. 


Because of the very stiff consistency and the cooler fermentation, biga provides a lot of strength to the dough, which was its original purpose.  Today with stronger flour, bakers must be careful to use the biga properly, or the added strength could penalize extensibility in the dough.  The advantages of a properly fermented biga are similar to other methods: better flavor and extended shelf life. (Rossada).


Poolish (Wet/Sponge style) is a name that gives us a glimpse into the depths of the French language.  Most of bread baking tradition comes from Europe and principally the French, so they get to name things. 


Poolish is a term that was coined by the French to honor the Polish bakers who, centuries ago, taught them this technique for improving bread. . . . The wet sponge offers far less resistance to fermentation than does firm dough, so the yeast has an easy time converting the available sugars into carbon dioxide and ethanol (Reinhart, p. 53)


The Poolish formula is very wet using equal parts (that is weight) flour and water with only a pinch of fresh yeast (100-.25) giving a consistency somewhere between lemon meringue and melted ice cream.  Rossada offers a more precise scale for the fresh yeast (not instant) used for this pre-ferment based on the time that you are allowing it to work:


Fermentation time                  3 hours       7-8 hours     12-15 hours

Quantity of yeast                    1.5%             .7%                .1%


The final dough mixed with Poolish will require additional yeast to complete the rise, but the flavor imparted is remarkable because the flavor comes from the grain.  If you were making an enriched bread recipe, the yeast is feeding off of the sugar added to the dough (causing a rise) instead of the natural wheat.  With the use of a pre-ferment you taste the converted sugar in the grain


ferments


Levain Levure (Wet/Sponge style) is French for “leaven of the yeast.”  Yep, the Europeans called it like they saw it once more, and this name is also interchangeable with the “sponge” pre-ferment.  The sponge has its own unique qualities and has been largely replaced in commercial baking by the shelf stable “bread” you find in the plastic tube on the grocery store shelf.  These shelf stable “breads” require dough enhancers which all have really long names that are foreign to any home kitchen, so please stick with a time tested pre-ferment (such as a true levain) if you want to bake amazing bread at home and skip the tube.


Levain and Sourdough have many similarities and are sometimes mixed terminology.  They both have this in common—you can perpetuate them and feed them, and even name them if you want—whereas the other pre-ferments are one-time deals.  Although you can snag a piece of your favorite  Pâte Fermentée to ripen the next day’s bread, it is not really “alive” like Levain/Sourdough.


A regular sponge, on the other hand, is usually faster than a poolish because it front-loads all or most of the yeast in the sponge itself.  This kind of sponge, often used in whole grain and rich breads, improves flavor and digestibility of the grain, but in less time than poolish (Reinhart, p. 53).


pre-ferment


A simple low-risk experiment that you may wish to try at home is a form of a “soaker” which technically is not a pre-ferment, but does affect the outcome of the final product.  The technique is known as the “autolyse” process and Chaya says that it helps tremendously. 

  • Take your flour and water and mix them in a bowl for four minutes. 
  • Allow the mixture to rest for approximately twenty minutes, and then mix the rest of the ingredients including the yeast in for the required time. 


The big differentiator here is that the yeast is not active to cause a bacteria response, this is simply the water breaking down the fiber somewhat.  In either case, gluten and yeast are activated by the water, you are simply staggering those reactions in this method.


Calculations of Yummy Bread

Another wrinkle in the pursuit of great bread is calculating the pre-ferment in the bread formula.  If you recall from our blog post on Baking Math, a real bread baker will use something called a formula instead of a recipe.  This will vary from recipe to recipe, so be sure to calculate your total flour weight based on whether the recipe calls for the pre-ferment as its own percentage or as a part of the total flour used. 


And if that was not enough to think about, the gluten content in the dough will soften as the moisture is absorbed—which may not be surprising to you.  However, the higher the dough’s gluten content the more liquid is needed to maintain the consistency due to the absorption.  This is in addition to longer mixing times also required to blend the ingredients properly; and mixing is where the gluten is developed into strands.  


fermentation


Yet one more detail to plan around is the use of salt.  As you see, salt is highly controlled in pre-ferment products because salt is a counterweight to yeast.  If the yeast has more time to work, then you can get away with less of it—stretching your yeast supply out further.  This is good news for the thrifty bread baker, better flavor with less consumable yeast.


Baking great bread really comes down to one skill: how to manipulate time and temperature to control outcomes. . . . if the bread is not properly fermented, it can never be better than average.  It is in this, the primary fermentation stage that dough is transformed from a lifeless lump of clay into a living organism (Reinhart, p. 59)


 In our next blog, we explain the science to all of this, so check it out.  If you have any tips or tricks to share with your pre-ferments, leave a comment and share it with us! 


Wilson

Pro Deo et Patria


Works Cited:

Reinhart, P. (2002). The bread baker’s apprentice, mastering the art of extraordinary bread. (p. 27). Ten Speed Pr.

Rossada, D. (n.d.). Retrieved from http://www.bakerconnection.com/artisanbaker/article_04.htm


Photo Credits:

Ghirardelli (Factory) by Ghirardelli Chocolate Company taken from http://www.ghirardelli.com/about-ghirardelli

All other Photos by Pantry Paratus
 

Proviso:

Nothing in this blog constitutes medical advice.  You should consult your own physician before making any dietary changes.  Statements in this blog may or may not be congruent with current USDA or FDA guidance.


www.Hypersmash.com

Pre-ferments: Grain, Yeast, & Time (the secret to baking world-class bread)

Pre-ferments, the key to unlocking really great bread 

Leveraging time, enzymes and yeast


“Fermentation is the key to world-class bread, assuming that the flour and other ingredients are good” (Reinhart, p. 11).


Prefermentation in Bread Baking


I used to not believe that quote above, but then again I used to think that flour only came in a paper bag.  Which now that I think about it, should have tipped me off because the bag always leaked and why would an agricultural society (& one that cares about “if seal is broken”) put up with that?  Sure, yeast will eat sugar.   I have tasted beer and watched bread rise to know that is true.  However, before I was married to a bread baker I was unaware that there is so much more than the mechanical pressure of carbon dioxide going on in the bread baking cycle.  The difference between bread by the academic definition and extraordinary bread is fermentation; and if you want to go up a notch from there—pre-ferments make the difference. 


We will metaphorically follow the bread baker’s axiom that the best loaves are made by building dough in stages . . .  Eighty percent of the quality of the finished bread will be determined during the primary fermentation stage (Stage Three) and the other twenty percent primarily will be determined during the baking, or oven stage (Stage Ten) (Reinhart, p. 48-49).


Reinhart goes on to identify twelve stages of baking bread, but that is for a different day.  If you recall from our blogpost on the Classifications of Bread, the use of a pre-ferment (or not) is what makes the dough a straight or direct dough as opposed to an indirect or sponge dough.  I still consider myself to be still catching on to this, but a real bread baker utilizes millennia of wisdom.  Dough that is mixed directly can still use yeast as the fermenting agent, but will not have the benefit of unlocking all the sugars of the grain which make the bread truly delicious.   That happens only with grain and yeast and time


What does “pre-fermentation” mean?

A fermentation process allows time to capitalize on the bacteria naturally present in a food item to digest the difficult enzymes that our bodies might not like (things like phytic acid), releases gases, and gives all of the flavors present an atmosphere to mingle, smooze, and make connections. If you make bread using yeast instead of sourdough, you are taking a shortcut (and you know it—but hey—I’m not judging) to the end result of bread without allowing a true fermentation to take place. 


Prefermentation helps develop gluten strands


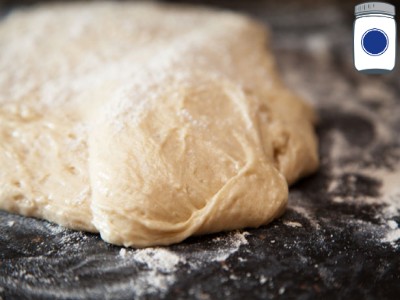
A “pre-ferment” is when you do give the flour a fighting chance for flavor by the gift of time.  You are hydrating the flour ahead of time.  You can use any measure of the flour you will use in the end recipe and an equal part water, stir, and let it sit out at room temperature for a few hours or even overnight (we will get into the details of this in our next blog).  It is called a “pre-ferment” instead of “ferment”, because you are not fermenting the entirety of your bread, you are not utilizing a sourdough starter (with the proper strains of bacteria to raise the bread) and you did it ahead of time from the actual act of “making bread”.  In other words, you aren’t adding the rest of the ingredients yet, you aren’t getting flour in your hair, and you have not even invested enough time into this process to require a “bread baking music” selection.   You are not adding the ingredients yet.  Just flour, just water (and sometimes a smidgen of yeast).  This can still be yeast bread and not a sourdough with a sourdough bread starter, but you will mimic many of the flavors and increase the health benefits of a pre-digested wheat kernel through that gift of time. 


Is this just academic? When will I ever use this, anyway?

French or Italian breads can only be properly made with a pre-ferment because the ingredient list is so simple: Flour, Water, Yeast and Salt (in a 60-2-2 baking math formula).  The difference between bland and awesome is “the quality of the wheat, coupled with the baker’s ability to draw out flavor through fermentation and baking technique” (Reinhart, p. 31). Since the wheat berry is such a compact form of energy, it is best to coax the maximum value out of it slowly over time; which as a corollary has everything to do with the gluten content. 


Preferementation should have some bubbles


Take this analogy of a gallon of gasoline.  If poured into a metal pan and ignited on fire, it will not do much work at all—rather it will likely put out a lot of black smoke and prompt your neighbors to call the fire department.  Take that same gallon of gasoline and meter it out slowly in a fuel efficient internal combustion engine and you can get twenty or thirty miles down the road on that same unit of energy.  Wheat works the same way, in that it responds better to slow release of flavor.


The use of pre-ferments is a simple and inexpensive way to improve bread quality.  Each preferment generates different aromas depending on its characteristics.  Aromas and final bread flavors are influenced by the pre-ferments’ liquid or stiff consistency, fermentation temperature, salt including or exclusion and the use of commercial yeast or wild yeast (Rossada).


So have I left you hanging?  In the next blog we pick this conversation right back up.  We will discuss the different types of pre-ferments and the considerations to make when choosing one.


Wilson


Pro Deo et Patria


Works Cited:


Reinhart, P. (2002). The bread baker’s apprentice, mastering the art of extraordinary bread. (p. 27). Ten Speed Pr.


Rossada, D. (n.d.). Retrieved from http://www.bakerconnection.com/artisanbaker/article_04.htm


Photos by Pantry Paratus.  Feel free to re-pin or share them, but maintain proper attribution and link.  Thank you.


 Proviso:


Nothing in this blog constitutes medical advice.  You should consult your own physician before making any dietary changes.  Statements in this blog may or may not be congruent with current USDA or FDA guidance.


www.Hypersmash.com

Breaking in a New Cast Iron Pan

 I have to say that I love cast iron and use it for just about everything. 

It seems to play well with my thrifty nature in that if properly cared for it can be given to my great-grandchildren.  Other than being durable, it is in its own way, beautiful.  I love how it hangs on the rack in our kitchen.

cast iron skillet

“Anything that holds food and transfers heat can be considered cookware. . . . ideally [cookware] would heat up quickly, distribute the heat evenly, retain the heat well, and respond quickly to changes in temperature.  Unfortunately, no such material exists” (Joachim & Schloss, p. 160).

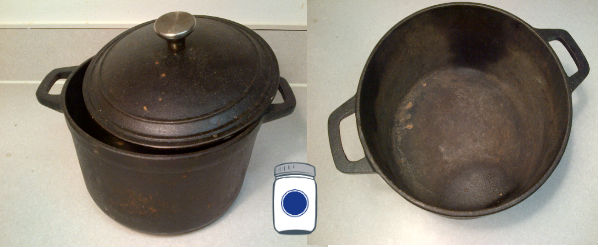
 American made cast iron is such a rich tradition that traces back to the very roots of Yankee ingenuity.  Take for example our favorite hand crank appliances made by Chop Rite Two in Pennsylvania.  These truly are built like family heirlooms that can be used for generations, not to mention that all spare parts are available for sale separately.  As a personal policy, whenever I see cast iron at a thrift store, it generally is coming home with us.  Take this recent score, a cast iron pot with lid which will certainly be used over the campfire this summer. 

 cast iron pan

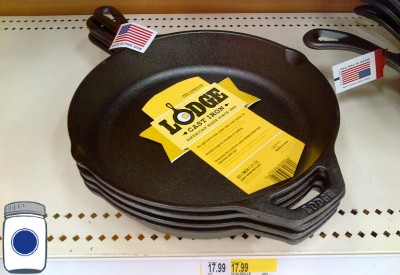
 Whether it comes to pan frying, deep fat frying, campfire cooking, baking, braising or broiling—a good cast iron pan just cannot be beat.  So this week we decided to add one more to the fleet, and bought a new Lodge brand pan (also made in America). 

While I have always been satisfied with the way that cast iron performs when it is heated up, getting it to that temperature can take longer and there is a good reason for that.  “cast iron is only a fair heat conductor (about four times slower than aluminum), but it retains heat well and has a high melting point, making it excellent for high-heat cooking” (Joachim & Schloss, p. 162).


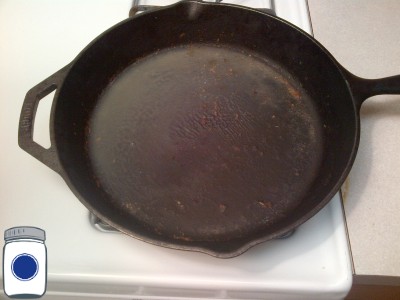
new cast iron skillet

 First off, the question of how to clean cast iron comes up quite a bit.  For an initial cleaning (right home from the store) I will use dish soap and water.  The Lodge cast iron products come already seasoned, but I still want to clean off any yucky stuff picked up in transit or while on display. 

For daily use I typically just wipe out the pan and hang it up until it is used again, avoiding using soap at all—and never put it in the dishwasher.  This can be done largely because we cook with saturated fats or olive oil (although typically not for high heat cooking).  For stuck on food bits, you can try coarse salt or citric acid, or a cup or so of beer simmering in the bottom of the pan does wonders but the definitive treatment on cast iron can be found here in a great article by Paul Wheaton.  Also, here is a great video post from Jocelyn Campbell on how to restart a cast iron pan:

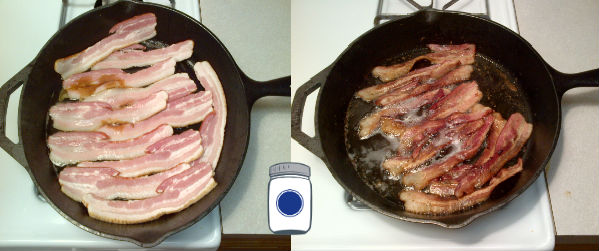
Now let us talk about how to season a cast iron item.  I typically like to do it by cooking with saturated fats, like bacon for example.  As it turned out, the kids were also grooving on BLT’s for lunch, so it was a win-win all the way around. 


bacon in a cast iron skillet

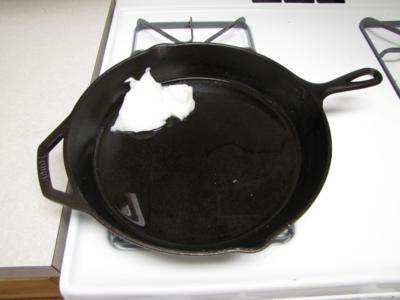
 The synergy between real lard (not the fake stuff) and cast iron is legendary. 

 lard in a cast iron skillet

 Over time, the cast iron skillet will build up a “seasoning” that coats and protects the pan in a way that no non-stick coating ever could as well as help to transfer heat more evenly throughout the pan.  A good seasoning layer does take time to develop. 

One faster method involves coating the cast iron pan with oil, and baking it upside down in an oven at 350°F for two hours (over a baking sheet because it will drip), recoating the cast iron every 30 minutes with fresh oil. 

Now, I normally agree with everything that Joachim and Schloss say in their great book, The Science of Good Food—except perhaps on this point where they say to use highly unsaturated oils like canola, corn or vegetable (soy) to coat the cast iron.  With that last part I would explicitly disagree as those oils are dangerous in the body over time, and saturated fats like those in animal products are far superior. 


saturated fat at room temperature

Cast iron is pretty forgiving and so after I cook something like bacon or lard and I am trying to season the pan for its first couple of runs, I will just cover the cast iron skillet and set it aside.  Remember, saturated fats are highly stable so unless you cooked something really wonky in there, it will be fine.  You can even cover the cast iron pan and put it in the fridge if that suits.  The key is to keep the oil in contact with the pan for awhile.  The repeated heat cycles is what helps to impregnate the cast iron with the oil; “when the oil heats with the metal, it polymerizes, or forms a dense plastic-like layer that keeps out oxygen and prevents rusting” (Joachim & Schloss, p. 160).


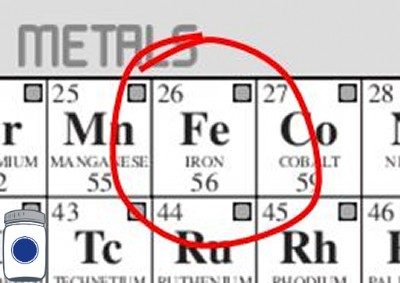
iron

If you have a question about cast iron your want to leave a comment about how it worked for you we would love to hear it. 

 Wilson

Pro Deo et Patria


All photos by Pantry Paratus


Works Cited:

Joachim, D., & Schloss, A. (2008). The science of good food. (p. 160). Toronto: Robert Rose.

Classifications of Bread

Classifications of Bread


A systematic approach to the staff of life


“Bread is basic.  Most likely it was the original baked good, for at heart bread is nothing more than flour and water” (Joachim & Schloss, p. 64).


People think in concepts that are reduced to words such as: tree, house or bread.  What is crystal clear in one person’s head may not be so to another person, so language was invented to trade these ideas in the form of words.  And when a particular kind of tree is under discussion, not just any old word will do and so descriptors were invented to classify things and identify their distinctions—bread is one such thing.  What comes to mind as “bread” in France is different than New Zealand, China or Argentina because everyone has their own favorite kind of bread depending on available ingredients and techniques.  So it is good that people (who like to name things) have thought of a way to have different classifications of bread. 


bread


Bread is largely divided up by its contents with one exception being flat bread which is a label applied to the physical characteristic of the bread namely its height.  Peter Reinhart in his landmark book, The Bread Baker’s Apprentice, lists five different criteria in which bread is classified, namely:


point  Hydration

point  Richness

point  Pre-fermentation

point  Leavener

point  Height (as in flat bread)


First up, classification by hydration: Bread’s basic ingredients are flour made from some kind of grain and water; from there you can do just about anything to vary the staff of life—everything from whole food to the now defunct Wonder Bread.  Delineating bread by water content is an example of a pretty straight forward application of Baking Math.  According to Reinhart, the types are stiff doughs, standard doughs and rustic doughs (Reinhart, p. 45).


Classification by Hydration


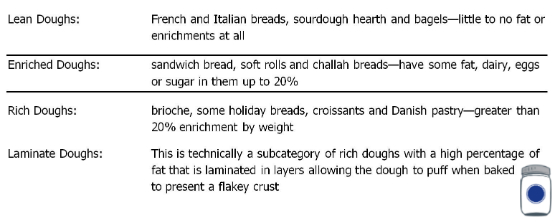
Next is the Classification by Richness.  Flour and water are the basic ingredients for both paper mache and a genuine Valley Forge soldier’s firecake—neither of which tastes very good at all.  So over the past few millennia man has engineered bread to taste moister, absorb more gravy or just feel better to the mouth by enriching it with fats, milk and/or sugars (whenever available).  Reinhart identifies three kinds of these doughs: lean doughs, enriched doughs and rich doughs with a subcategory called laminate doughs (Reinhart, p. 45). 


Classification by Richness


Classification by (the use of) Pre-fermentation is also another category by itself.  This is the means to make bread extraordinary through the careful manipulation of time, enzymes and the raw fuel found in grains. 


As dough ferments, its yeast continues to produce carbon dioxide, which filters into the air pockets formed by kneading, causing them to inflate and raise the dough.  The gentle stretching continues to develop the gluten, so even barely kneaded dough will become stretchier and more cohesive during fermentation.  Yeasts reach their greatest activity at around 95˚F (35˚C), so at that temperature a dough will rise rapidly, but a fast-rising dough can also develop unpleasant yeasty aromas and an abundance of unwanted by-products of yeast metabolism, like alcohol.  Lowering the temperature, by letting the dough rise in a cool room or in the fridge, extends the rise, diminishes off flavors, and encourages more desirable flavors.  The longer a dough ferments the more time there is for yeasts and bacteria in the dough to generate flavor compounds.  This is most evident in whole wheat breads, in which a slow rising increase the nutty and honey-like flavors in the grain (Joachim & Schloss, p. 66).


The topic of pre-fermentation is a fascinating one, and we will have a whole blog dedicated to that next week.  For now, suffice to say that the two categories that Reinhart identifies regarding pre-fermentation are straight doughs and indirect or sponge doughs (Reinhart, p. 45). 


Classification by Pre-fermentation


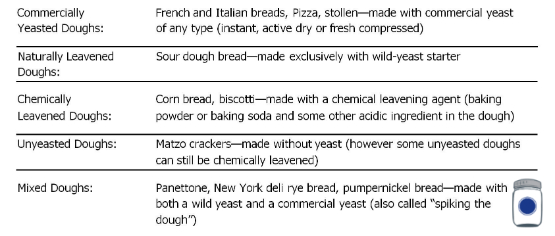
Then we have classification by leavener.  The type and use of (or lack thereof) regarding leavening agents is how this category is divided.   Breads here can be commercially yeasted, naturally leavened breads (wild yeast or sour dough), a hybrid of the above (also called “spiking the dough”) and unyeasted doughs that may or may not be chemically leavened (Reinhart, pp. 45-46). 


Classification by Leavener


Lastly we have the classification by height.  Where all of the other categories up until now have been groupings of breads by ingredients, this last category is a bit of a catch-all.  Flat breads can be enriched or lean, yeasted or unyeasted and are all differentiated from other breads by their low height.  Both pizza and matzo crackers are included here in flat bread, while the former has yeast and is enriched the later does not have yeast and is lean.  (Reinhart, p. 45). 


ferment


With these classifications you can catalog any bread.  Take Chaya’s awesome bread recipe, it scores as follows: stiff, enriched, direct and commercially yeasted which helps explain it looks like a pirate boarding party with butter knives in hand when the bread comes out of the oven.  If you do not own Reinhart’s book, you can click on this link to see a view of pages 46-47 to look up a bread by name and see what its classification is.  Bread baking is a controlled chemistry experiment, and when you learn what the classifications of bread are you will better understand how to bake it or better yet, how to make substitutions when necessary (or trouble shoot when something goes wrong).   Bread, with thousands of recipes, there is likely a loaf of bread awaiting you at the end of the learning curve.  Are you are a bread baking pro?  Then try different ferment techniques to really give that flavor some kick!  Enriched or lean, good home baked bread is tough to beat, so leave a comment and tell us how yours comes out!


Wilson

Pro Deo et Patria


Photo Credits:

All photos by Pantry Paratus

Tables are adapted from Peter Reinhart’s book, cited above


Works cited:

Joachim, D., & Schloss, A. (2008). The science of good food. (p. 64). Toronto: Robert Rose.

Reinhart, P. (2001). The bread baker’s apprentice: mastering the art of extraordinary bread. (p. 45). Berkeley: 10 Speed Press.


Further Reading:

https://www.stellaculinary.com/scs20


Proviso:

Nothing in this blog constitutes medical advice.  You should consult your own physician before making any dietary changes.  Statements in this blog may or may not be congruent with current USDA or FDA guidance.


www.Hypersmash.com

Baking Math

Baking Math


The tastiest way to learn more about Baker’s math


Endeavoring to understand Total Flour Weight


When I married Chaya, that changed my life.  When I read The Bread Baker’s Apprentice by Peter Reinhart and that changed my outlook on baking forever.  Is baking bread an art or science?  Likely it is both.  But for anything to be called a science it has to be observable, measurable and in certain cases reproducible (no one gets reproduce creation or the Roman Empire for example, but we can sure study the heck out of them).  In that regard professional bakers rely on the measurements they use to be precise in the controlled chemistry experiment we call baking.   To pull all this off, bakers have developed baking math or baker’s math to get a reliable yield from batch to batch.


The problem: Not everyone has the same definition for the universal English unit of measurement we refer to as “the cup.”  One cup of flour (by volume) that I measure might be more than one cup of flour that Chaya would measure, so the dough made with those units of flour would perform differently as well.  To mitigate this, baking math starts with weighing the ingredients not measuring them by volume.


1 cup of flour scooped by one person may not weigh the same as 1 cup scooped by another.  That is why professional bakers prefer to use weights, since 1 pound of flour, regardless of how many scoops or cups it took to get there, will weigh the same 1 pound from person to person (Reinhart, p. 27).


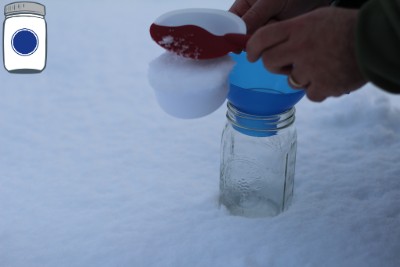
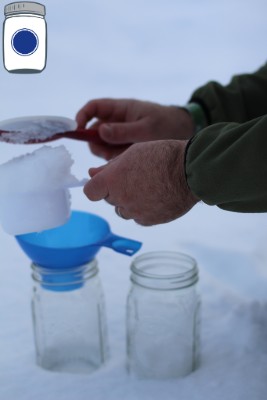
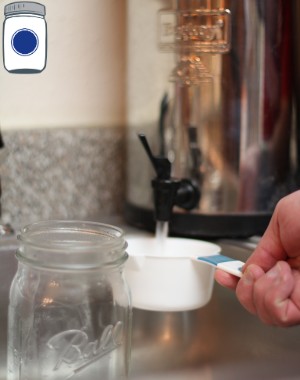
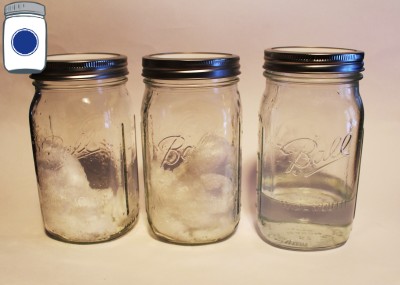
So when you talk about baking math or any kind of math it leads to proofs (proof of concept and not proofing dough in this particular instance).  So I set out to see what I could use to prove this scientifically.  What substance could I use to show the difference in volume measured one way verses another way while in Montana during the winter?  Observe one cup of snow unpacked, one cup of snow packed and one cup of water all put into canning jars with lids on top to control evaporation:


one cup of snow

One level cup of lose snow


one cup of packed snow

One cup of packed snow


one cup of water

One cup of water


snow and water side by side

One cup each of lose snow on left, packed snow in the middle and water on the right


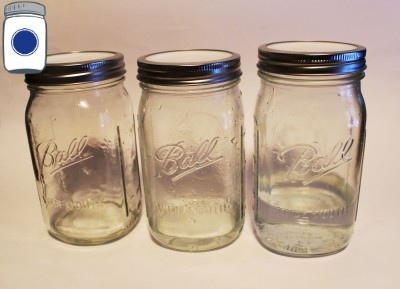
melted snow

Observe the levels of the melted snow side by side, each was “one cup”


I would love to say that I was then able to measure out the melted snow precisely down to the fraction of a teaspoon (since a liquid cannot be compressed measuring by volume is fine).  However, the sets of cute little hands I had helping me halted that scientific progress and since I could not accurately measure how much water spilled into the carpet I had to just use the visual you see in the last picture rather than try to repeat the experiment again. 


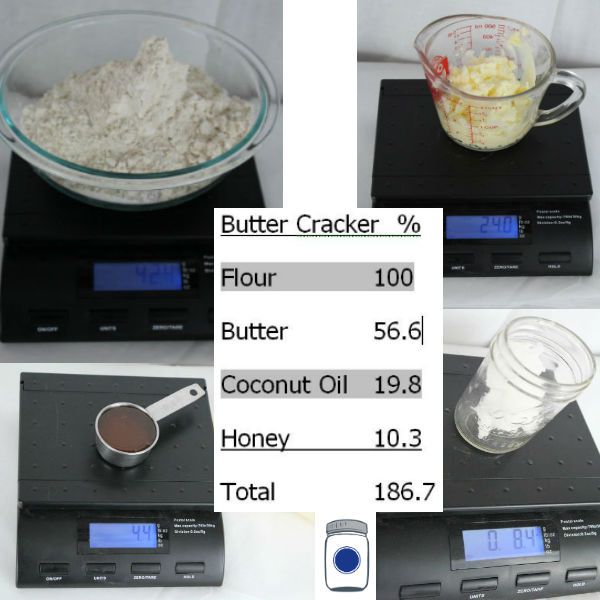
When baking with wheat, gluten is king and will determine what kind of product you are going to end up with.  I put a handy gluten chart in this blog to show the proteins by percentage, in Europe they assign a number (i.e. #55 flour) that represents “ash content.”  So what would a baker’s recipe (or formula is what it is called by the professionals) look like by weight?  Chaya shows us here with this Butter Cracker formula:


butter cracker formula


 The type of flour will drive the end product and ultimately the time scale portion of the baking math.  The reason is because the more fiber and gluten in the flour the more water will be needed and the longer the dough will need to be baked. 


As you see above, the Total Flour Weight (TFW if you needed one more acronym in your life) is 100%, because all other ingredients stand in ratio to that number. 


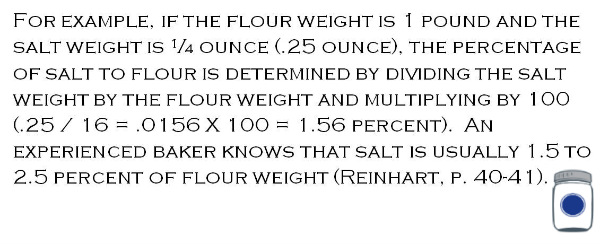
Reinhart Quote

If you got the hang of Total Flour Weight, then you can move on to Total Percentage (TP) which is a sum of the ratios.  In baker’s math, a formula may call for a Total Percentage of 164 or 181 depending on the number of ingredients.  The formula starts with 100 percent which is the sum of all flour (or flours if you are using more than one, they are simply combined). 


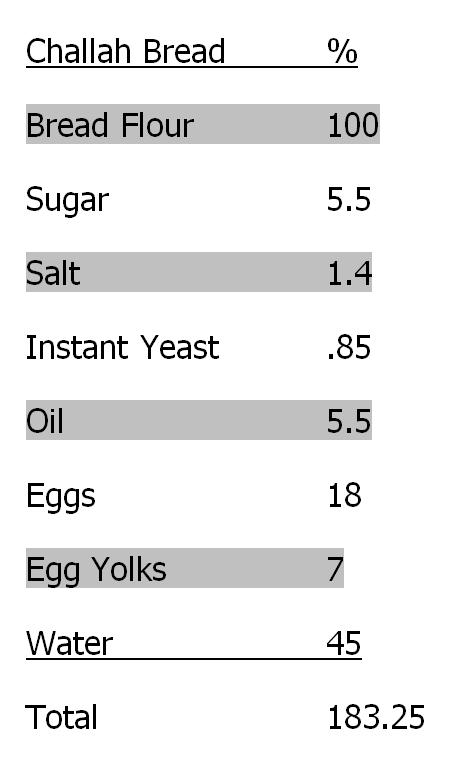
Take this example of Challah Bread as found on pp. 133-134 in Reinhart’s book:


 baking math


You can see that the Total Flour Weight is 100 (as it should be) and the Total Percentage is 183.25 because the dough includes so many ingredients!  Also of note is that the yeast to flour ratio here is .85 which means that the whipped eggs will be doing more work in this recipe—but more on that another day. 


I will do my best to develop this further in later blogs, but for not suffice to say that baking math is more precise as everything is measured by weight and then stands in ratio to the only 100% ingredient which is the flour itself.  The math in baking can take some getting used to at first, but you may find that you like it better in some ways and frustrating in others when it comes to the whole food ingredients you are using like salt or eggs.  However, the precision and the probability that you can have repeatable results is really what makes this system the one used by the professionals. 


Pro Deo et Patria,


Wilson


Works Cited:


Reinhart, P. (2002). The bread baker’s apprentice, mastering the art of extraordinary bread. (p. 27). Ten Speed Pr.


Photo credits:


All Photos by Pantry Paratus


Further Reading:


http://theinversecook.wordpress.com/2010/05/28/bakers-math-a-handful-of-practical-examples/


Wilson’s blogpost: The Expanded History of Baking Powder, Part I


Wilson’s blogpost: The Expanded History of Baking Powder, Part II


Proviso:


Nothing in this blog constitutes medical advice.  You should consult your own physician before making any dietary changes.  Statements in this blog may or may not be congruent with current USDA or FDA guidance.


www.Hypersmash.com

Wilson’s video review: The Oiling of America by Sally Fallon Morell

Wilson’s Video Review: The Oiling of America


Discussing the Lipid hypothesis, fat and heart disease


“Lettuce is a modern luxury and in the past people only had lettuce during certain parts of the year.  And this leads to my own particular theory about the cause of heart disease—it is caused by lettuce” (Morell, 2008).  If you have never read anything from Sally Fallon Morell, then that last statement will likely not resonate with you.  However, I recently had the chance to meet her and I was pleased to see that I share the same sarcastic sense of humor with her.  Her high-water book, Nourishing Traditions is a straight talk book about everything that you wanted to know about food and nutrition but were afraid to ask.  Her challenge to the “diet dictocrats” starts on page 4 with a discussion on fats and how the right fat is in fact healthy for you.
 

Oiling of America


I tend to read a lot more books than watch videos.  Although I found the movies Fresh and Food, Inc. fascinating and entertaining they are not well constructed arguments that you would expect to see in a book due to the nature of their brevity.  The average book that I read takes me 10-30 hours to read, where a movie is two hours or less of “engagement.”  If you do not have the ability to watch this presentation, you can download the slides here for free or buy the movie (I recommend that) here.  
 

“Americans have cholesterol that is too high.”  If that statement sounds like everything that you have ever heard or read on the latest publications in the supermarket checkout that pass for scientific journals, then you will really enjoy this video.  What is a healthy diet?  Well, that is exactly what Sally Fallon Morell specializes in not only by writing Nourishing Traditions, but also by presiding over the Weston A. Price Foundation as well as being a farmer herself. 


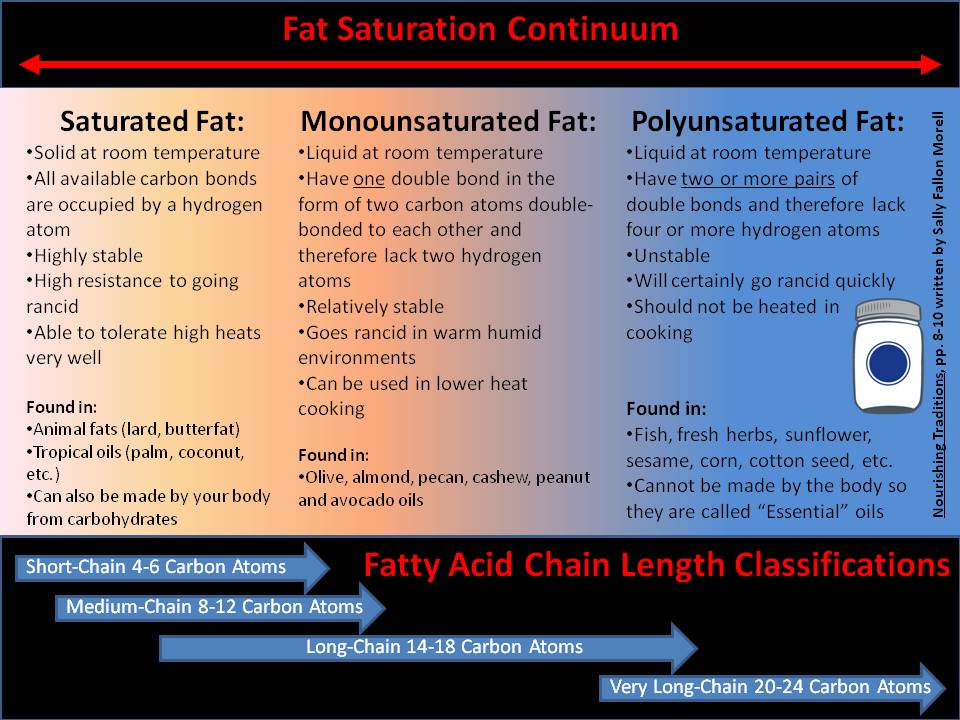
saturated fat


Saturated fat, the long time target of what Michael Pollan calls “lipophobia” has been all the rage; sadly, it never went out with the Carter Administration, which is the era from whence it came.  The story of how fat and heart disease became “the truth” is an interesting story that was rightfully scorned in the early part of last century when it was first espoused.  According to the DVD presentation by Sally Fallon Morell, the first myocardial infarction (heart attack) was not recorded in America until 1921; by 1930 it was 3,000 myocardial infarction deaths and by 1960 it was 500,000 deaths.  Today the number of deaths from heart attacks is 600,000 each year, and according to the CDC—that is one out of every four deaths


The numbers are treacherous, 600,000 deaths is a crushing amount.  However, where do they come from?  Lettuce?  Not directly, likely the silent killer for so many people eating a “western diet” is transfats, white sugar and white flour.  Saturated fats do so much for food.  Without saturated fats culinary arts would not have progressed nearly as far as they have over time because the “peasant foods” that make ethnic culinary cuisine so popular the world over would not have been invented. 


For example, what gives a croissant the flaky crust—fat, real fat.  You can substitute bread, gravy, sausage, salami, bacon, or cheese and get the same trajectory in culinary tradition—go with the fats.  The reason why saturated fat is so popular in history is because it keeps so long–it is stable.  Take lard for example, when properly rendered it will keep for a looooooong time.  The prized leaf fat from a pig’s back is found no where else in nature and is so valuable, that it is the only fat good enough for traditional Charcuterie methods for making salami.  Why do saturated fats last so long?  Because they do not oxidize very easily—that is to say that they do not go rancid like a polyunsaturated fat will at a much faster rate.  Fats or anything else that oxidize easily are generally known in the business as free radicals—bad news. 


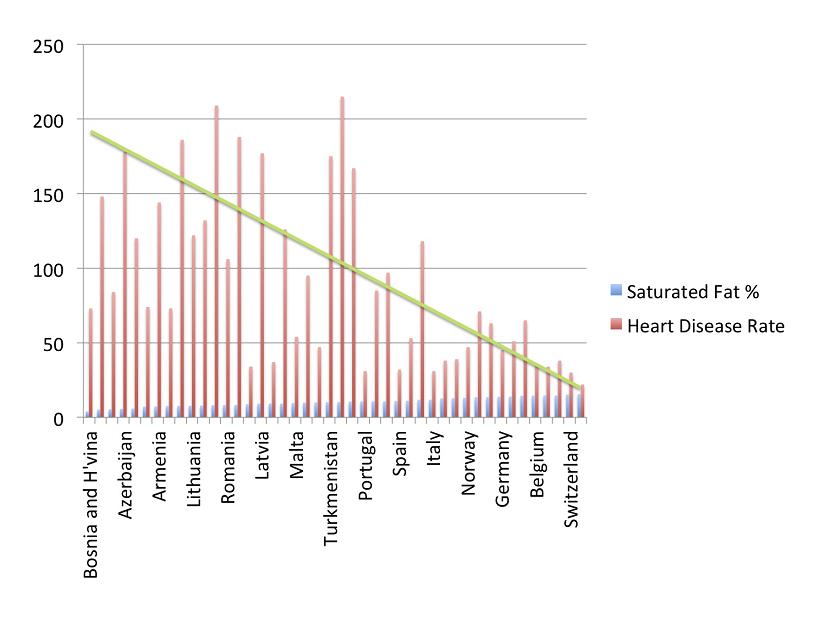
Fat and Heart Disease

Graph showing the “French Paradox:”   can originally be found here


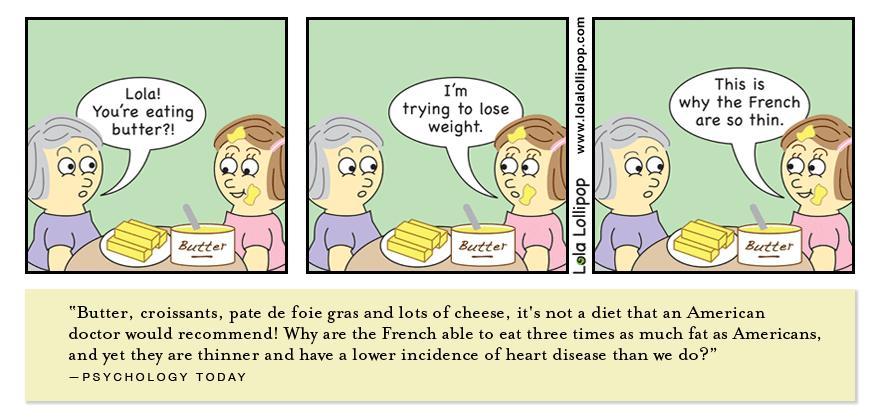
Among epidemiologists and other people who study these trends, there exists something known as the “French Paradox.”  In case you are not conversant on food science studies and governments’ interest in them, the “French Paradox” is the trend that shows the populations of Belgium, France, Switzerland, Germany and Austria as eating diets high in saturated fats but having lower than normal complications from heart disease.    This is bad news if you were say all geared up to push statins on the market . . .


The elephant in the room that Sally Fallon Morell really brings to the front of the viewer’s attention is if fat and heart disease is such a sure connection, then why is saturated fat (namely animal fats) the number one target?  If animal fats (the largest source of saturated fat) are the culprit, then why do vegetarians have similar autopsy results to omnivores?  “Autopsy studies show zero correlation between estimated animal fat intake, and degree of atherosclerosis of serum cholesterol level” (Morell, 2008).  Why Sally Fallon Morell does make a good case for the benefits of saturated fat and animal fats in particular, the culprit for heart disease has to be something else other than high cholesterol food—because not all fats and not all cholesterols are the same. 


 Fat Characteristics


If the fat and heart disease link is so unassailable, should history not show the same trend when you control for certain factors?  Unfortunately not for these en vogue “diet dictocrats.”  One early opponent was a medical doctor by the name of Dr. Paul Dudley White, who was known as “the father of modern cardiology,” one of the founders of the American Heart Association and personal physician to President Eisenhower following Ike’s heart attack.  Dr. White had this to say on public television,


“Heart disease in the form of myocardial infarction was nonexistent in 1900 when egg consumption was three times what it was in 1956 and corn oil was unavailable. . . . See here, I began my practice as a cardiologist in 1921 and I never saw an MI patient until 1928.  Back in the MI free days of 1920 the fats were butter and lard.   And I think that we would all benefit from the kind of diet we had at that time when no one had heard the word ‘corn oil’” (Morell, 2008).


French Paradox


French Paradox comic strip is used with persmission from Lola Lollipop


There is way more content in the video than can be effectively summarized here in just one blog, and everyone has to weigh out the evidence for themselves between the accepted link of fat and heart disease.  However, given the historical cover-ups, the half-baked scientific methods used to show pre-approved results in the “studies”, and the force of law used to leverage the outcomes– the DVD is well worth an hour of your time to evaluate what Sally Fallon Morell presents on the detangled science of real food.  Lastly, it would be anticlimactic to not establish the link between lettuce and heart disease—transfats found in salad dressings and other food imitators.  Speaking as a former lipophobe, I can actually believe that it is not butter.  Butter, cream and eggs perform like nothing else—but they are costly and the real foods that they are used in will spoil much more quickly than other . . . shall we say, not real foods. 


Wilson

Pro Deo et Patria


Photo credits:

Oiling of America is from New Trends Publications

Saturated Fat by Pantry Paratus

Fat and Heart Disease is taken from Dr. Briffa’s blog of the UK, the original source can be found here

Fat Characteristics by Pantry Paratus

French Paradox comic strip is used with permission from Lola Lollipop


Works cited:

Morell, S. (Presenter) (2008). The oiling of America [DVD].

Fallon, S., & Enig, M. (2005). Nourishing traditions. (Deluxe Edition ed., p. 4). Washington DC: NewTrends Publishing.


Further reading:

http://www.drbriffa.com/2012/10/02/the-french-paradox-is-not-a-paradox/

Article on Dr. Paul Dudley White: http://onlinelibrary.wiley.com/doi/10.1002/clc.4960140716/abstract


Proviso:

Nothing in this blog constitutes medical advice.  You should consult your own physician before making any dietary changes.  Statements in this blog may or may not be congruent with current USDA or FDA guidance.


www.Hypersmash.com

Got Farmer’s Market? Longing for Spring and how-to dehydrate carrots

Looking forward to the Farmer’s Market this year . . .


Putting that dehydrator to good use


Farmer's Market


Farmer’s Market season is well over now, and oh how I am missing those beautiful summer days as I watch the snow gently fall.  Unless you have a great green house you are still regulated to paying winter retail prices for produce at the grocery store—unless you dehydrated last season’s food surplus.  As in any year, I had a bounty of some things and only teases of others.  It is why I preserve the bounty with a dehydrator because next year may not fare so favorably in what contributed to this year’s abundance. 


One tried and true way to preserve food is the root cellar.  We do not have a true root cellar right now (but I caught Chaya reading this book, so I am sure it is on the project list for next summer).  Truthfully, I prefer to have many of the staple foods in their dehydrated form because of the flavors and versatility.  A cold storage apple becomes “mealy” to me about 4-5 months (again, I need that true root cellar!), but an apple ring?  I can hardly keep those on my shelf!


At Pantry Paratus, using a dehydrator for food is one of our four core competencies, which makes having an Excalibur dehydrator high on our list of recommended products for people to own and routinely use.  I was just tickled when I came across these pictures of last summer’s harvest from the farmer’s market, so I thought in honor of Spring’s soon arrival I would show a quick how-to dehydrate carrots. 


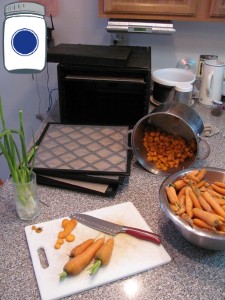
Bounty

Look at this beautiful bucket of carrots, garlic and onions! 


dehydrator 

To start, cut the carrots into “coins.”


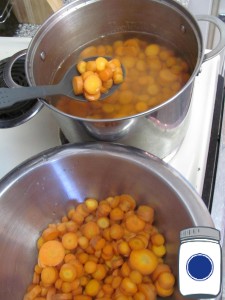
 Blanch

Next, I blanch them in boiling water for 60 or so seconds, then strain them out.  This will help to soften the outer layer of the carrot to prevent case hardening (where the outside of the food dries and it locks in the moisture inside the food—not good for storing food).


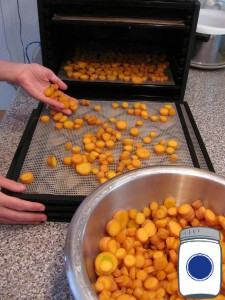
 lay carrots on the dehydrator tray

Lay the carrots one layer deep on the Excalibur dehydrator tray


Start the dehydrator.  I typically run carrots a lower heat in my food dehydrator than what is recommended for about 36 hours.  Your mileage may vary depending on where you live and how much humidity you have. 


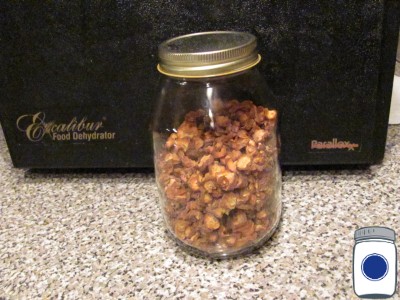
dehydrated carrots

Lastly, I roll up the mat and funnel them into an awaiting jar. 


If you are storing them for a long time, then I recommend using an Oxygen Absorber (cost about $0.10—very cheap insurance). 


Now sit back and wait for Spring, or do the dozens of other chores you have around the homestead.  Either way, putting away food from either your garden or your local farmer’s market when it is in season means that you do not have to pay retail for produce (by the way, I paid ~$9 for everything in the above bucket at my local farmer’s market).


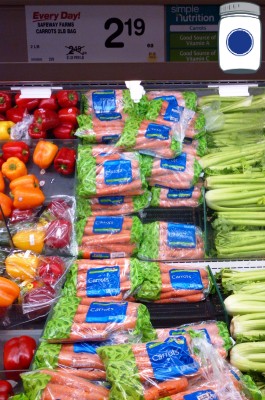
Carrots Retail


Wilson

Pro Deo et Patria


Photo Credits:

All photos by Pantry Paratus


Proviso:

Nothing in this blog constitutes medical advice.  You should consult your own physician before making any dietary changes.  Statements in this blog may or may not be congruent with current USDA or FDA guidance.


www.Hypersmash.com

The 9 Tray Excalibur Dehydrator vs Deep Freezer—what does it really cost to store food?

How does the cost stack up over time?

When we talk about storing food, you can effortlessly weave “savings” into the same conversation.  My inner geek really took interest when I saw an article like this one at TheSimpleDollar.com.

Is a deep freezer really worth it?  In this blog, I want to compare and contrast the cost of dehydrating food and storing it for one week verses freezing it in order to store it for one week. 

Pragmatically, thrift is a great reason to store food.  If I were to buy Twinkies® on sale (which I would not do, but for this discussion say that I actually did) I would not really worry about taking any measures to preserve them.  However, say for instance you got a great deal on something highly perishable like fresh carrots from a farmer’s stand.  Would it indeed be great to still have those same fresh carrots six months from then– say in the middle of winter– when you cannot get fresh carrots for that price?  

Entropy, we may as well embrace it.  Until man can overcome Newton’s Second Law of Thermodynamics we are stuck with precious few methods for food preservation: freezer, dehydrator or fermentation.

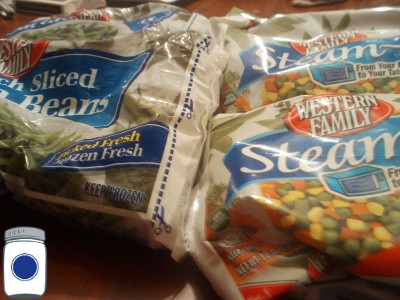
I needed a benchmark to start, so I took a few bags of frozen vegetables as a test subject for both appliances. 

deep freezer

A full freezer is an efficient freezer!  However, my upright chest freezer does not really scale in measurable cost of running it for a bag or two of vegetables as compared to it being packed full of venison.  For our experiment, some wiggle room needs to be factored in for the total operating cost. 

US Residential Electricity Price

I needed a cost for electricity which is typically measured in Kilowatt Hours.  As of the time of this blog writing (March 2013), the national average for a Kilowatt Hour of electricity is $0.1227 (up from $0.1127 in December 2011) according to the EIA/Department of Energy

There are several useful energy calculators on the internet.  I happen to really like this one.

Plugging the average cost for March 2013 into the energy calculator, I can then calculate the cost of running just about any appliance. 

The calculator comes standard with an upright freezer, auto defrost, 16.5 cubic feet of space.  Using this average freezer in the proverbial average household running that freezer for one week we get $4.33 (which is up from $3.96 when I last did this comparison in December 2011):

deep freezer cost comparison

I am going to use the published data on the back of the Excalibur 9 Tray: 

Excalibur dehydrator data plate

This gives us 600 Watts to plug into the calculator.  Since there is not a “Dehydrator” appliance listed, I will simply use six 100 Watt incandescent light bulbs for a period of time 36 hours long (the mean time I usually run my Excalibur Dehydrator):

dehydrator cost comparison

I wanted to keep this comparison apples-to-apples.  We can attempt to factor in things like where is the freezer stored—in the cool basement or exposed to the hot sun on a porch, filled to capacity or empty, how many times is it opened typically during a day, etc.  Likewise, the 9 tray Excalibur dehydrator may not be the one that you own (yet), and if you are not running it on the highest heat setting, it will consume much less wattage than 600 Watts.  Also is 36 hours too long for your typical dehydrating processes?  For us, we like lower heat longer time so that my finished product is dry and crunchy for long term storage.  Also keep in mind that this is a one-time electricity charge for that food item, not weekly freezer space rental.   In all reality, I believe that this is a fair comparison.  If you disagree with that, please leave a comment.

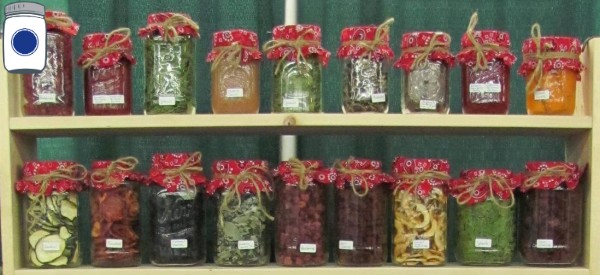
Pantry Paratus Expo Shelf

All things considered, simply storing the vegetables in the freezer for a week costs (according to the calculator) $4.33 (up from $3.98 in December 2011).  Now, dehydrating the same vegetables for 36 hours costs $2.65 (up from $2.44 in December 2011).  Add a 50cc Oxygen Absorber to the jar for an additional cost of $.10 and I can store those same vegetables for months and even years! 

Let us take this a step further.  Say you got a killer deal on frozen goods.  How long could you store them at ~$4 per week before the sale is not so great anymore?  Or, let us say you were not even worried about freezer burn, how long until the storage starts costing you more than you paid for the food itself at ~$4 a week rent to store it?  Coupon or not, you need to consider that ongoing cost into your food budget calculations. 

Taking this one step even further, you have that same $2.65 invested in the dehydrating process holding your on sale items long into the future without any reoccurring costs.  This effectively makes your hard won bargains always on sale to you months or even years later. 

We love the Excalibur 9 tray Dehydrator in our house—easy to clean, dries the food evenly and it is made in America!   Dehydrators are the work-horse of the do-it-yourself long term food storage minded family. 


Pro Deo et Patria,


Wilson


Photo Credits:

Proviso:

Nothing in this blog constitutes medical advice.  You should consult your own physician before making any dietary changes.  Statements in this blog may or may not be congruent with current USDA or FDA guidance.

What is Epsom Salt, is it really a salt and how can I use it?

What is Epsom Salt


Is it really a salt and how can I use it around the homestead?


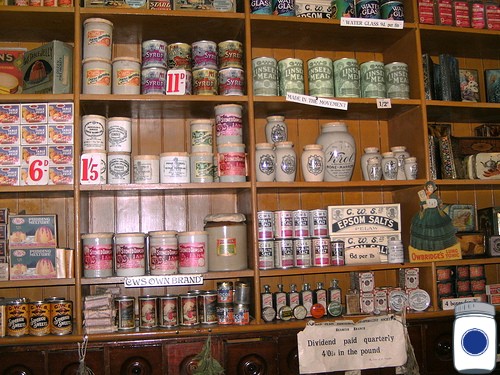
So among the list of things that you should have on hand around the old homestead, does Epsom salt appear on your list anywhere?  What is Epsom salt anyway—is it really even a salt?  Technically no, and like other kitchen nomenclature such as “sour salts” (which is really an acid) it is not even a salt at all. 


Epsom salt bath


If you were to do an internet search for “use of Epsom salt” you are likely to come up with a host of uses; everything from beauty, to bathing, to gardening, to curing digestive maladies and even arts and crafts applications.  What is in Epsom salt is what makes it truly useful.  If it really were a salt, then why would you put it on your garden?


Going by the handy name Magnesium Sulfate Heptahydrate (or MgSO4 + 7H2O) it does not fall under the chemical class of salts.  Chemically speaking in the hustle and bustle of electron swapping, salts are ionic compounds that are produced when an acid and a base react together.  Note that it is a sulfate not a sulfite which is different.  And if that just is not nerdy enough for you, watch this video about the predictability of ionic compounds and the periodic table of elements:


We now know that it is not really a salt, so who/where is Epsom and how did he/she get to name it?


Epsom salt, named for a bitter saline spring at Epsom in Surrey, England, is not actually salt but a naturally occurring pure mineral compound of magnesium and sulfate. Long known as a natural remedy for a number of ailments, Epsom salt has numerous health benefits as well as many beauty, household and gardening-related uses (Salt Works, 2013).


For us here at Pantry Paratus, we do keep Epsom salt on hand because it is so handy for a short list of applications that we need.  Although it is not likely that I will ever need it for its alleged hair volumizing properties, Epsom salt was helpful when starting the GAPS diet; we all routinely took an Epsom salt bath to help “purify” the system.  I saw only one reference to a reasonably short shelf life (4-5 years), but since it is a chemical compound found in nature then it probably will store quite well if protected from moisture. 


what is in Epsom salt


What is in Epsom Salt? It contains both sulfur and magnesium.  It is interesting to note that both of these appear on the list of what Sally Fallon Morell calls the seven macrominerals: “Calcium, chloride, magnesium, phosphorus, potassium, sodium and sulphur [sic]” (Fallon & Enig, p. 40).  Regarding many citations on the internet for the benefits of repeated Epsom salt application on a garden, I find it very difficult to believe that you would intentionally put that in your soil repeatedly.  The reason why—despite the necessary effects of sulfur on the cell wall of plants and the uptake of nutrients on the cellular level in animals, it is not something that you want to have in bulk in your soil.  And I get this on good authority: this past summer, I had the great pleasure to interview a very smart father-and-son team on their family farm, who explained the “all you ever wanted to know about soil chemistry but were afraid to ask” in a very succinct dose as part of a great interview.   


Lest there be any runs on local stores for Epsom salt, when it comes to the use of Epsom salt I must be fair to warn you that it does have its detractors.  Nevertheless, if you keep it amongst your homestead supplies then know that you are in very good company with a lot of “old wives” who tell tales—evidently the word got passed around for some reason.  For example, we have at least four “natural remedies” books that list it by name along with potential uses in an Epsom salt bath to aid in things like bee stings to swollen joints.  I will let you make your own call, but as for us it sits happily in the jar on the bathroom shelf. 


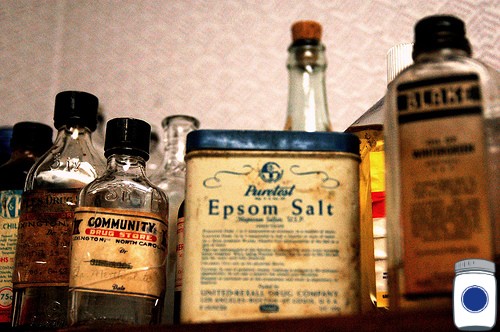
Epsom Salt


Pro Deo et Patria,


Wilson


Works Cited:


Salt Works. (2013). Epsom salt uses & benefits. Retrieved from http://www.saltworks.us/salt_info/epsom-uses-benefits.asp


Fallon, S., & Enig, M. (2001). Nourishing traditions. (p. 40). Washington DC: Newtrends.


Photo Credits:

Epsom salt Bath:friskierisky via photopin cc


What is in Epsom salt:mbtphoto (away a lot) via photopin cc


Further Reading:


http://www.treehugger.com/health/8-uses-epsom-salt.html


http://saveyourself.ca/articles/reality-checks/epsom-salts.php


http://www.saltworks.us/salt_info/epsom-uses-benefits.asp


http://www.epsomsaltcouncil.org/about/


Proviso:


Nothing in this blog constitutes medical advice.  You should consult your own physician before making any dietary changes.  Statements in this blog may or may not be congruent with current USDA or FDA guidance.


http://www.hypersmash.com


Only in America

“Only in America”


DC Radishes, a fresh start to spring


Article by Charles Fenyvesi reprinted with permission


Spring, the mythic season of renewal, began for me in late January, and it was ushered in by a stranger.


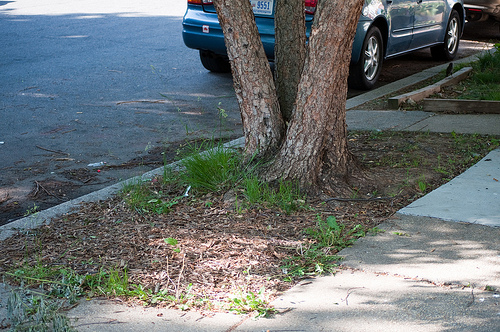
It was the kind of lovely, unseasonally balmy day the nation’s capital offers every winter, making daffodils and magnolias as well as people think that winter has been cancelled and spring is about to break out.  I was walking toward the poor end of M Street, downtown Washington’s power corridor.  Between 22nd and 23rd streets, in front of a dilapidated row house, I saw a pudgy little man digging up what is known as a treebox: a 2-foot wide, 10-foot-long strip of mean urban sod sandwiched between the concrete sidewalk and the asphalt street. 


Tree Box

A tree box in DC


He was in his middle 50’s and wore a rumpled, thick, brown wool suit that must have originally belonged to someone taller and heavier.  With sweat glistening on his face, he wrestled with a rusty old spade, stopping only to remove a clump of scraggly grass or a piece of broken brick.  He also ran into plenty of chewed-up concrete.  Patiently and neatly, he collected all of the debris in an aluminum trash can.


I wished him a good morning and asked him what he had in mind to plant.  “First radishes,” he said, stopping his work and pulling a 75-cent seed packet from his breast pocket.  “Then some more radishes.  And maybe later I will plant other vegetables I also like.  I am sorry but I don’t know their names in English.  Not yet.”


I found out that he had come from Iran a few months earlier, to join his brother who had a little restaurant in the row house facing the strip of land he was cultivating.  Both of them had been in the restaurant business before the Iranian revolution of 1979, but they did not want to live in the new Iran.  “Khomeini is no good,” he said.  “Khomeini wants to kill, kill, kill.”  He turned around faced east and shook both his fists in anger.  “In Iran I had a big garden,” he said.  “Many radishes.”


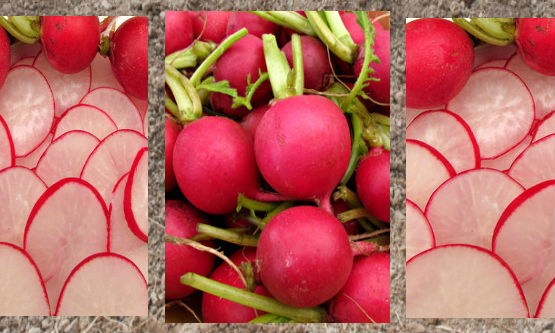
Radishes


He took my arm and lead me around the corner to 23rd street, where a much longer strip in front of another row house and an adjacent parking lot had been raked smooth and protected with a fence of sticks and strings, makeshift but attractive.  “Here I finish my work,” he said, beaming.  “Here will be more radishes.” 


I asked if he had added anything to improve the soil.


“Soil?” he asked.  “What is soil, please?”


I picked up a handful and asked if he thought it was good enough for growing radishes. 


“Soil,” he said triumphantly, delighted to add a new English word to his vocabulary.  He rubbed a little of it between his thumb and forefinger, and then smelled it.  “Good soil,” he said.  “Good America.  Good radishes.”


There is no room for Khomeini’s tyranny in this expatriate’s American garden.


Soil


I thought that the soil was typical heavy Washington clay mixed with a lot of urban rubble and much too compact for a root vegetable such as a radish.  But I did not want to say anything to discourage him. 


He explained that he was planting radishes so his brother could serve them fresh in the restaurant.  I must come and taste them fresh, he said, because that is the only way to eat radishes.  He assured me that I will love their flavor.  “Radishes are special,” he said.


He showed me the size of radishes he planned to harvest, and I thought that his expectations were high.  But I did not have the heart to tell him that in America, radishes do not grow as big as apples. 


Perhaps his radishes will.


Charles Fenyvesi


This article entitled “Only in America,” originally appeared in the May 1988 issue of Organic Gardening magazine, in the section called, “Another Look.”  The article is written by Mr. Charles Fenyvesi and is reprinted here with permission.  


Please feel free to leave a comment for Charles to read!


Photo Credits:

Treebox: photo credit: drewsaunders via photopin cc

Radishes by TACLUDA can be found here: http://www.rgbstock.com/searchgallery/TACLUDA/radish

Soil: photo credit: Pink Sherbet Photography via photopin cc


www.HyperSmash.com

Rendering Lard, a pictorial how-to

Lard, the real stuff


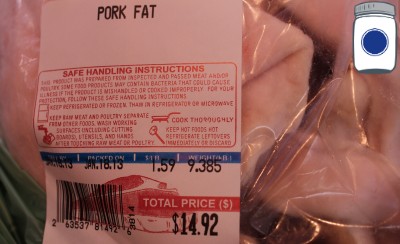
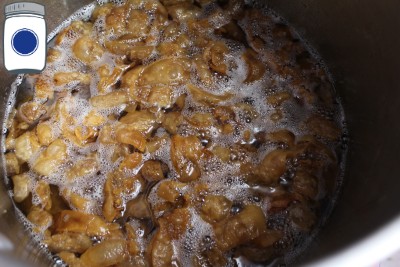
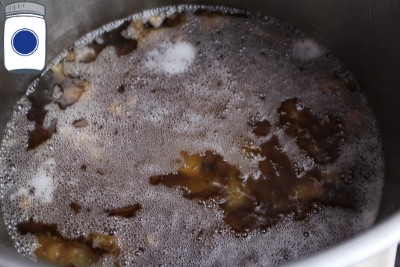
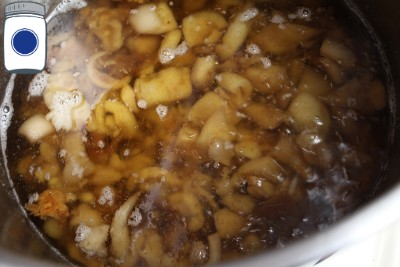
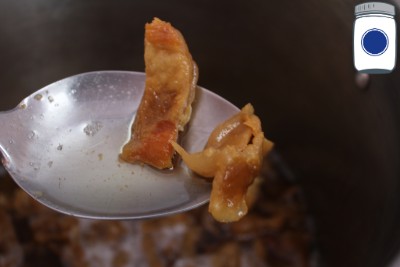
How to render lard: Pork fat + Time + Heat


Just short of a culinary disaster is how I would describe it.  I tried to make cornbread in a cast iron skillet while at Chaya’s parents house over Christmas.  Actually, it was worse than that because we were going over to another Aunt/Uncle’s house for chili, and these are relatives that we hardly ever see.  “Don’t you have a food blog?,” is not a question you want to answer when you have just served really bad cornbread.  I have successfully made cornbread before at our house, but the only difference this time was the use of store bought lard.  You can find the ingredients here—Yuck! 


What is really hard to believe was that I could not find non-chemical laden lard anywhere.  I guess that no one is making pure lard anymore, or the distribution is not as prolific as say hydrogenated oil.  Sadly the anti-fat bias is around and while neon spandex, the bio-pace bicycle crank and “spot reduction” excercises have all gone the way of the dodo bird—yet the low fat low cholesterol is still with us (and so are the autoimmune diseases, poor dental health, obesity, diabetes, cancer, etc.).  Michael Polan refers to this as “lipophobia” which in my opinion should have gone out with the USDA under the Carter Administration when it was made so popular.  


In an effort to redeem myself and make some decent cornbread, I called every health food store in the phone book as well as every butcher shop—no lard to be found (in this populated city).  I could buy shortening all day long complete with hydrogenated oil and all kinds of other yuck—but no pure lard.  Finally Chaya and I found some “Pork Oil” in a container at an Asian food store.  This proved to be just bacon grease so it was very salty to the taste and did not perform like lard.  Anyone looking to get into a niche business for themselves, it would seem that the organic lard market is wide open in the Midwest.


Here is the method we use to make lard:

I bought 15 lbs. of straight pork fat from the local grocery store butcher.  If I had a local pig farmer, I would certainly buy it from him/her rather than take a chance on CAFO pork products—but it was all I had available. 


pork fat


Cut the pork fat into strips or chunks if you like.


Cut fat into pork strips


 Pork fat cut into strips


Put the chunked pork fat into a stock pot or crock pot (which is Sheri Salatin’s method—see “Further Reading” below).  I recommended starting very slowly with low heat until the fat starts to seep out of the pork fat.  When you render lard in this manner the process will speed up over time as there is more liquid to make contact with the solid fat, thus transferring heat more efficiently and leaching more liquid fat. These photos are about 12-16 hours apart:


Simmer Pork Fat


Simmer Pork Fat 2


Simmer Pork Fat 3


Eventually you will see bubbles on the top.  According to Sally Fallon Morell, these are likely toxins and should be skimmed off.


Simmer Pork Fat 4


Simmer Pork Fat 5

Perfect!


Pork Fat Cracklins


The solids that you are left with are known as “cracklins” in the South.  They certainly can be salted and eaten, but I set them aside (see below). 


To filter out the liquid from the solids I use a combination of the stainless steel funnel with screen and a canning funnel.  This combination gives me the stand off from the stainless steel spout to the lard in the jar along with the capability to filter out the solids.  I then put the solids (or cracklins) in a bowl to be pressed (see below).


Filter rendered lard 3


Filter rendered lard


Filter rendered lard 2


Filter rendered lard 4


After the jars are full, I covered them with a Tattler reusable canning lid and set them aside with loose lids (basically, I am just trying to keep the dust out them).  


Rendered Liquid Lard


Let the jars cool.  The lard will solidify and turn white at room temperature. The fact that lard does solidify at room temp is exactly why it makes the best pie crust as opposed to the candlewax alternative sold as “vegetable shortening.”  No, I did not make that up either.


Cover Jar


This next step is totally optional, and truth be told may be more trouble than it is worth (unless you are doing a big quantity like we did) because it only added may be 10% more finished lard.  I set up my awesome Choprite Two #25 sausage/fruit/lard press.  It is made in America, built like a family heirloom this is a supurb press!—did I mention how awesome it was?


I scooped/poured the lard and the last of the cracklins into the basket of the press and used the smaller plunger (that fits inside the basket).  Be sure that you have a partner working with you to catch the lard in a jar so that you do not have to dirty any other items. 


Add lard to press 


Then I closed the arch and cranked down the press and waited for the drips to stop flowing into my jar. 


turn crank on press


The final yield was 1.5 gallons of beautiful homemade hydrogenated oil free pure lard!  These will keep for a very long time in the fridge or root cellar.


The balance of the cracklins in the bowl turned out to be 2 lbs 2 oz of leftovers that went to the chickens—who loved it!  It looked like a chicken mosh pit over their food bowl.


15 lbs of fat renders 1.5 gallons of lard


Leave a comment below, and let me know how you did.  I put some additional resources from our friends below on how they complete the same lard making process.


Wilson

Pro Deo et Patria


Photo Credits:

All photos by Pantry Paratus


Further Reading:

Blogpost from our friend Jill Winger of the Prairie Homestead on how to make lard.    

Blogpost from the famous Sheri Salatin of Polyface Henhouse on how to make lard.

Video blog from our friend Sarah from the Healthy Home Economist on how to make lard.


Errata: I totally had the WRONG light for these pictures, sorry that the photo quality is so poor.  I will try to rectify that in the future!


Proviso:

Nothing in this blog constitutes medical advice.  You should consult your own physician before making any dietary changes.  Statements in this blog may or may not be congruent with current USDA or FDA guidance.


http://www.hypersmash.com


How to Core and Dehydrate a Pineapple

How to Core and Dehydrate a Pineapple


Aloha from Montana


Pineapple Actual Size


Pineapples were on sale, so I picked up two and they are both in the photo above . . . no, seriously.  The pineapple on the left is in its natural state the way the Dole shipped it and the pint widemouth jar on the right is also one whole pineapple that has been dehydrated


If you read up on the Sulfur, Part I and Part II blogs you saw where I compared the store bought dehydrated pineapple side by side with my own.  I wanted to show you the steps of how I got that final product using the right Kitchen Hardware and Everyday Tools.


homemade vs storebought pineapple


First thing is first, you have to get the pineapple chilled.  Any way you choose to do it, I recommend cutting off the top and turning it upside down.  Montana in the winter, done! 


Montana Aloha


Let us say it is not winter, or you do not have snow—not to worry, you can always put it in the refrigerator.  For reasons that are not completely clear to me, the Hawaiians that I have talked to said that it is important to flip it upside down as it is normally stored right side up.  This is to let the juices redistribute back through the whole fruit.  Who am I to argue? 


In the case of no snow


After it has chilled for a few hours, you are ready to start cutting the pineapple.  I have illustrated with the Tattler widemouth canning ring about how much of the pineapple you get when it is cored for you in the store.  This is a substantial loss of the valuable fruit for a small cosmetic gain.  


Pineapple Yield


As for me, I like to just start cutting the skin off the pineapple closer to the edge.  This will leave some “divets” in the fruit depending on how sharp your knife is, how ripe the fruit is and how much of an angle you are cutting. 


Cutting off the pineapple skin


Contine all the way around until you have the pineapple totally skinned.  Next step will be to remove the “divets” the best that you can.  Since this is going into the dehydrator and not being served to the Queen of England, I am willing to live with a few blemishes. 


Trimming the Pineapple


Pineapple divets


Since the Apple Corer that I will be using is not all that deep, I will cut the pineapple in half so that I can remove the core.  The fiberous center along with the pineapple top and skin are destined for the compost bin.


Cut the Pineapple in half


Next comes the show and tell for kitchen tool technology.  The apple corer on the left is one that we had in the drawer from years past that is more like something you would expect to use if you were on a work detail in a prison camp–it is not easy to use or pleasant to clean.  The Apple Corer on the right is one that we sell that works like a dream without all the suction and brute force banging on the countertop. 


Apple Corer


Simply put it in the center, align it and push it through.  Voila! 


Core the Pineapple


Core Pineapple


Next, eject the core into the compost bin.


Eject the Core


Next, slice the pineapple (watch that thumb!) and then cut it into chunks.


Slice the Pineapple into rings


Rings to Chunks


Since the pineapple is already high in citric acid, you will not have to do anything to it before putting it on the dehydrator tray.  I typically like to run my dehydrator at lower heat for a longer time to make sure that I get it good and dry. 


Here is the pineapple after 24 hours:


Dehydrated Pineapple 24 hours


After 24 Hours


Here is the pineapple after 48 hours:


Dehydrated Pineapple 48 hours


After 48 hours


Lastly, take them off the dehydrator tray with some tongs and place them in a jar.  If you dried them very thoroughly (~93% dehydration) you can hear bounce as you drop them on the counter.  These will keep for a long time, especially with an oxygen absorber


Shown Actual Size


Leave a comment to let me know how you did.  Enjoy!


Wilson

Pro Deo et Patria


Photo Credits:

All photos by Pantry Paratus


Proviso:


Nothing in this blog constitutes medical advice.  You should consult your own physician before making any dietary changes.  Statements in this blog may or may not be congruent with current USDA or FDA guidance.


www.HyperSmash.com