The Continuum of Self-Sufficiency

These thoughts have been formulating for awhile.  I have ample opportunity to meet a wide variety of folks all striving to acheive some of the same goals.  You might be surprised what you have in common.

I’m going to have you read it straight from TheSurvivalmom’s website today, because you’ll notice a special offer for TheSurvivalmom readers and I don’t want  you to miss out on that–a free pack of oxygen absorbers ($19.50 value)!


Enjoy!

Bitterroot Sweet Zucchini Relish (& Beet Salad Recipe)

We may be transplants to Montana, but it hasn’t taken long for us to take pride in all things Made in Montana!  That is because Montanans are a winning combination of both hard working and extremely creative.  

Mary Ippisch is no exception.  Like many Montanans, her yearly harvest became a family tradition; not satisfied with freezer-burnt zucchini she transformed her fresh harvest into a delicacy-in-a-jar, sweet zucchini relish!  What started out as kids eating it by the spoonful turned into gifts for other friends and family; and now?  She’s in business!

Jar and Bowl
We (as a family) love Bitterroot Sweet Zucchini Relish, and so I was very excited to speak to Mary.  I asked her a few questions about her journey from home canner to business woman.

Where did this recipe come from?  Do you ever can anything else?
My sister gave me the original recipe almost 30 years ago and she got it from a friend.  Over the years I have modified it quite a bit.  I have been canning this recipe and jams and other fruits for about 30 years.  

So do you water-bath can or pressure-can your zucchini?
I prefer the water-bath canner even though I hear that the newer pressure canners are much safer!

All American Pressure CannersI know that this started out as a way to preserve your own harvest, but now that you are in production, where does the produce come from?
I purchase my produce during peak season from local growers and when I can’t get it from them, then I go to my local grocer and he gets the produce from his suppliers.  I prefer to buy locally when I can.

Close-up of the Bitteroot Sweet Relish
Tell me about your journey from home-canner to commercial production.  What’s your story? And do you actually still do all of the canning?
Over the years my family and friends have always enjoyed receiving the relish.  A couple of years ago, my sons encouraged me to market my product.  So I started the process with getting licensed, product analysis, becoming a food manufacturer, label designing, etc.  The batching up process was interesting.  My oldest son helped me with the calculations.  He is a culinary graduate, so he knows food and how to increase or decrease.  Yes, I do all the processing myself with help from friends and family.  It has been an exciting year for me and my new business.

Bitterroot Sweet Zucchini RelishThe label on your jar is as “gourmet” as the product itself!  How did you arrive at the product name and label?
I wanted the label to be interesting and colorful.  I came up with the idea of the state flower “Bitterroot” and its origin/legend*, hence the story.  I wanted the colors to be something that would stand out on the shelf (and it does), not just the usual green and yellow pickle colors you see with the other brands.

What advice would you give to someone who knows they have a good product?
I knew the relish was good, but had no idea that it would take off like it has.  I believe if you have a passion for something and you want to market your product or idea, you shouldn’t let anyone get in the way of your dreams.  I surround myself with positive people that share my passion.  This motivates me to continue doing what I want to do in spite of the economy, government regulations and anything else that might seem to get in the way.  Most people run into issues and problems and quit.  I say have some tenacity and get through the problems.  I consider problems to be a challenge.  It is so surreal to go into the grocery store and see “Your” product/hard work sitting on the shelf, and it’s even more of a thrill to see someone purchase your product.  I am currently working on other products, hopefully for next year.

I have found your relish to be very versatile—it is great tartar sauce and I’ve created a Cold Beet Salad recipe with it. It’s also delicious on its own.
Yes, it is—and you ought to try it in barbeque sauce!

Mary’s relish, Bitterroot Sweet Zucchini Relish, is beginning to take off in the local Montana market.  For now, it’s not available everywhere, but you could request it at your local store–we sure did!

*There is a story from the Native Americans that the sun heard a mother crying because her baby was starving.  The sun turned the woman’s tears into the “Bitterroot” (Lewisia rediviva) so that her family would always have food.  It’s a beautiful wildflower with several edible parts.


*****************************************************************************************************

Relish-Beet Salad

Relish-Beet Salad

First, let me say that beets are (used to be?) my least-favorite vegetable.  My family loves them and so I’m learning to cook with them.  I started with a basic recipe, and modified it to meet the average person’s time constraints and pantry supplies.  The result was amazing!  I absolutely loved the flavor, color, and presentation! 

•    4 beets
•    4 potatoes
•    4 carrots
•    1 ½ cup of Bitterroot Sweet Zucchini Relish (to taste)
•    ¼ cup olive oil
•    4 tablespoons apple cider vinegar
•    salt to taste
•    1 teaspoon of dill (to taste)
•    3 green onions, chopped

     1.    To retain the maximum color of the carrots and potatoes, boil them separately from the beets.  If you don’t care, save a pot (the carrots are still orange). Quarter and boil all of the vegetables for approximately ½ hour.
      2.    When the vegetables have cooled, dice them into cubes.  
      3.    In a separate bowl, combine the relish, olive oil, vinegar, salt, and dill.
      4.    Coat the vegetables with the dressing, and then add the green onions.  Toss lightly.
      5.    Thoroughly chill before serving.  

The Chronicle of a Reformed City Girl

We were citified yuppies.  We drove the approved car, lived in the approved four bedroom house in the approved neighborhood, with the approved 2.3 kids (I was pregnant) and I could give the approved answers at all of the approved yuppie social functions.  Our former dream home

 We did have some closet behaviors, of course.  To start, we’re Christians, but that’s okay, we just gravitated towards the Christian-yups.  We were a homeschooling family, knew which end of the fishing pole did what and we could muster the carpentry skills to build a semblance of a compost bin.  I milled my own flour and baked constantly.  The smell of freshly baked bread was my gateway drug which eventually led to dehydrating, and even pressure canning (that is when you have crossed over). 


My husband stumbled upon the notion of rain barrels.  Our lack of these specific self-sufficiency skills led to some “unapproved” blogs about how we could all pay a price for our failing economy and that it would be a good idea to put something away for a “rainy day”.   I reviewed some homeschooling curriculum about economics and it all clicked for me, too.  “Hey,” I thought, “you can’t spend what you don’t have.”  So novel, I know. 


That was the beginning of the journey and the point of no return was in our rear view mirror.  I read Carla Emery’s “Encyclopedia of Country Living” cover to cover (yes, even appendices).                                                      The Encyclopedia of Country Living by Carla Emery We became radical to get out of debt: excessive couponing, even selling the Volvo and getting by with one car—gasp!  Above all else, we spent a lot of time in prayer.  Well, sometimes we didn’t pursue God—it honestly felt more like He pursued us.  We sold much of what we owned, gave away the rest, and moved from one side of the country to the other. 


We gave up all sanity if you were to ask anyone we knew, but we knew that we were exactly where we were supposed to be . . . beautiful Northwest Montana!   Cabinet MountainsThree days in the car with three sick children.  By the time we hit Wyoming, I was teetering in my resolve, “Carla Emery didn’t mention this,” I thought.  Perhaps sanity is overrated. The dog was crossing both sets of her legs, so we pulled off at a quaint little general store/tackle shop/pizzeria/fireworks stand/laundry mat/gas station, miles from anywhere else.                                                                                                               


The wind softly blew the dust up and the horse tied to the post pawed the ground and snorted.  The checkout lady graciously led this whimpering mother back to the “Employees Only” utility sink, so that I could hand scrub three soiled lovies, lest the children refuse to sleep without them.  Wyoming Sign

 We finally arrived to the small town in Montana which we now call home, checked into a hotel, and immediately headed over to the grocery store for something we could call dinner.  The Local Grocery Store

 Something was strangely odd; bumblebees and princesses, dragons and race car drivers were walking across the parking lot holding hands and looking both ways.  We walked through the door of the grocery store, met by a human sized M&M (green, my fave) who passed a baggie of tickets to each of us.  We had arrived on Halloween.  The entire town, it seems, goes to the grocery store on Halloween.  The local icon known as “the Balloon Man” was there in his homemade clown costume giving hats and swords to the children and giving the adults funny anecdotes about his grandchildren.  The grocery store passed out free hotdogs, chips, and soda.  There were games and prizes, samples and—to the locals—a chance to catch up on the news while waiting in lines. 


Culture Shock. 


It’s been a tough year on many accounts and we have grown.  We’ve gone from one end of the economic pendulum to the other.  We survived those first few winter months simply by the grace of God and of others.  I never knew generosity until I met the neighbors of my small town.  I would find a mason jar of goat milk on the front porch every morning when I let the dog outside.  Plates of cookies, homemade bars of soap, and even canned elk meat were given to us because “I had some extra…”

 Arial View of Small Town, Montana

A year has recently passed.  This year, we escorted a Tigger, an Eeyore, and a Piglet across the parking lot, holding hands and looking both ways.  As children compared costumes and parents compared the week’s happenings, I asked my husband, “A whole year—what do you think now?”


“We are different people now,” he replied.  “The culture shock is gone, and we are different.”  We smiled somberly, as though that smile recorded the memories of a year. 


Everything has been a new experience, from butchering livestock to homemade ice cream to community firewood cutting.  There were our failed attempts at gardening in a harsher climate, our new friendships, and endless winter months playing board games with restless children.  The people here are strong.  The lifestyle is simple but never confused with easy


I nodded in agreement, fighting back a tear.  “Yes,” I whispered, “we are stronger.” 


photo credits:

Cabinet Mountains: Alice and Jim Hayes, Loveless Realty

Grocery Store: Rosauers photo

Arial of Town: Kootenai River Development Council, Inc.

Elderberry Tincture

The Elderberries were a gift from a friend.  It was a gift of health.


Last year was my first winter in Montana.  As with all moves, our immune systems were not prepared for the onslaught of every flu and cold, every bacteria and virus in which we came into contact.  I thought I was going to die at one point.  A friend sent my husband home with a bottle of Oregano oil and a set of instructions for me to mix a few drops with water and drink up.  Not only did I think I was going to die, my husband very nearly did that day.  If you have ever tasted the burn of Oregano oil, you know what I’m talking about.  But I recovered immediately.


So this trusted friend (who just might have saved my life once) gave me a bag of Elderberries.  They were so delicious, I very nearly ate the bag of them; I restrained myself in the name of health for the long upcoming winter.


 I am not in a medical profession so please understand that I am not giving any medical or miracle claims.  I can only tell you what others typically use the tincture to treat and I’ll let you draw your own conclusions.


To make a tincture, you can either use glycerin or a strong alcohol.  However, which of those two options you use has everything to do with the herb or berry used itself.  The chemical compound may not be drawn out simply by using glycerin, as is the case with Elderberries.  Alcohol is needed to draw the medicinal properties out of the plant in this particular case.  You should research each individual plant to determine which type of tincture will give you the most benefit.


Elderberries can provide excellent immune support, and many natural products you buy claiming to do so will have Elderberries in its’ contents.  It’s also an antioxidant and is used to treat coughs and colds.  They say that it can combat both viruses and bacteria, and even help with tonsillitis!

Elderberry Cluster


I did refer to this site for very easy-to-follow instructions. The whole process took less time than pouring a glass of chocolate milk.  Seriously.  The hardest part for me was when my husband asked the church pianist, “Where can you buy liquor on a Sunday morning in this town?”.


Supplies:

A clean  jar with tight fitting lid

Vodka (or Brandy) with the highest alcohol proof available (100-proof desirable)

Elderberries

A wooden spoon and colander (preferably non-metal)


  • Wash and strain elderberries in the colander.
  • For a tincture, you do not need to worry about the seeds.  Remove the stems with a fork.
  • Mash the berries as much as possible with your wooden spoon in the jar.
  • Pour alcohol over them until just above the berry-line.
  • Label the jar clearly, including contents (so that you’ll know which tinctures on your shelf contain alcohol and which ones do not).  Date the jar.
  • Occasionally shake the jar during the next 6 weeks.  This is the ideal length of time to allow the tincture to fully “cure”.  You can certainly use it before then if you need to.
  • The tincture can be stored in the jar for up to 2 years.  I recommend placing it in the refrigerator once the jar has been opened.

Optional—if you would like to remove the berries after 6 weeks, simply strain out as much of the tincture as possible and rebottle it.  This is not necessary.

Chaya's Elderberry Tincture


Picture of Elderberry Cluster is from this (really informative) site.

Dehydrating carrots and making sauerkraut

Carrots and Cabbage

Carrots and cabbage—I love them both.  Since we do not have a greenhouse, we wanted to preserve what food surplus we had now to get us through the winter.  Carrots dehydrate so nicely and are great for soups, stews and casseroles.  Cabbage is high in Vitamin C, ferments so easily and stores very well in the form of sauerkraut. 


A Polish friend recommended this recipe to us, and it is now one of our go-to-cannot-possibly-fail standards: take some sausage and potatoes and cook them in a cast iron skillet.  Then add sauerkraut and applesauce at the end.  Simmer for ten minutes and you have a complete meal.  On a cold winter night, this is pretty tough to beat! 


Sauerkraut is a great source of probiotics, which are great for the health of your gastrointestinal tract.  Sauerkraut is such a simple way to store cabbage and the probiotics that are created naturally from the bacteria found in cabbage make this a great addition to your pantry.  Here is a great article on some of the history and benefits of lacto-fermented “super foods.” 

Stuffed Acorn Squash

Acorn SquashIngredients

2 acorn squash, halved

1 chopped onion

2-3 garlic cloves

Butter or Olive Oil

1 lb sausage

Thyme

Rosemary

Sage (optional, depending on the strength of sausage used)

                   Sour Cream, optional


1.   Either microwave or roast (in water) acorn squash halves until tender.


2.   For filling, sauté onions and garlic in butter or olive oil.  Add sausage, thyme, rosemary, and sage to taste (I’m not going to tell you how much of each to add, some of it depends on your recipe size, but my suggestion is that you use 2x the thyme than you do rosemary  or sage).  Add a “swirl” of maple syrup and 1 cup walnuts when it is nearly completely cooked.

3.  Add the filling to the softened squash and roast in the oven to just broil…


 4. Serve with a dollop of sour cream onto each one, and serve with creamy (or cheesy) broccoli soup and bread sticks

Cheesy Broccoli Soup and Stuffed Acorn SquashStuffed Acorn Squash


Picture of Squash used from: The Cook’s Thesaurus

Chaya’s Video Review: free online movie, “Back to Eden”

“The LORD God took the man and put him in the Garden of Eden to work it and take care of it.”  Genesis 2:15 (NIV)  We see that God made everything perfect, man freely chose sin and the consequences have been very bad—exactly the opposite of what God described His creation (Genesis 1:31).


Before ever watching Back to Eden, I took the time to read the reviews for it here, on Permies.com.  This site is devoted to permaculture, the practice of growing your garden in a productive and natural way, and certainly represents individuals from all walks of life and from a variety of world views.  They seemed impressed with the video, saying that the gardens and the science in the video were excellent, and they did not feel “proselytized”, as one forum member put it. 


I was in awe.  This video was absolutely amazing.  Where to start?

Carrots from Back to Eden


Price:  The generosity of Paul Gautschi comes through—this full length movie can be viewed freely here, on the movie’s website! They simply ask that if you were inspired by this movie, that you would consider purchasing copies for yourself or others as gifts (that makes Christmas shopping easy this year).   

Update: We were so moved by this movie that we have requested the ability to retail it, and we now have it in stock.  Please consider purchasing the movie directly from Pantry Paratus.  


The production and design: The movie was brilliantly done in a simple way that allowed the gardens to speak.  The music was all original and fitting, the sections were divided in a very clever way that brought giggles (yes, never sit by me in a movie).  And the overall movie quality and content was such that I sat there watching every line of the credits afterward.

 New Growth from Back to Eden

Content: Paul Gautschi’s gardening techniques are simple yet brilliant.  His theories are proven true by his garden and the gardens of others featured in this video, and no one can deny that the man knows what he is talking about.  He is passionate in his speech, gentle in his actions, and motivational to those who meet him personally and to those of us who have only had the pleasure of watching him on screen.  He stresses the Biblical concept of  Matthew 11: 28-30, and Paul explains that Jesus was saying “I don’t do things like the world.” What does the world use a yoke for? To plow the ground, and it’s a lot of work.  Jesus said that his yoke is easy, his burden light.  And to quote Paul Gautschi: “We work hard to fail.”  There is a better way.


The connection to God:  Paul’s knowledge of Scripture was quite humbling to me.  He does not preach (the Permies crowd agreed), but he weaves the Word of God into his gardening—or is it the other way around?—in such a seamless way that you begin to understand the nature of the God of the Bible. 

Beets from Back to Eden


Overall effect: This movie calmed my spirit to the core and yet reignited a passion for both gardening and God’s Word!  I left the movie believing that I could replicate what I saw because the techniques were simple.  I also left in a prayerful attitude and in repentance.  A garden cannot be rushed—and neither can God’s timing, which is something for which I am notorious (on both counts). 

 *****

 A note to believers: Can others see your garden and see the glory of God?  I can only laugh a nervous kind of laugh in reply.  Fewer things bring me closer to cussing than the weeds in mine!  Could my garden be a reflection of my Savior?  For that matter, are there other areas of my life that need “tended” to reflect the glory of God?

 “Now may He who supplies seed to the sower, and bread for food, supply and multiply the seed you have sown and increase the fruits of your righteousness,” – 2 Corinthians 9:10


I’d also like to direct Christians to one more website.  God has given us a mandate to care for the earth but yet Christians aren’t necessarily characterized by leadership in the cause for good stewardship.  Take the time to check out this site: http://www.creationcare.org/


 Here is a length to the full length movie.

Sausage-Stuffed Apples

Sausage Stuffed Apples

yummy version of this back-to-basics easy recipe


Whenever a baked apple is part of the main course, invite me over!  This is an easy recipe I have made many  times over—I use the term “recipe” loosely.  Think of this sausage and apples recipe as more as a “guide.”


 For a recipe like this one, you will need the handy-dandy tool like this one: 


 Apple Corer


                                              Ingredients:

                                              8 apples, cored and halved into the top and bottom

                                              1 lb pork sausage

                                             2 tbs ground sage

                                             ½ cup maple syrup (approximately, to taste)

                                             1 cup chopped walnuts

                                             Olive oil

Preheat oven to 375 degrees.

-Place apples cut-side-up in a greased baking pan.

-In separate bowl, mix the sausage, sage, maple syrup, and walnuts.

-Stuff the apples with the sausage mixture.

-Drizzle olive oil on top.


 Bake for approximately 45 minutes. 


sausage stuffed apples


As for side dishes that you could serve here to along with the sausage and apples, I like to either include fried red cabbage, sliced potatoes or carrots. 


These sausage stuffed apples are a hit with the children, so give them a try and let me know what you thought of them by leaving a comment at the bottom.


Chaya


Recipe: Apple “Oatmeal Cookie” Granola

Apple Oatmeal Cookie Granola

Easier than a “no bake” oatmeal cookie


I named this recipe “oatmeal cookie” because that is the closest I can come to the emotion that overcame me as I bit into this granola.   


Oatmeal Cookie


This is made in your Excalibur dehydrator, using Paraflexx sheets.  You will set the temperature to approximately 125° F and allow it to run overnight.  At least, that is what I did but it was so perfectly crisp that I do believe less time or lower heat might be possible.  If you prefer “living foods” closer to raw, try a lower temperature—either way you will still end up with a healthy oatmeal cookie like product. 


The yield for this recipe was three trays. Play with the ingredients.  For instance I did not use all raisins, I combined them with dehydrated berries from my pantry.  I also mixed walnuts and pecans because I could not decide between the two. 


recipe for oatmeal cookie


5 medium apples, sliced and peeled

6 cups rolled oats

1 cup nuts

1 cup raisins

Dehydrated crumbled raspberries, to taste (optional)

1 cup maple syrup

2 cups warm-hot water


In a separate bowl, mix the maple syrup with water.  Set aside.


 Maple Syrup Mixture


In a large bowl, mix all of the other dry ingredients for this no bake oatmeal cookie.  Stir in maple syrup mixture. 


Mix Dry Ingredients


Dump mixture onto dehydrator trays.  Turn on the dehydrator and forget about them until morning, and then enjoy your chewy oatmeal cookie with your yogurt!


This is a great snack recipe for kids.  Give this recipe a try and tell me what you think below in the comments section. 


Chaya


Apple Butternut Squash Soup

Apple Butternut Squash Soup

Autumn in a bowl!


Apple Butternut Squash


Apple Butternut Squash anything makes me excited it is autumn.  Oooh, am I ever excited about leftovers for lunch!

I served this apple butternut squash soup with my bread—with one main exception!  When I was ready to bake bread this week, I realized all-too-late that I did not have enough honey.  Without time to run to the store, I substituted ½ cup molasses instead.  My bread was rich, dark, and moist.  It has a complex flavor that any true bread-lover would savor.  It was a perfect pairing (with real butter) to this warming and filling soup.


Notes:

* This butternut squash apple soup can easily be vegan—substitute vegetarian broth and a nut milk for the cream.

* I love the rich flavors of the spices and so I am personally heavy-handed.  I add more than what I listed for you.  You will need to use your discretion on the amount of the spices.

* This apple butternut squash soup recipe is creamy, rich, and more filling than most.  Hubby and myself only ate one bowl and were full.  If you are forever looking for a meatless meal that actually fills you, this is it!


Apple Butternut Squash Soup

1 yellow onion, chopped

5 small apples, chopped (no need to peel)

2 butternut squash, steamed or boiled

1 quart liquid broth (I used home-canned turkey broth)

½ cup water

1 quart half-and-half or thick cream (ideally cream from raw milk where it is legal)

½ stick butter

1 tsp lemon juice

3 bay leaves

1-2 tsp dried nutmeg, to taste

3 tsp dried sage

1-2 pinches salt, to taste

Pepper to taste


Directions:


Sauté onion and apples in butter.  Add chunks of squash to a cast iron skillet, along with the lemon juice, bay leaves, nutmeg, sage, salt, and pepper.  Sauté the butternut squash and apple mixture only a few minutes with all of the spices, and then add ½ cup water to simmer for 5 minutes.

Transfer to a pot, add broth and cream.  Simmer for approximately 15 minutes.  Add additional seasoning to taste. 


Put portions in a blender to create a creamy finished product. 


Serve with fresh bread and butter!


I hope that you enjoy this Apple Butternut Squash treat as much as we do.  It is even better on the second day!  Give this a shot and leave a comment below to let us know what you thought of it.


Chaya


Pumpkin Cream Cheese Oat Bars (or Oat Muffins)

Pumpkin Cream Cheese Oat Bars (or Oat Muffins)


Pumpkin Cream Cheese . . . let’s get to baking!


Pumpkin Cream Cheese Oat Bars, I literally invented this one as I went, not even basing it upon or adapting from another recipe.  It was a fantastic surprise!


          Pumpkin Cream Cheese


I started out baking these in my go-to cake pan, and then I ended up with a muffin tin full as well.  It was very good both ways, so I suppose you can just do what suits your fancy.  Pumpkin and cream cheese were both on sale, so I started with what I had on hand.  I think that the topping makes these as delicious as they are—please do not skimp here!


Pumpkin Cream Cheese Oat Muffins


Also, I used half of a box of cream cheese and the flavor was light.  I could envision these being even more decadent though, so if you try it with more cream cheese, would you please leave a comment below and let us know how it turns out?  One other note, I used hard red flour and they were great—but next time I will try soft white, as it is the best choice for a quick bread.  In either case the cream cheese pumpkin combo yield a moist but firm overall product that my kids love with milk as a snack.


Do not be intimidated by the seemingly long list of ingredients—the topping and batter ingredients overlap and these are mostly basics you already have on hand.  You could simplify with “pumpkin pie spice”—if you do, let me know what you think of it!


I have cut the recipe in half, so this should give you either a dozen muffins or a cake pan’s worth.

Topping:

2/3 cup old fashioned oats

¼ cup brown sugar

1 tsp cinnamon

2-3 tsp butter, melted


 Pumpkin Cream Cheese Oat Bars


Batter:

1 ½ cups fresh-milled flour

1 cup old fashioned oats

1 tsp baking powder

½ tsp baking soda

1 tsp cinnamon

1 tsp ground nutmeg

1 tsp ground cloves

1 cup sour cream

3 cups pumpkin puree

4 oz (half box) of cream cheese, softened

½ cup brown sugar

¼ cup olive oil

1 egg


 Directions:

  1. Preheat oven to 350 degrees.
  2. Stir topping ingredients and set aside.
  3. Combine dry ingredients (flour, oats, baking powder, baking soda, spices).
  4. In a separate bowl, add sour cream, pumpkin, cream cheese, brown sugar, oil, and egg.  Beat for approximately 2 minutes to ensure blending of the cream cheese and to get air into the egg.
  5. Pour one bowl into the other, stirring lightly.
  6. Pour into cake pan or muffin tins. 


If a cake pan, it will take 30-40 minutes.  If muffins, 30 minutes. 


This pumpkin cream cheese recipe is delicious and easy.  I usually try to make one other baked good item on my bread baking day to get my family through the week with snacks and quick healthy breakfast choices—so this works well either as pumpkin cream cheese bars or muffins!


Cream cheese and pumpkin


Give this pumpkin cream cheese recipe a try and let me know how you like it.  This may be my new favorite take-along finger food for get-togethers! 


Chaya


Photo Credits:

All photos by Pantry Paratus

Use It Up , Wear It Out, Make Do, or Do Without!

The inflation rate, even according to the government (who often tries to dissuade fears by downplay), is inevitable even within the year.  Now is the time to reevaluate our shopping habits and how we can get the most for our dollar ahead of food inflation.  We need to plan ahead.  We must …


WWII propaganda poster

Would you like a breakdown of the upcoming inflation of food?  Coming to a pocket book near you . . . 

http://www.ers.usda.gov/briefing/cpifoodandexpenditures/data/cpiforecasts.htm

SOURCE


Changes in Food Price Indexes, 2009 through 2012 September 23, 2011
Item
Relative importance1
Month-
to-
Month
Year-
over-
Year
Annual
Annual
Forecast
Forecast
Jul2011 to Aug2011
Aug2010 to Aug2011
2009
2010
20112
2012
Consumer Price Indexes Percent Percent change
All food
100.0
0.5
4.6
1.8
0.8
3.0 to 4.0
2.5 to 3.5
Food away from home
43.1
0.4
2.7
3.5
1.3
3.0 to 4.0
2.0 to 3.0
Food at home
56.9
0.6
6.0
0.5
0.3
3.5 to 4.5
3.0 to 4.0
Meats, poultry, and fish
12.5
0.3
7.7
0.5
1.9
5.5 to 6.5
3.5 to 4.5
Meats
7.9
0.7
8.9
-0.6
2.8
6.5 to 7.5
3.5 to 4.5
Beef and veal
3.7
0.4
10.4
-1.0
2.9
8.0 to 9.0
4.5 to 5.5
Pork
2.5
0.7
7.5
-2.0
4.7
6.5 to 7.5
3.0 to 4.0
Other meats
1.7
1.2
7.7
2.3
-0.1
3.0 to 4.0
2.5 to 3.5
Poultry
2.4
-0.1
3.4
1.7
-0.1
2.5 to 3.5
3.0 to 4.0
Fish and seafood
2.2
-0.4
8.3
3.6
1.1
5.5 to 6.5
4.0 to 5.0
Eggs
0.7
4.9
14.5
-14.7
1.5
5.0 to 6.0
3.5 to 4.5
Dairy products
6.1
0.9
9.1
-6.4
1.1
5.0 to 6.0
3.0 to 4.0
Fats and oils
1.7
1.0
10.8
2.3
-0.3
6.5 to 7.5
2.5 to 3.5
Fruits and vegetables
8.4
0.2
6.3
-2.1
0.2
3.5 to 4.5
3.0 to 4.0
Fresh fruits and
vegetables
6.4
0.4
7.5
-4.6
0.6
3.5 to 4.5
3.0 to 4.0
Fresh fruits
3.3
0.7
9.1
-6.1
-0.6
2.0 to 3.0
3.0 to 4.0
Fresh vegetables
3.2
0.0
6.0
-3.4
2.0
4.5 to 5.5
3.5 to 4.5
Processed fruits and
vegetables
1.9
-0.4
2.4
6.6
-1.3
1.5 to 2.5
3.0 to 4.0
Sugar and sweets
2.2
1.2
4.7
5.6
2.2
2.5 to 3.5
2.0 to 3.0
Cereals and bakery
products
7.9
0.8
5.3
3.2
-0.8
4.0 to 5.0
4.5 to 5.5
Nonalcoholic beverages
6.7
0.3
4.0
1.9
-0.9
2.0 to 3.0
1.5 to 2.5
Other foods
10.7
0.9
3.0
3.7
-0.5
2.5 to 3.5
2.0 to 3.0
Note: Bolded entries reflect changes from the previous month’s forecast. Green arrows indicate an increase and red arrows indicate a decrease in the forecast from the previous month’s forecast.

1BLS-estimated expenditure shares, December 2010. Food prices represent approximately 14 percent of the total CPI.

2Forecasts updated by the 25th of each month.

Sources: Historical data from Bureau of Labor Statistics; forecasts by Economic Research Service.


What is food inflation?  Basically, it is the worth of everything you eat going up except the money that you use to buy the food.  Classically the funny money inflation metrics do not include inflation on fuel or food.  I know, I know, you are thinking, “but those are the things that cost the most,” exactly.  This is what keeps the numbers looking so good.  Factor in that the Farm Bill commodities float on a sea of oil and subsidies and the real costs start to hit very close to home. 


You already know how serious the inflation on food is.  Have you priced bacon lately?  May be it is that the real paradigm was there all along right in front of us:


Food Pyramid


The USDA Food Pyramid?  Yes, the widest part at the base is what you are “supposed” to be eating more of—which is why we call it the Farm Bill Pyramid:


Food Pyramid Annotated


The commodities are based on cheap oil (artificial fertilizers, fuel for farming implements, trucking and transportation, etc.).  As there is an inflation in oil prices there follows an inflation in food prices as well. 


Let me illustrate further: try to find something in the grocery store that does not have corn syrup in it.  Actually, you would be very hard pressed to find foods without corn or soy derivatives in the food.  Since corn and soy are row crop commodities, which depend on oil to fuel the production you will naturally see inflation on food when you see inflation on oil. 


The food inflation markers are there—I hope that you are thumbing through your seed catalog for this spring. 


Chaya


Photo Credits:

WWII Propaganda Poster by http://creativecommons.org/licenses/by-nc-sa/3.0/

 Food Pyramid from http://www.nlm.nih.gov/medlineplus/ency/imagepages/19836.htm

Clipart from www.cliparts101.com

What I Put Into My Bread–The “Why”

bread with seeds

Bread Ingredients


The Role of Each Ingredient in the Final Product


I would like to explain what each of the ingredients does and how it interacts in my bread recipe.  Once you understand this, it is easy to modify a recipe and make it your own.  Perhaps you avoid eggs, or want a product with less gluten, etc.  If you understand the interplay of these ingredients, you can make substitutions, and create your own variant.

 I prefer to start with natural ingredients as much as possible.  I will mill my own flour before I get started to ensure that I have the highest nutrient density in my family’s bread.  Where possible, I highly recommend pastured eggs.  The Omega 3 is clear to see in the bright yellow yolks—bugs and sunshine make the best eggs!  Lastly, if you can use filtered water you will get better performance with your recipe ingredients (and you will not miss the Chlorine). 


pitcher of water

Water—Beyond joining the bread ingredients, water temperature is very important for activating yeast.  You want your water to be approximately 110-155˚F.  Again, filtered water is going to give the best results. 

 Altitude is another consideration on how much water you need to add to your recipe.  Higher altitudes are dryer climates (lower boiling point for water) and will require a higher ratio of water to the dry ingredients.  My recipe worked for me at both sea level in North Carolina and at 3,000 ft here in Montana . . . however I have to use a slightly higher water-to-flour ratio here at 3,000 ft.  When I tried to bake bread at 7,000 ft in Colorado Springs, my low altitude recipe failedClick here for a tested high altitude bread recipe.

  olive oil

Oil—Next to flour, the quality of the oil has the most direct effect on the quality your bread, both in flavor and in nutrition.  I almost exclusively use olive oil, because when you examine the finished product, you will know the recipe by ingredients used to make it.  It is this fat content that makes a tender and moist baked good.  The fat interacts with the strands of gluten to shorten (why we call them “shorteners”) the length of the gluten strands.  This allows the gases more freedom of movement so that your baked goods are more “airy”.  Egg yolks also help serve this purpose.


honey

Honey—I always add the oil first so that the honey will slide out of the same measuring cup without mess or waste.  Traditional cookbook recipes just use plain white sugar, which is good for plain white bread.  But why, when you can take your bread from “boring” to “rich”?  Honey within itself is the original antibiotic—it is extremely healthy for your immune system, it is easily digestible.  Yes, it is one of the more expensive items on the ingredients list—but if you did a blind taste test between two loaves of bread, you would know which one had the honey.  I have baked with a variety of sweeteners over the years, to include agave nectar, stevia, and molasses.  I find that the honey has the least finicky response in the recipe and is the most versatile.


flax seeds

Flax Seed—this is a completely optional  in my list of recipe ingredients, but one I choose for the Omega 3 fatty acids.  I know that it is difficult (depending upon your geography) to fill your diet with excellent seafood.  If you do not grind the flax seed, you are basically only getting the fiber and the rest of the nutrition passes through undigested.  It is an excellent source of both soluble and insoluble fiber. If you grind it in a coffee grinder (you can typically pick one up cheaply for about $10.00 at a box store or pharmacy store) that you have reserved only for your herbs and seeds, you will get many precious phytochemicals in your bread.  Flax, like other seed grains, has a lot of antioxidants, including lignans. 

We like to use bread for sandwiches, but I commonly hear the complaint that homemade bread can crumble too much for this use.  Here’s a great trick:  grind your flax seed and add a tablespoon of water to it and let it sit in a bowl for a minute before adding it to your dough.  It will work as a binder–just like egg–and will help hold your bread together even while giving you the great nutritional benefit of flax.

 soy lecithin


Lecithin—This one ingredient single-handedly transformed my early breads to something edible.  I did not know WHY back then.  Since then I have learned that it is considered a health supplement for its ability to break down fats, to improve memory, and for its promotion of healthy gall bladder functioning.  It lowers cholesterol and has been linked to improving women’s reproductive health.  In cooking, it is used as an emulsifier to prevent sticking (such as what you find in a cooking spray and chocolate). It provides a tenderness and (perhaps the most important thing of all), it extends the shelf life of the bread!  I get several more days at room temperature out of my bread with lecithin, than the bread I have made omitting this ingredient.  “Lecithin” is a generic term that can mean any emulsifier and it can be made from many sources.  Although I typically avoid soy due to the GMO factor these days, I have used soy lecithin in my bread in the past.  You can live without this ingredient, but its shelf life extension, texture improvement, and health benefits make this one you need to weigh personally. 

Now that I’ve mentioned all the benefits and how I never baked without it in the early years, I must fess up and tell you I do not use it now.  I can “read” my bread dough better with years of experience and don’t need the lecithin to help hold it together for me any more.  I do have some on my shelf but I rarely reach for it now.

salt


Salt—I have forgotten it more than once.  Your bread is flavorless without it, entirely.  I have also overdosed on it, and that makes the bread inedible at best.   Salt also tempers the effect of the yeast; you usually realize you have forgotten the salt when your bread will not stop rising!  Stick with sea salt if you can; it greatly enhances the flavor and nutrition of your bread.  It makes it something richer.

 Palouse Flour


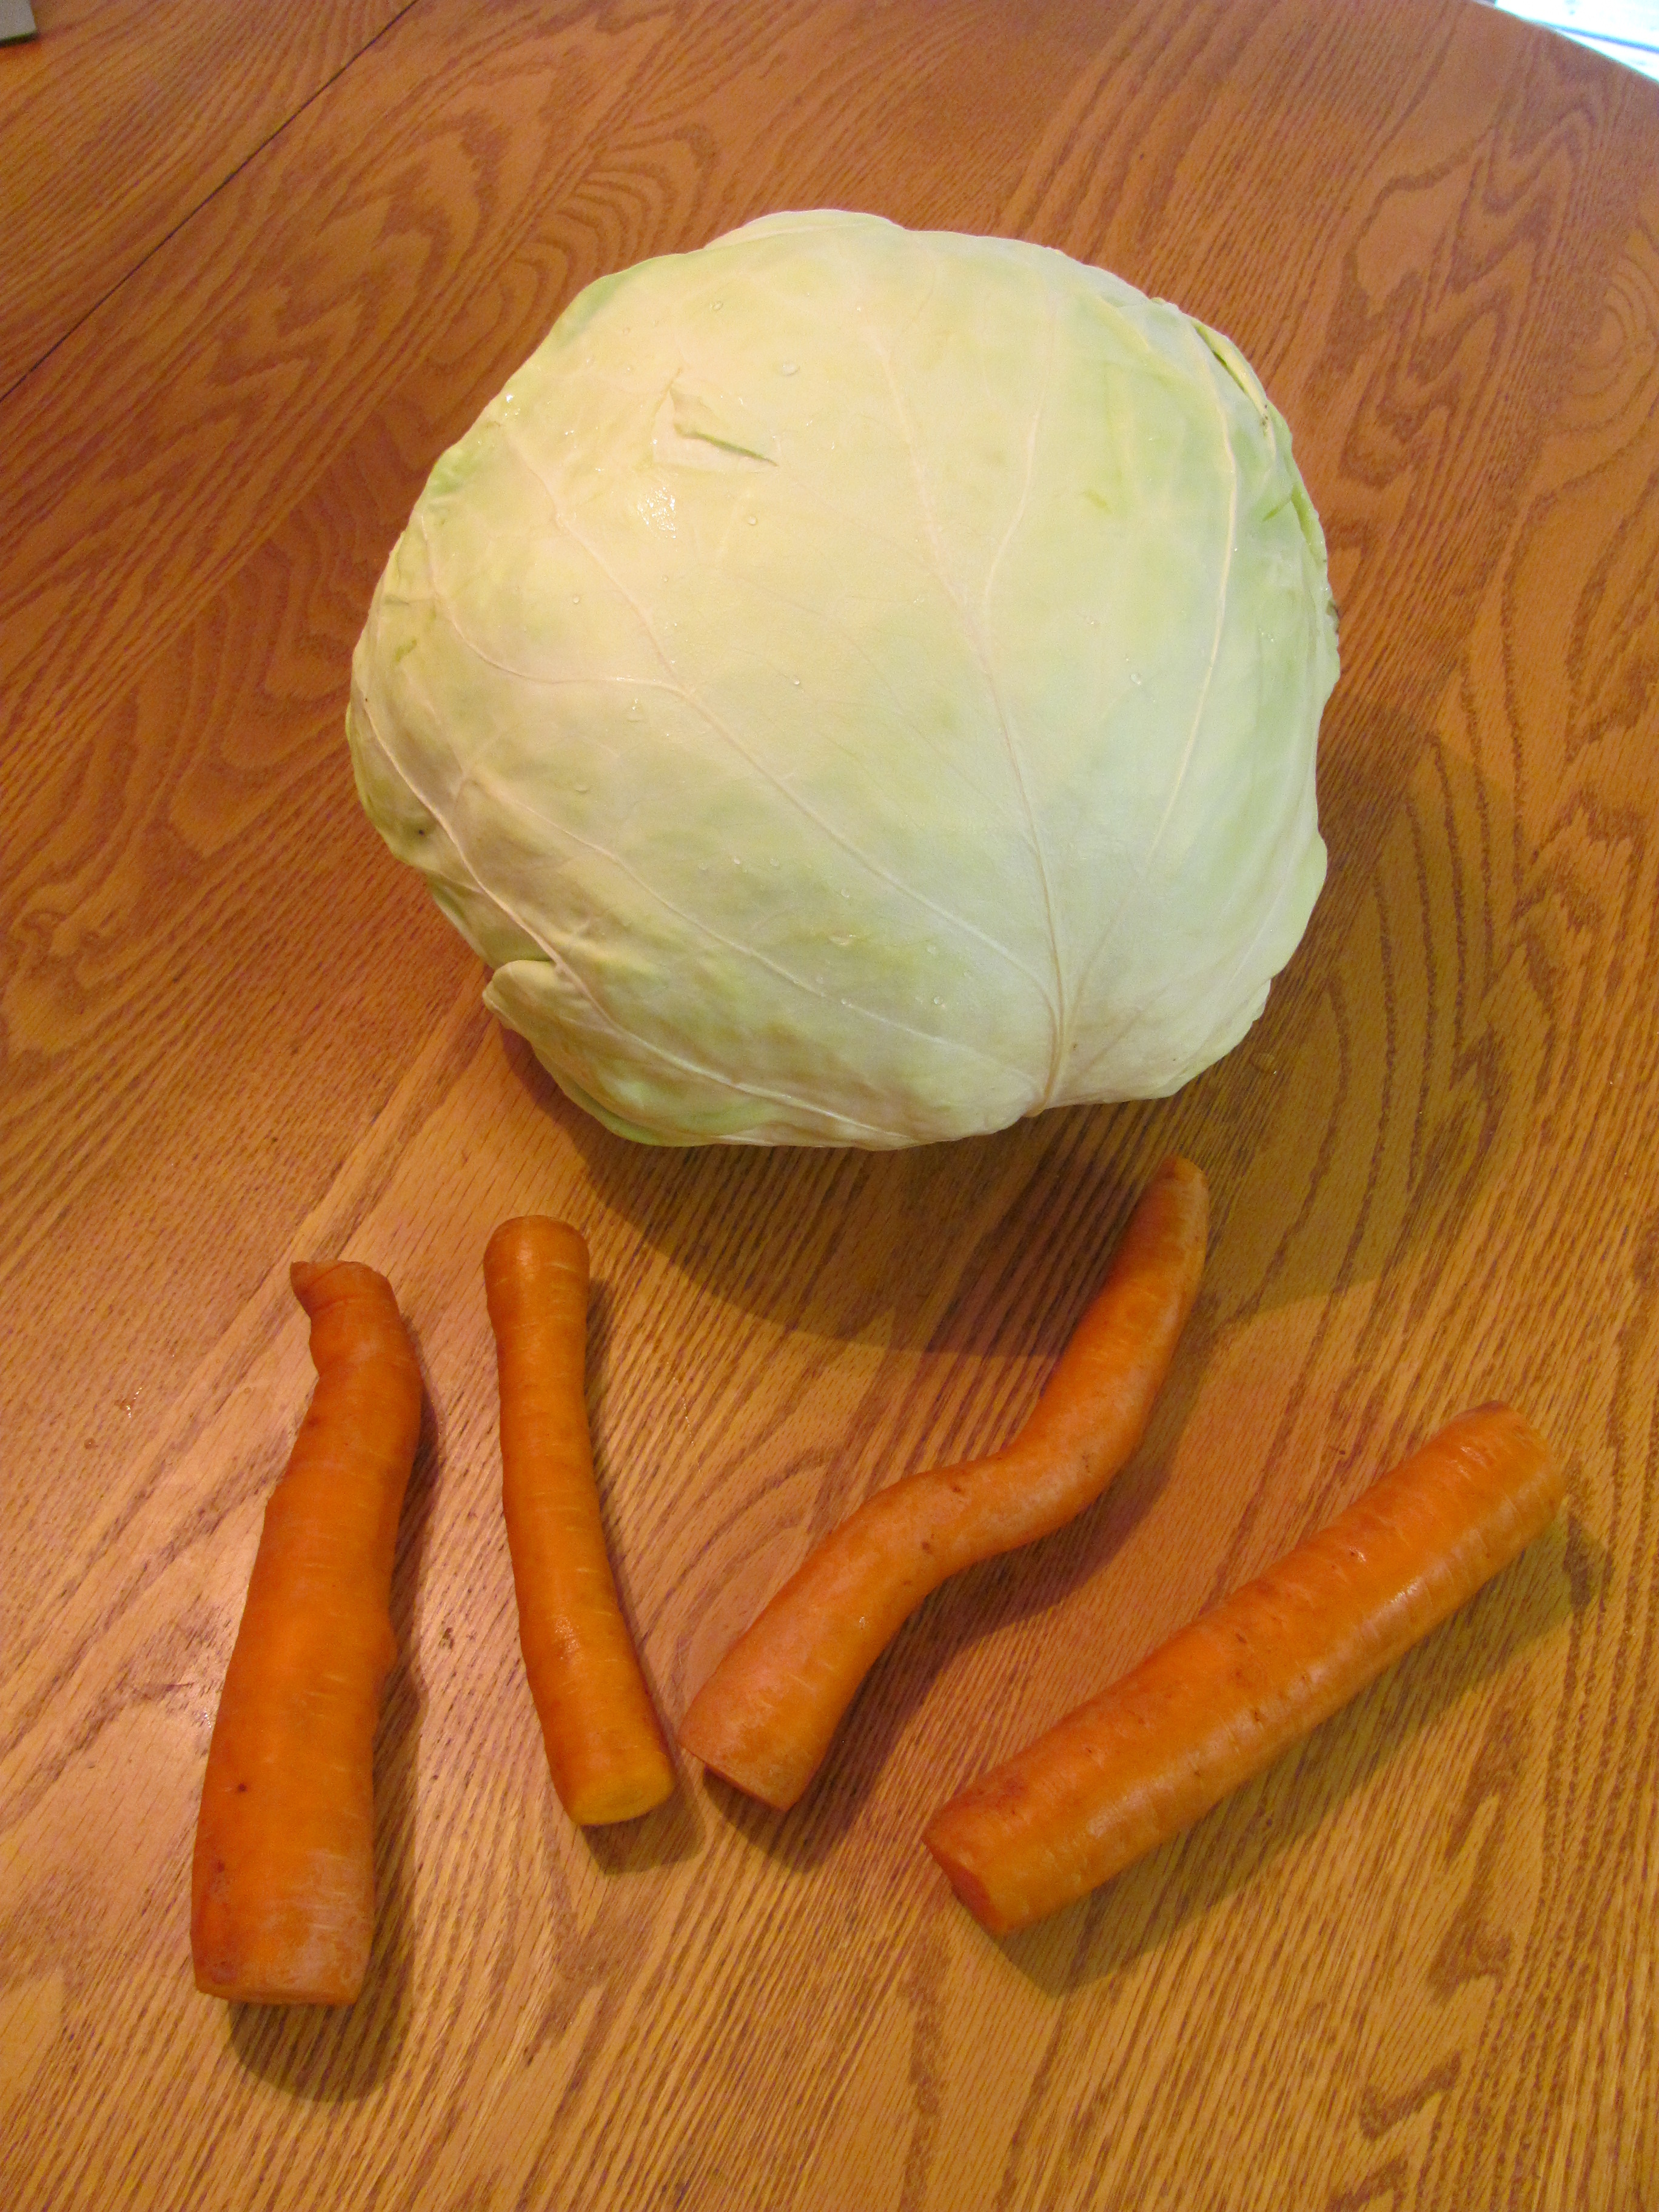
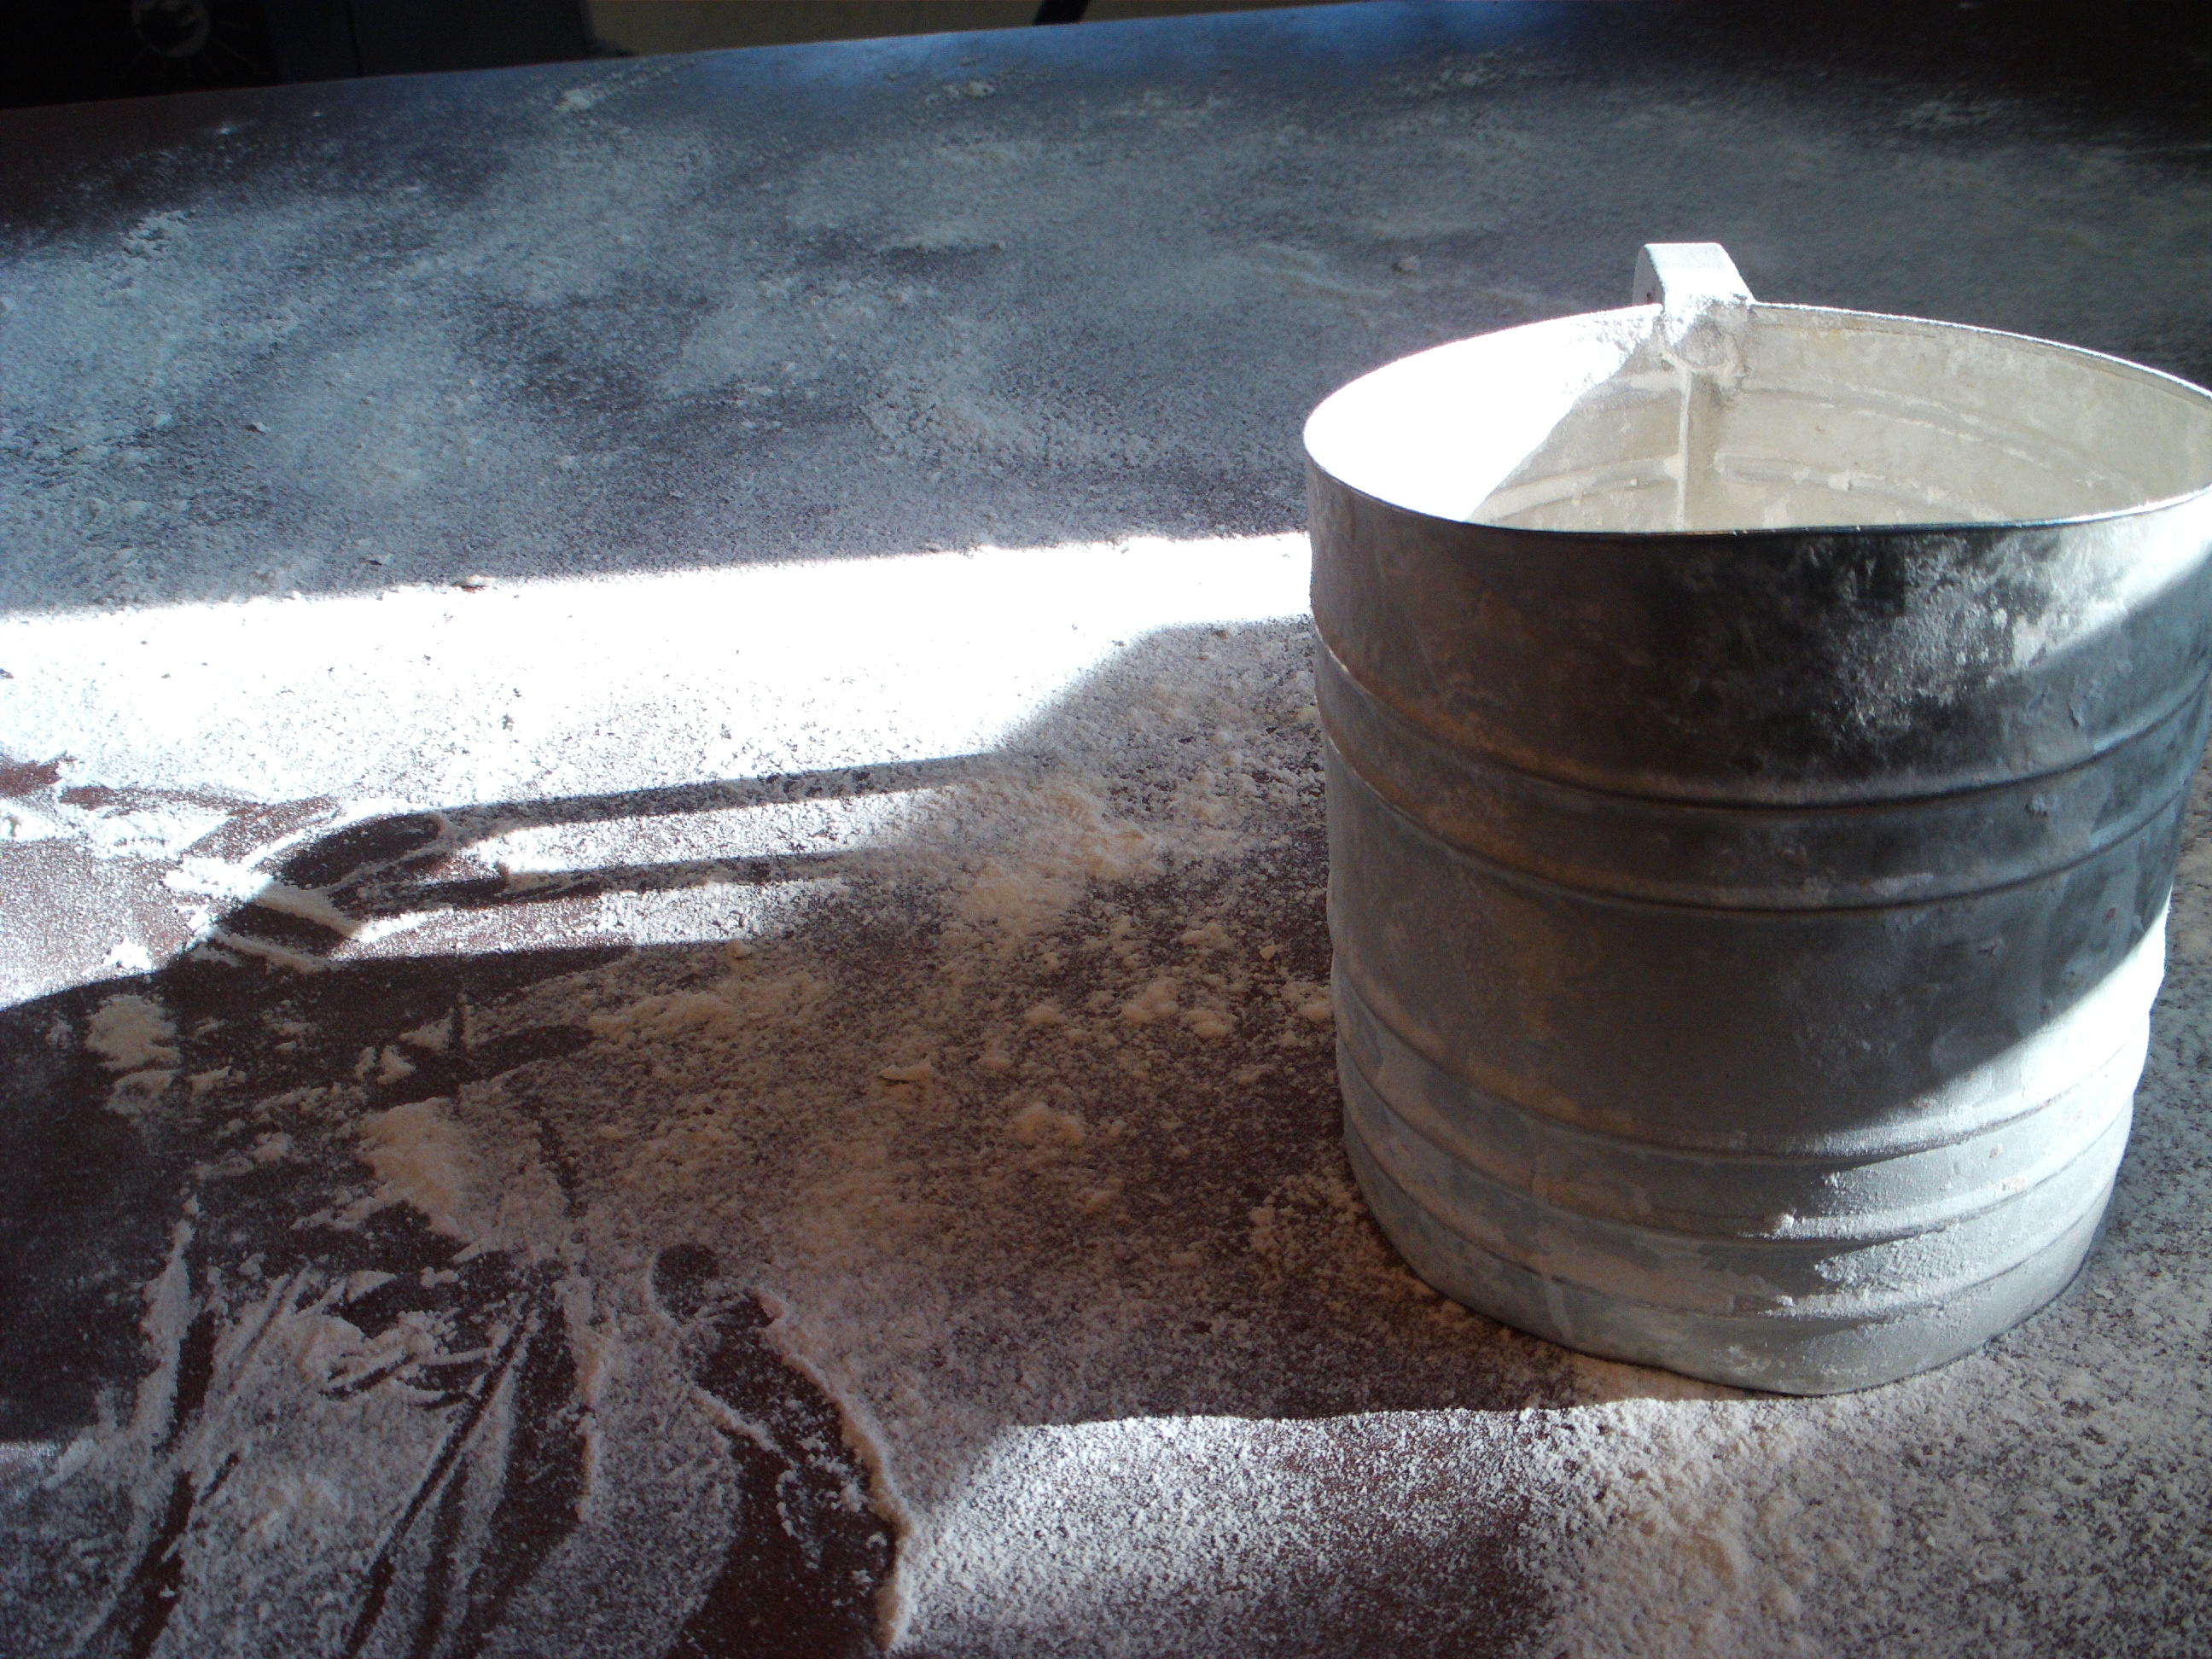
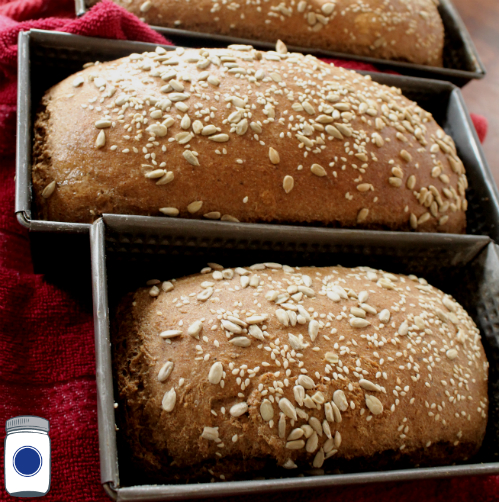
Flour—The single most important of all the ingredients, which is why I only use home-milled flours because of the marked health benefits.  Store bought flours, even the gourmet ones, have had to strip some of the nutrients out in order to give it shelf life.  Flours in the frozen section maintain most of the nutrition but freezer life will take its toll on that as well.  Milling your own flour is easy, affordable, and the most nutrient dense way to bake bread.  You can substitute bean and other flours (chickpea, for example) for some of the wheat, but do not go over 25% (you will likely need to add gluten) of the entire flour content or it will not rise properly. 

 Not all wheat is the same.  “Hard” wheat has higher gluten and is best for yeast breads.  “Soft” has lower gluten and better for lighter baking products like cake that use other rising methods, such as egg yolk, baking powder, and baking soda which also appear in quick breads.

 Hard Red—this has the dark, wheaty flavor.  I started with Hard White and began adding this in slowly.  This can be an acquired taste, now I love it!  Hard Red wheat responds very well to yeast recipe breads. 

Hard White—Less wheaty flavor.  Very tasty, excellent to use in yeast products.

Soft White—This is the best for quick breads, cookies, baking items with lighter structures.  I sometimes mix some in with bread flours for yeast bread, but never more than 10-25% of the total flour. 

Durum—This is your pasta wheat!  Very tasty and you will see a difference, but in a pinch, use soft white instead. 

Spelt—This is delicious and versatile wheat substitute.  You can use it in both breads and quick breads.  Some people who have sensitivity to wheat breads do well with this flour.


eggs


Eggs—This is the binder in your bread.  I have tried to live without them and I have tasted several loaves from other bakers without it and I come to the same conclusion every time—use eggs (even better, get your own chickens)!  The bread crumbles more easily without it—so if you want sandwich bread you cannot skip this step.  You might want to play with how many you use.  Eggs also provide another source of healthy fat for your bread, which helps lighten the overall texture. 

 There are likely thousands or even tens or thousands of bread recipes across the world, but each one will differ based on the ingredients.  The food science is the same though, so choosing recipe ingredients that are fresh, quality and wholesome will yield a superior product.  If you come across a recipe that you want to modify, you can as long as you which bread ingredients do what and why.  If you come across any ingredients that I did not mention here, please leave a comment below and let me know what you like to see in your bread recipe.


Chaya


Photo Credits:

Pitcher of water  http:/www.freedigitalphotos.net/images/view_photog.php?photogid=1857%22%3EImage:%20zirconicusso%20/%20FreeDigitalPhotos.net%3C/a%3E%3C/p%3E

 Oil  http:/www.freedigitalphotos.net/images/view_photog.php?photogid=681%22%3EImage:%20m_bartosch%20/%20FreeDigitalPhotos.net%3C/a%3E%3C/p%3E

Honey  http:/www.freedigitalphotos.net/images/view_photog.php?photogid=851%22%3EImage:%20Danilo%20Rizzuti%20/%20FreeDigitalPhotos.net%3C/a%3E%3C/p%3E

Salt  http:/www.freedigitalphotos.net/images/view_photog.php?photogid=345%22%3EImage:%20Carlos%20Porto%20/%20FreeDigitalPhotos.net%3C/a%3E%3C/p%3E

 Eggs  http:/www.freedigitalphotos.net/images/view_photog.php?photogid=1758%22%3EImage:%20Rawich%20/%20FreeDigitalPhotos.net%3C/a%3E%3C/p%3E


Proviso:


Nothing in this blog constitutes medical advice.  You should consult your own physician before making any dietary changes.  Statements in this blog may or may not be congruent with current USDA or FDA guidance.