Home Grocery Delivery: The Future (& History) of Grocery Shopping

The Future (and History) of Grocery Shopping

By Naomi Shaw, guest contributor

For some, the idea of grocery delivery seems either too “modern” or excessive. They argue that the supermarket is just down the road. Why bother with delivery? Well…

 Once upon a time, families depended on food deliveries everyday. Milkmen delivered glass bottles of fresh milk and eggs, and it was essential that families keep food fresh via to-your-door ice services. So the concept of food delivery isn’t new; perhaps society is returning to a personalized relationship with produce.

 When the Game Changed

 The refrigerator revolutionized the way average Americans stored and consumed groceries. Until the middle of the century, refrigerators were relatively small and mostly preserved the necessities. However, as technology progressed and an increasing number of Americans gained disposable income, the average fridge size more than doubled, growing from 9 cubic ft. to 22 cubic feet! Suddenly, perishable items weren’t so perishable!

The Move to Megastores

 With the prevalence of big refrigerators and the move to multiple-vehicle-owning families, giant grocery stores became the norm. In 2013, the United States grocery market brought in $850 billion. However, the online grocery industry represented a mere 1% of that figure. So why is it a good idea to buy your groceries online instead?

  • You’re less likely to impulsive buy unnecessary or unhealthy items. A recent study estimates that shoppers spend an roughly 20% of their grocery bill on 60% of grocery store runs. Shopping for food online means you’re more meticulous and likely to stock up on staples you really need.
  •  It’s convenient. Time is money. There’s no doubt that online grocery shopping ensures you’ll save trips to the supermarket. This way, you’ll have more time to cook, read, and do the things that make you happy.
  •  You’ll also save cash on transportation. Use less gas and save milage on your car.
  •  It’s more sustainable! You might be surprised to find that shopping for food online helps to save the environment. A single delivery truck making multiple stops burns less gas than lots of individual car trips. Plus, most delivery services use paper, not plastic, so you’ll keep non-biodegradable products out of oceans and landfills.

Some Tips for Online Grocery Shopping

  •  Research where companies get their produce. Inquire about GMO fruits and vegetables versus organic. Find out which areas your delivery service sources it’s products from. This is a great way to determine sustainability.
  •   Determine the turn-around time between order and delivery.
  •  Inquire about the company’s ethical policies. For instance, Pantry Paratus only sells Frontier bulk spices and baking ingredients because they are healthy, economical, and ethically harvested.
  •  Compare prices with competitors to get the best deal. Save money and time!
  •  Investigate to determine whether or not you can place a recurring, monthly order. This way you can be sure you’ll get the essentials each time without having to reformulate a list with each purchase.

 So there you have it… a brief overview of grocery delivery and tips for making the switch! Now that you’ve gotten some food for thought (sorry not sorry), would you give up in-store shopping for online delivery? Leave your comments below!

Home Delivery Infograph

1 Comment

Amber, Head Pixie

posted on Monday, October 27, 2014 12:32:45 PM America/Denver

Nice post! My CSA is a weekly delivery service, and you can add on local meats, eggs, milk, and more. It’s only in the Asheville/Greenville-Spartanburg area now, but I hope to see more like it popping up everywhere!

Group Snacks: When the Cool Mom Crowd Causes Compromise

Group Snacks

Group Snacks: When the Cool Mom Crowd Causes Compromise

(& Why I Won’t Next Time)

Group Snacks


Have you ever provided, exclusively, the group snack for the team, for the club, or school party?  I mean, have you been the only one bringing food to a gaggle of children? 

In most cases, we attend gatherings where everyone brings something, and so we feel free to take food that we will personally eat as a family—in fact, we feel required to do so since it’s likely that my corn-allergic kid will only be able to eat what I personally bring.  I figure, with other options available they can take it or leave it, and I really don’t care.  They can wrinkle their nose and I can feel all the pious-pity for them that I want, declaring that they do not understand real food and are the truly unfortunate ones.  Then, when the parents like it and ask for the recipe, I can simultaneously indulge in that  praise even while feeling sorry for those who don’t understand real food.

Okay, I’m not as bad as all that.  At least, I never let on that I’m not as bad as all that. 


It was our week to bring the team snack to the soccer game.  I spent 2 weeks  making a complete issue out of a non-issue.  Yes, I’m that mom.   All of the snacks thus far have been pre-packaged, nothing homemade.  Is this the social protocol? Is there room for homemade snacks on the soccer field?  I felt pressure to get this right and still hold to my values.

You see, food for me is a moral issue.    I placed pressure upon myself to find something:  1)prepackaged in portion size, 2) appetizing/appealing to 2nd graders, 3) non-gmo and healthy, and 4) affordable enough to feed the entire team.

To quote the Princess’ Bride, “I don’t believe they exist.” 

I was shocked when my husband found prepackaged baby carrots in the same container that those fake-cheese & crackers come, but in the cheese section was ranch dressing.  Okay, I can do this, I thought.  Sure, the ranch dressing had all kinds of stuff we don’t eat.  I really felt like I was compromising for the sake of imagined peer pressure, but I was willing to do it to keep my kid from feeling  like he had “that mom.”

He’s going to have a lot of that in years to come. 

The game was close, we lost by one, hands were slapped in typical good-game fashion, and they made a run straight for me.  Snack Mom.  One by one, “no thank you.”  They were polite, but only the moms took the snacks, not a single kid of his own volition accepted.

Perhaps this falls into the category of “First World Problems”…okay, it totally does.  There is, however, a deeper, more sensitive issue at play: when every lifestyle choice you make is deliberate and you are forever getting strange looks and probing questions from others, sometimes you lack the strength to do it again.   I can answer for my own weirdness all day long, but I do not want my kids to be forced into answering for it.

Those who have been reading this blog over the last three years know I have a bad habit of shrinking myself (previous occupational hazard), and this is the question I ultimately have to ask…which moral stance has the greater value: eating ethical food that is healthy and nutritious, or keeping my kid from a potential sideways glance from another child?

My children are healthy and strong inside and out.  Next time, I won’t compromise:

*I won’t because if these kids are going to see these ethics as valuable, they must see them as consistent , first.

*I won’t compromise because part of being a caring adult means that I would not feed someone else’s child food that I know is unhealthy—regardless of their parents’ own decisions on the matter.

*I won’t compromise because if my kid does get that snicker or sideways glance, it’s a monitored learning tool that we can utilize to guide family discussions towards things like leadership, handling peer pressure, resilience, and standing up for what is right.


And so, next time, I think I’ll follow the lead from other moms who have had this First World Problem, and conquer it with homemade gelatin.  Here are some suggestions:

*Best post ever on homemade granola treats:

30 Recipes for Granola

Here is a place I can go to when I’m feeling weak (and a place to send other moms who need the encouragement to keep consistency): https://www.facebook.com/spoonfedblog.net
These homemade fruit snacks look irresistable!

Homemade Fruit Snacks


AnnMarie Rossi is an expert at this sort of thing, and so I’ll point you to her work on the Untrained Housewife, like her healthy cookie dough bars, for instance.

Healthy Cookie Dough Bars


Yup, that’s all I got…but what is your go-to snack for group snack duty? 


Comments:

Rebecca | LettersFromSunnybrook.com

posted on Tuesday, September 30, 2014 4:06:25 PM America/Denver

Oh, that’s a tough situation! I have corn allergy as well and cannot eat any prepackaged or processed foods. While I try to get my family to eat more from-scratch, healthy food, I feel I am competing with all the “fun, more interesting” foods they are bombarded with in advertising. My son’s 14th birthday is coming up and I suggested that I could make homemade pizzas or tacos for him and his friends. He said, “Mom, I really like your pizza best, but I’m not sure my friends will know how to appreciate it the same way, so I think we should get it from Pizza Hut.” I was glad he was honest and able to express himself. So, for his party I will cough up what I see as a lot of money on someone else’s pizza so he can fit in with his new friends. Other times I will serve my homemade food. It is a tough call though.You know exactly what I’m talking about! First of all, serious props for raising such a mature kid, that he can express himself clearly yet gently. And he’s probably right–his friends won’t know how to fully appreciate it.As an aside, and in the light of compromise (which this entire blog is saying I won’t do)…we did discover that this a corn-free option at Papa Murphy’s (the take-and-bake)…you will have to check their online menu, but you can get the alternate crust and sauce to make it completely corn-free. We discovered this while we were on vacation at someone’s home who was ordering pizza. So yeah, there are just times we have to make the best of the situation. Thanks for the comment!

Marcia Little

posted on Wednesday, October 1, 2014 2:01:16 PM America/Denver

I make homemade granola cereal, granola bars, and fruit and grain bars. My whole family chows down on them, and I know what went in them.Marcia, great example–we love the idea.  We were half tempted to do just that, but fear of Urban Myths drives “the standard” which seems to be individually packaged portion sized serving.  Kinda the same standard for Halloween candy, if it looks homemade there is a 0.0002% chance of a razor blade being in the apple, so throw it away.  But, I do love the idea.-Wilson

Libby Kuhlmann

posted on Wednesday, October 1, 2014 9:57:42 PM America/Denver

When my youngest daughter was in Brownie and Girl Scouts – years ago, I’m a granny now 🙂 – I found the one thing that was absolutely irresistible to the girls and it was something that they all looked forward to when it was my turn for snacks – once a month on a rotating basis. I would make a turkey sized platter of cut up veggies with a couple of bowls of homemade ranch dressing. It was always a big hit and there was never one bite, or even a sliver of vegetable, left on the platter and most of the time the bowls would be “wiped” clean of dressing and no matter how much I piled on the tray I was usually asked if I had more to share. When she was older and playing softball, I did the same thing with the vegetable tray and it still was a treat for the girls and I never returned home with anything but an empty tray and bowls. It seems I was the only mother who brought this for a snack and it turned out to be something the girls really liked and always looked forward to Crystal’s mom bringing the “good stuff.” Just an idea someone might like for a daughter in sports or Scouts. I doubt this would go over with a bunch of ruff and tumble boys (it wasn’t too popular with most of the boys when my sons played ball, but I had to try, but my sons loved it) but it most likely would be a hit with the girls.

Sheila

posted on Thursday, October 2, 2014 5:47:44 AM America/Denver

First I’d like to say, my daughter made fun of me a little for insisting on buying normal, healthy, organic food. Yes, they are more expensive but well worth it. She told me yesterday that since she has been going to farmers market, buying organic foods, eating less processed foods and drinking whole, unprocessed milk, she feels a lot better. Score one for Mom. As far as Halloween, I wanted to make wholesome treats too, but the way it is now it’s no longer accepted. I had out the fruit tummies made from fruit with no additives.

Sheila

posted on Thursday, October 2, 2014 5:48:52 AM America/Denver

First I’d like to say, my daughter made fun of me a little for insisting on buying normal, healthy, organic food. Yes, they are more expensive but well worth it. She told me yesterday that since she has been going to farmers market, buying organic foods, eating less processed foods and drinking whole, unprocessed milk, she feels a lot better. Score one for Mom. As far as Halloween, I wanted to make wholesome treats too, but the way it is now it’s no longer accepted. I had out the fruit tummies made from fruit with no additives.

Heidi @ PintSizeFarm

posted on Friday, October 3, 2014 10:46:33 AM America/Denver

This is really hard. We have had a few people bring healthy options and a couple homemade – but they usually bring a pre-packaged thing too.

Shout Out to the Farmer’s Market

The Farmers’ Market

Making the most of the harvest for the winter’s pantry


Shout Out to the Farmers Market

It was late August, and the temperature went from summer in the 90’s to autumn– raining– in the high 40’s.  I do believe that our eggplant got a case of frostbite; at least the leaves seem to indicate so.  We had not yet fully gone “all in” on our summer food preservation so the untimely weather had me at the Farmer’s market, since our gardening was lackluster this year. 

 The downside is that it was very cold and wet, and only a few booths were open.  Trying to find the upside, I took some photos of all of the colors that struck me on the cold, rainy day.  If beautiful, brightly colored veggies cannot make you happy on a dreary day, then you may be too far gone for this blog. 

Vegetables at the Farmers Market

As it turns out, Pantry Paratus, Inc. started out in a farmer’s market years ago.  It was prior to our website launching, but we were passionate to get our products into the hands of people who wanted to preserve their food, too.  All through the cold wet spring in Northwest Montana, Chaya set up the booth, passing out free samples of Tattler lids.  All throughout the desert-dry summer, Chaya offered breadbaking troubleshooting to anyone who asked while Bugaloo (still in her two’s) fought against taking a nap in the sloping backseat of the truck.  In the dead heat of summer when there was no respite from the sun, we built our brand.  So shopping a farmer’s market now brings about a bit of nostalgia, perhaps even moreso on a day like that. 

Root Veggies

 We had been strategizing all summer long with whom we would make the big end-of-summer bulk food push.  Chaya has a very tender spot for businesses that support people with disabilities, so the booth selling tomatoes will likely be selling us at least four cases of tomatoes to dehydrate and to make into sauce for the winter (we like pasta)–it is work program for people with disabilities.  I  found a farmer who pasture-raises his pigs, so we reserved a whole hog with him.  We have enjoyed produce from some very industrious youth, and some cases of apples (of which some are in the dehydrator as I type this) from the couple who drives them all the way in from a no-spray farm in Washington State. 

Carrots in the Rain

But this day I was just there for the basics; I needed to pick up some produce for a dehydrating demo class that Chaya is holding at the Zone 4 Live! event in Pray, MT next week.  $18 was the arbitrary amount that I had in mind to get, and also happened to be the amount of money in my pocket.  So I shopped around and here is what I took home. 

Summer Produce

This picture does not do justice to the scale; that is over 1/2 of our dining room table.  Not bad all told, and all of it went to use.  This is actually the secret multiplier to making summer last—do not waste anything!  Any bruised spots, stems, cores, or dried ends go into the jar in order to later go out to the compost pile.  Some other tougher bits and peels go into a bag in the freezer for Chaya’s totally free homemade broth.  Sharon Peterson from Simply Canning has a blog on how to make stock, too.  

Compost JarCompost Keeper available at Pantry Paratus

Nothing goes to waste.  Why?  Because we are taking the best exports of from a farm into our home as our inputs, and what a shame it is to not use all of it.  And, in the next two blogs I can show you how to make use of those left over bits that may not seem all that tastey . . . come back and see us for Preserving Summer’s End Part 1 and 2. 

Zucchini at the Market


Pro Deo et Patria,

Wilson


 Proviso:

Nothing in this blog constitutes medical or legal advice.  You should consult your own physician before making any dietary changes.  Statements in this blog may or may not be congruent with current USDA or FDA guidance.


Food Foraging: Get Started with These 7 Tips

Food Foraging: 

Get Started with These 7 Tips


The treasure hunt for fresh, local food sources can literally be as “local” as your own yard.  Dandelion jelly, puffball mushrooms, clover for your tea, and so the list continues.  Delicious foods that pack a nutritious punch may be common “weeds” or might be found in a neighbor’s field or a local park.  A treasure hunt indeed–there is a thrill to finding and identifying early springtime wild asparagus or an onion blossom (ooh, yummy “fritters”).  Your mind races with all of the plans you have for the delicacy that only reveals itself for a brief season.  This is food that requires living in the moment, and can serve as your trophy from a day out in the bright sunshine. 


Tip 1

There are some things you must know before you get started.  First and foremost, you must know the land, know the owner and something about it.  Has it been sprayed with any chemicals?  One of my favorite foraged herbs (Mullein) is deliberately sprayed by our county because it is considered a noxious weed–this means that I can only forage it from my land or from that of a friend who verifies it safe. 


Butterfly on Oxeye


Tip 2

Secondly, only pick a few things you want to forage.  Get a great guide like this one and learn only a few items well.  Once you decide what you want to try to forage, look up the food in alternate books and guides; sometimes the difference in artwork can help you clarify what it is that you are searching.  Plan on no more than three foods to start this season, and every year you will add to your repertoire.  This keeps foraging safe for you; you are not guessing or getting confused.  You can also use good books to learn the fakes and look-alikes.  Some edible plants have poisonous counterfeits.  Know them both by heart.


Backyard Foraging


Tip 3

Thirdly, get talking!  Someone in your area loves to forage, no matter how unlikely it seems for your neighborhood.  I have found many kindred spirits at my Farmer’s Market and through the local food co-op, so these are great (and natural) places to strike up the conversation.   They’ll give you suggestions as to where to look, the effect recent weather has had on the crop, and anything else you should know.  One piece of advice given to me when first moving to Montana was by two older women that I would guess to be in their late seventies: “Always wear bells on your clothes; it helps scare the bears away.”  Your newfound foraging friends may offer to take you along to show you a trick or two!  If they do not offer, do not hesitate to ask; this might help you make positive plant identification and will ease any concerns you have about it.  If you live in a community with a cultural center for an immigrant population, this might be a starting place.  I once took Russian language lessons from a Russian cultural center that taught everything from ballroom dancing to chess, to—mushroom hunting!


Huckleberry Picking with a Friend


Tip 4

My fourth tip might be controversial to some, but follow me out.   If you are starting, skip the mushrooms altogether.  There are about 10,000 known species of mushrooms out there–dizzying, isn’t it?  Out of those, only approximately 1,000 species are edible (edible, not necessarily delicious).  Mushroom hunting is a wonderful skill and a very rewarding one, but not for the beginner.  There is a Russian saying: “There are Brave mushroom hunters and Old mushroom hunters, but not Brave, Old mushroom hunters.”  Try something easier first, then spend this next winter attending your local mushroom hunting club to gear up for Spring when you have the expertise and companionship of Old mushroom hunters.  


Morel Mushrooms in hand

photo credit: Chiot’s Run via photopin cc


Did tip #4 make you mad?  For those who understand that a world of opportunity lay at your feet with mushroom hunting,  understand that the fear of poisoning is what keeps most people from ever attempting food foraging!  By eliminating mushrooms altogether for the newbie, we have opened up a world of delicacies from the forest floor and eliminated the initial fears that would inhibit them from these delicious discoveries. We need to be careful with all foraged foods, but mushrooming is the one area I say should be reserved for hands-on instruction with a veteran.


Tip 5

Make a day of it!  Plan on hiking.  Invite a friend.  Take good maps, a change of clothes in the car, lunch and snacks, tell others where to find you.  Carry a bucket or bag for the food you collect.  Let me recommend the Roo apron; it will keep your clothes clean, your cell phone handy for emergencies, and eliminates the need for a bucket when you traipse through the woods.


Make a day of it

 photo credit: yvestown via photopin cc


Tip 6

Wait until you get home to taste test.  This is another safety tip.  It might be exactly what you think it is, but if you personally have an allergic reaction, the side of a hill is not where to discover it.  Just wait until you get home, cross examine the food item with your other books and resources, and then nibble.  Wait a half hour.  By then, you will know that you positively identified a nourishing food on your hike. 


Fiddleheads & Lemon Slices

photo credit: libraryman via photopin cc


Tip 7

Finally, experiment in the kitchen.  Your books will recommend the best way to eat a food item, and you can learn some great recipes through resources like this book.  Play, eat, and enjoy!


Preserving Wild Foods


Staying Safe, Sun-kissed, and Satisfied,

Chaya


Proviso:  Nothing in this blog constitutes medical or legal advice.  You should consult your own physician before making any dietary changes.  Statements in this blog may or may not be congruent with current USDA or FDA guidance.


Using Cacao Part 3: Homemade Cocoa Powder

cacao nibs

How To Make Homemade Cocoa Powder

Using Cacao Part 3

 How to make homemade cocoa powder


I suffer from high expectations, and since I use chocolate to self-medicate the consequences of that, I decided that I should begin applying my high expectations to the chocolate itself.  First, is it ethically produced chocolate?  Is it fresh?  And then, if I’m getting those two things how on earth can I have it affordable?  The answer lay within the nearest bag of organic, fair trade cacao nibs.  By purchasing bulk through Pantry Paratus, I am getting a great price.  By grinding my own nibs into powder, I am getting the freshest product possible.


Taste Test

 I wanted to know if I would really prefer it to the others on the market.

I did a cocoa powder taste test. 


Hersheys, Ghirardelli, and Organic Fair Trade Cacao Nibs


It was hardly a scientific approach.  The Hershey’s Powder and the Ghirardelli were in my pantry already. Both were within the expiration dates by a wide margin but I highly doubt I purchased them simultaneously so they are likely differing ages; they were stored properly and in the same conditions. 

RESULTS:

Hershey's Cocoa Powder

    Tired.  Bland.  Slightly clumpy but a nice powder texture.

That was the Hershey’s.   No real complaints but definitely my least favorite.  It requires more to get the same chocolatey flavor.


Ghirardelli's Cocoa Powder

  Good flavor, nice powder. But expensive.


Yup, that would be the Ghirardelli’s. Having done a taste-test between it and Hershey’s, I would say that Ghirardelli’s is the better powder by far due to texture and a more potent chocolate flavor. I deliberately did not alter these photos to improve lighting; look at the difference in color between Hershey’s & Ghirardelli’s.


Grinding Cacao Nibs

    Best value (hands down), freshest flavor, and known origin.

  Extra steps and cleaning.


Without a doubt, I really do prefer the home-ground cacao nibs flavor-for-flavor.  Other powders remove much of the cacao fat so that it is shelf-stable, but it is where the deep, bitter flavor resides.  You are retaining that with cacao nibs, so fewer are needed to get a rich flavor.  With Ghirardelli selling for over $18 a lb, I think I’ll take the DIY method with the cacao nibs.  I use my coffee grinder so it isn’t really more work, but it is an extra step and the grinder does make one more thing in the dirty-dish pile.  Knowing the human trafficking involved in the chocolate industry, though, it feels extremely selfish to voice the “ugh, a dirty dish to feed my gluttonous indulgence for chocolate” complaint outloud.  <yup, erased and re-wrote the last paragraph twice—don’t want to sound like a horrible person OR like a self-righteous one.  It’s the chocolate talking. >


Cacao Nibs


How To Grind Cacao Nibs

The high level of fat in the nibs means that you should never use an electric grain mill.  Use either a solid and trustworthy food processor, a hand-crank grain mill with the stainless steel burrs, or a coffee grinder.  You will make your appliance earn its spot on the counter with this job, though, so be sure it is a tough one.  You will have to grind it several times.  It may never come out with the fine powder to which you are accustomed (shelf-stable powder also have a lot of the cacao fat removed), but the right appliance and multiple grindings can do it.  As you grind, you may need to pause and remove the gummy cacao fat (“liquor”) on the bottom of the grinder several times.  Store your powder in an air-tight container in the freezer for maximum shelf-life.  Remember that there is a high percentage of fat in that powder and it will go rancid.  Ideally, only grind what you plan to use within the week.


I’m done buying the store-bought stuff when fresh, full-flavored cocoa powder can be made so quickly, ethically, and affordably.  If you would like to pick up a 1 pound bag of cacao nibs for a great price, get them here with Pantry Paratus.


Humbly signing off to go wash dishes,

Chaya


Did you miss the other articles in the Using Cacao Series?

Part 1: Is Cocoa Powder and Cacao Powder the Same Thing?

  Part 2: Chocolate By Any Other Name (Chocolate Defined)


All Photos are property of Pantry Paratus.  Feel free to share or pin them in conjunction with this blog, but  please keep proper attribution.  Thanks in advance.

Vegetable Powders: Making Them, Using Them, & Long-Term Food Storage

Vegetable Powder

 Vegetable Powders

Making Them, Using Them, and Long-Term Food Storage


Vegetable Powder


The Moms were eating lunch while the kids—claiming they were full—exited to play tag.  The subject  discussed was by no means gloriously thrilling.  Spinach.  We were talking about spinach.

“I got it on sale, overbought it, and not even the husband will touch it.  I am doomed to salads three meals a day for a week.” 

Nods of sympathy. 

I asked if she had a dehydrator; no, but it is on the wishlist she said.  I nearly prefer spinach in its dehydrated form because it makes for great pasta (or my meatballs with bechamel sauce) and is a wonderful nutritional boost to anything while the family is completely oblivious.  Sure, some might say it’s a passive-aggressive way to achieve optimal health; I prefer the term clever.   I do not think most nutrition should be sneaked; kids should understand what constitutes a healthy diet and be encouraged to eat fresh, raw fruits and vegetables.  However, complex flavors unaware to them will ultimately expand their palate so that the next time you introduce that icky green, it won’t seem so foreign—or icky.  I have personally experienced this.

 And it started with vegetable powder.

My kids were not keen on spinach, but I found that powdered spinach could work as a thickener and, if in small amounts, boost the nutrition without changing the flavor (color but not flavor).  Over time, I got lazy and then used it as flakes; I think they know it’s in there.  Like I pretend not to notice stuff the kiddos do on my weary days, I think they pretend not to notice the increased spinach flakes.  Maybe I’m wearing them down.


Dehydrated Spinach


And just like my children increase the actions to which I turn a blind eye, their silence has only emboldened me.  Why stop at spinach?  Tomatoes, carrots, the possibilities are endless!  I personally powder celery, onion, garlic, tomato, carrot, and spinach.  A few weeks ago I got 5 pounds of asparagus from the local co-op.  I checked in my “Preserve It Naturally” book (which comes with an Excalibur from Pantry Paratus), and guess what????   I can powder asparagus for use in soups!  I really had no plan when I ordered 5 pounds of asparagus.  It just sounded good.  Other great soup and sauce additions are green beans, broccoli, cucumber, peas, and peppers.


Dehydrating Asparagus


 I was a primary caregiver for a child that was underweight and came from a difficult circumstance.  She just would not eat.  In desperation I turned to a  cookbook that, although had  some poor nutritional suggestions in it like vegetable oil, was written on the notion of making vegetable purees that could go virtually undetected in nearly anything.  I made spinach brownies and chickpea chocolate chip cookies, stuff like that.  The difficulty was that the pureed vegetables had to be either refrigerated for immediate use or frozen.  This, for me, was not practical.  In fact, we wrote a whole article about the hidden costs of the deep freeze (which do not even include things like losing food to freezer burn or power outages). 

Enter the Excalibur Dehydrator.  Seriously in love.  But if you really wanna hear me gush, go check out this article.  

Beyond the nutritional boost from powders, here are a few other reasons I love them:

Pantry Paratus To use as a thickener to soups, stews, and casseroles

Pantry Paratus To add a depth of flavor in unsuspecting ways (carrot powder is great in meatloaf, for instance, and a little is great in your oatmeal cookies)

Pantry Paratus Vegetable powder is seriously boots long-term food storage because its density means less quality-compromise from air exposure, and is far less bulky.

Pantry Paratus Wonderful for thickening (and nutri-boosting) your smoothies

Pantry Paratus I can jump on great vegetable deals without panic that I have more than I can use

 To make Vegetable Powders: Check the food-by-food list in the Preserve It Naturally book available at Pantry Paratus, to determine the best method for that specific food.  If the food requires blanching, see the basic method here.  Here’s a basic breakdown, so you know what you are getting into:

Spinach and other leaves (herbs, raspberry leaves, kale, etc) get a rinse and then go straight into the dehydrator.  To powder leafy greens you can pulse them in a food processor,  break them up with your hands, or use a mortar and pestle.

Garlic and onion get sliced or chopped, and then you simply arrange them onto trays.  Once dehydrated, pulse in a food processor or use a mortar and pestle for small, immediate-use quantities.

Overwhelmed by Carrots

Other vegetables such as carrots and asparagus should be cooked (boiled or steamed). Once cooked, you can puree them and spread onto a paraflexx sheet.  This is by far the simplest method, although you can blanch, slice, and dehydrate.  However, I find that dehydrated sliced vegetables are more difficult to pulse into a fine powder. 

Dehydrating Vegetables as Leather


Once these vegetable leathers have dehydrated to a dry crispness, you can use them in cooking as sheets or flakes, or powder them using a food processor or mortar and pestle.

Putting Dehydrated Vegetables in Food Processor

Tomatoes and zucchini can be done to your preference; cooked or raw, peeled or unpeeled, sliced then in food processor, or as vegetable leather.  My preference for these is to puree, make leather, and then keep some as sheets and powder the rest.

Some Basic Guidelines:

1)      Dehydrate the food item according to specifications given in Preserve It Naturally until it passes the “clink test.”  Many foods should snap when you break them, and you can check them by dropping onto a table.  If they make a clinking sound, you have sufficiently removed the moisture. 

2)      Some foods will powder easily with mortar and pestle, but a food processor will be required for most foods and for larger quantities. 

3)      Store the powdered vegetable in vacuum sealed bags for long term food storage, and mylar bags will help eliminate the light and other variables.

4)      For immediate use, place the powder in a pint-sized jar with an oxygen absorber and keep it away from heat, steam, and light.


Put this on your calendar for this week.  Then come back here and share your ideas with us!

Produce, Prepare, and Preserve,

Chaya

Proviso: Nothing in this blog constitutes medical or legal advice. You should consult your own physician before making any dietary changes. Statements in this blog may or may not be congruent with current USDA or FDA guidance.

5 Baby Steps to Cooking Healthy Food

The weirdest gift I ever received was one of the most influential in my life. 

A vacuum sealer. 

 Wilson and I did not have kids yet, but he was still in the military and deployed.  Thus, I lived alone.  And my sister bought me a vacuum sealer. 

 “What am I supposed to do with it?” I asked.

 “You are supposed to start cooking,” she said.

 “It doesn’t cook things, it seals them.”  I retorted.

 “Duh, Toad.  <don’t ask–it’s what she calls me>… You are supposed to start cooking real food.  Healthy food.  Enough for more than one person.  You eat some, you freeze some.  Over time, you can kiss the frozen section of the grocery store goodbye—but not literally.  The produce guy gets mad when he has to clean your lipstick off the glass. Ask me how I know.”

 Slowly, over time, I started really eating.  And slowly, over time, I started to get better.  I had been sick, very sick.  That was a big part of my Frozen Section Excuse actually, too sick to do much of anything.  Too sick to care.

Frozen Section

 Step 1

I started by cooking one real meal a week.  Not spaghetti night, not a hotdog, a real and delicious balanced meal.  I worked full time and so I made this my Saturday evening routine.  Although I grew up in a home with delicious, homecooked meals, I also grew up  left to my own junk food devices too, so I had a lot to learn.  I did cook for hubby, but living alone?

Cooking for one is a lonely thing; many-a-meal I ate standing over the kitchen sink, refusing to sit at a table by myself.  Lest you think that a nourished lifestyle comes easy to this girl, let me tell you about rock-bottom.  I distinctly remember eating cold peas out of the can.  Over the Sink.  For Dinner.

 If you currently live on things that come in packages or cans or are from the frozen section; if you just open it and heat, then try this: Set aside one night a week to cook a real, balanced, healthy meal.  Use a cloth napkin, a real plate, and even sit down to eat it. 

 Grandmother's Spoon

You will feel more human.

  Do not cut the recipe in half to serve one; double it!  Use vacuum sealing bags to make your own “t.v. dinners” for other days.  Label the package with its contents and date, and you can drop the whole thing into a saucepan of boiling water, or (if this is where you are in life) even microwave it.  If you do live alone, you should put 3 of each meal away into the freezer.  Give this a month (a variety of 4 real meals) and you now have some choices when you open that freezer.    You now have food to take for lunch at work, too, so that you can cut back on eating out.

 Step 2

Soups & Stews.  This will kickstart Step 1.  The reason I suggest starting with soups and stews is because they really are forgiving.  If you are not a great cook and tend to spill the cayenne, don’t worry—just add more broth and make a bigger pot of soup.  If it is bland or the flavor is off, experiment until you like it.  Do not worry about fancy. There is something wholly comforting about the unassuming nature of soup.  This is also the best way to experiment with foods that might be new to your system.  When I realized I needed to cut white flours out of my diet I started experimenting with grains that were completely new to me—quinoa, barley, teff, and spelt.  A handful of anything will fill a soup nicely, and your tummy.  If you are really just that bad at cooking, I mean, so bad your dog paws at his nose when offered, consider investing in some great spice mixes (like Chili Seasoning, Mexican Seasoning, or Italian Seasoning).

Soup Night: Your Food Storage pops with flavor in this recipe

 (Don’t even like soup? You haven’t tried any of these recipes, then….seriously):

   To freeze your extra soup: put a serving size into a bowl and place it into the freezer, uncovered.  In a few hours, pull it out of the freezer.  Turn the bowl upside down under the faucet.  With your hand on it to catch your soup-cube, run warm water over the bowl.  It will pop out and is ready for the vacuum sealer!  Then, to warm it up, you can either warm it in a saucepan or the bag itself.  You are now combining the convenience of the frozen section of the grocery store with proper nutrition and homecooked meals!

 Step 3

Find something you enjoy in the kitchen.  Or find a happy distraction.  Let me say this another way.  I hated cooking meals because it felt like a lonely task with too much cleanup.  But I thoroughly enjoyed listening to Prairie Home Companion every Saturday night; I would get lost in the tales of Lake Woebegone, and you know what—this woman was getting stronger just by getting into the kitchen and making real food.  Cleanup was enjoyable when I was laughing at the stories and singing along to the goofy songs.  So although meal prep and cleanup are still—to this day—not my fave, I have found a way to redeem that time with something educational, distracting, or just plain fun.  


Kitchen Radio

 This was also the period in life when I discovered that I love baking!  Getting into the kitchen to bake, for me, is completely different than a meal.  During those lonely single days, I started baking breads and treats using real food ingredients.  This helped my health tremendously because I cut out all white flours from the store.  I saw my blood sugar stabilize and my energy come back. 

 Seeing results serves as its own motivator, too.  No matter how much I hate washing dishes, I love being healthy.

Step 4

Always carry something to eat.  The pressure to “grab a bite” was strong in my life.  The blood sugar problem was a legitimate excuse often, too. And yes, I was that crazy lady that oscillated between hitting the side of the vending machine and whispering sweet nothings to it in great desperation.   But once I started baking, I had things like oatmeal bars and homemade cookies that I could seal in snack portions.  I would drop a snack into my bag before leaving the house, always glad that I did. 


Homemade Fruit LeatherAn easy, take-along snack!

 Step 5

Replenish ingredients with healthy alternatives.  Some people quit white sugar cold turkey.  I did not.  But I did begin to replace the empty bags with ingredients I could feel better about.  For instance, the sucanat replaced the brown sugar.  The wheat and grain mill replaced store bought flours.  The cacao nibs replaced the palm oil & preservative-laden stuff I had been eating. 

 One at a time.

  It took time for me.  Then I noticed a peculiar thing.  Even though I saw many of these items as costing more than their junk food counterparts, I found they lasted a bit longer.  It was because a real brownie made with real ingredients really satisfies.  I no longer crept into the kitchen at 11pm to finish them off!  I also found that buying in bulk meant I was saving a considerable amount of money than the typical last-minute run to the grocery store.

 Bulk Organic Sucanat

A Head Start

You read this blog.  You have a plan.  Give yourself some grace.  Do not compare yourself to some food blogger (who probably still dips into the occasional jar of Nutella in front of her computer screen when no one will find out <cough>).  Just take a step.  A single step.  And then tomorrow, take another.  You will look back on this moment as the start of something good, the start of a healthier and more nourished you. 


One step at a time,

Chaya


Photo Credits:


Frozen Section: Fire At Will [Photography] via photopin cc

Grandmother’s Spoon: Tassike.ee – Marju Randmer via photopin cc

kitchen radio: Justin Snow via photopin cc


Proviso:

Nothing in this blog constitutes medical or legal advice.  You should consult your own physician before making any dietary changes.  Statements in this blog may or may not be congruent with current USDA or FDA guidance.

Looking at the Label: Palm Oil

Looking At The Label: Palm Oil

 The Intersection of Health and Sustainability

Palm Fruit

 You are casually strolling through the grocery store aisle and you flip a package to the list.  There it is, palm oil.  In your quest for healthy foods and traditional eating, can you partake with a clear conscience?   Chances are, you used something with palm oil in it today (it has approximately 30 names, you know). 

 This blog is at the intersection of nutrition and sustainability.

 Palm Oil and Health

I first refer to Sally Fallon Morell’s definitive work, “Nourishing Traditions” when I have a question as to the health of a particular food item.  She mentions palm oil (p.20) as a tropical oil that is high in lauric acid.  That is a good thing because it is a fatty acid, found in large quantities in mother’s milk and coconut oil, that has antifungal and antimicrobial properties.  In fact, Sally Fallon Morell suggests that traditional populations in tropical areas have been nourished and healthy because of things like these tropical oils.  She does also specify that red palm oil is strong and not as popular in America as it is in Africa; but that the odorless and tasteless clarified version can be used as shortening.

 Palm oil is a natural ingredient.  Your body can digest it.  Your skin can absorb it.  It is “all natural” and even “organic” sometimes.  According to an Australian website (so not sure if this holds true in the U.S.), it is in 50% of all storebought products including baked goods, confectionary foods, hygiene products, and cleaning supplies.  

 Palm Oil On The Label

How I feel label-reading

It appears that the usage of palm oil in the industrial food setting gave way to the hydrogentated crap  bad stuff we most often see on the label.  It does seem to me (anecdotally, mind you) that palm oil is making a comeback.  Maybe it is not just anecdote; the Rainforest Action Network claims that the importation of palm oil to the United States has increased 485% in the last decade (“The Case Against Palm Oil: A Factsheet”).

 Does the label say “vegetable oil”?  According to FoodNavigator.com , ½ of all of the world’s vegetable oil consists of palm oil.  Since it goes by 30+ names,  it is nearly as difficult to eliminate from your diet and skincare routine as corn. 

 The Auckland Zoo has a great “Buy Palm Oil Free Shopping Guide”, but it is Australian based and it took forever to download through my internet access.  Still, it is worth a read.  This is what I learned:

 Palm Oil can be listed on the ingredient label as:

Palm oil kernel
Anything containing the words “Palmitate” or “Palmate”
Elaeis guineensis (Scientific name for palm oil)
Hydrated Palm Glycerides
Hexadecanoic or Palmitic Acid


 Label ingredients likely to be palm oil:

Vegetable oil
Anything containing the words “stearate, stearyl”
Anything containing the words “cetyl, cetearyl”
Sodium Lauryl Sulphate (SLS)
Sodium Laureth Sulphate
Sodium Dodecyl Sulphate (SDS or NaDS)
Sodium Stearoyl Lactylate
Calcium Stearoyl Lactylate
Steareth -2 and Steareth -20
Emulsifier 422, 430-436, 465-467, 470-478, 481-483, 493-495, 570


Do those names look familiar to you?

 Is Palm Oil Ethical?

Only 4%  of the world’s palm oil is produced in a sustainable manner.  Some of that is even questionable.  The Auckland, New Zealand zoo says that there is no such thing as “sustainable” palm oil. 


Orangutans are devestated by Palm Oil

If it is not sustainable, then that means the ability to grow it is diminishing.  What are the practical realities? Loss of viable palm trees, loss of natural habitat, loss of animal life.  The leading cause of deforestation in Malaysia is the creation of palm oil plantations.  Over 50 orangutans die every week, and there are as few as 500 Sumatran tigers and 3000 Sumatran elephants left in the wild (“Palm Oil Action”).   There are also land grabs, human rights abuses , and even private militias.

 Palm Oil destroying Rainforest


“Yeah, but that is somewhere else.”  What is the landscape of your home, what animal songs greet you in the morning when you step outside, and how would your local economy, agriculture, and life be radically altered if it were all bull-dozed?  The temptation is to ignore this.  I think we know better.


In my research of palm oil, I found that propaganda was thick on every side.  I really want to give you a clear picture of this, but I am not sure that I can.  I know that this is a hot button in Australia and New Zealand; there is a silence in the U.S. media. 


Watch this:


 Healthy, yes.  Traditional, sure.  But sustainable?

 My Conclusion:

I know how allusive this particular item will be to remove from my home and so I doubt I will succeed completely.  Just the same, I am responsible for my knowledge and for my stewardship of the earth.  That means I am obligated to try. 


Let’s flourish (& help less fortunate parts of the world do the same),

Chaya


Sources:

The sources hyperlinked in the text are not listed below.


“Palm Oil Action .” PalmOilAction.org. Palm Oil Action Group, n. d. Web. 2 Aug. 2013. <http://www.palmoilaction.org.au/>.


“The Case Against Palm Oil: A Fact Sheet.” RAN.org. N.p.. Web. 2 Aug 2013. <http://ran.org/sites/default/files/po_factsheet.pdf>.


Photos:

Palm Fruit: Swamibu via photopin cc

How I feel after label reading:  TheeErin via photopin cc

Orangutans: Russell Watkins via photopin cc

Rainforest Destruction: Rainforest Action Network via photopin cc


Proviso:

Nothing in this blog constitutes medical advice. You should consult your own physician before making any dietary changes. Statements in this blog may or may not be congruent with current USDA or FDA guidance.


www.Hypersmash.com

/pspan style=

Signs of Spoilage in Food Storage

Signs of Spoilage in your pantry

This is a busy time of year indeed for food preservers!  We often get into such a frenzy canning and dehydrating that we miss a very basic first step—taking inventory of what is left in the pantry from last year!

 Before you put the first jar away you need to pull everything else out.  Rotating your food storage is the key to successful long-term food storage because it minimizes waste—both wasted food and wasted money! It is also much healthier; all food storage will lose nutritional value over time, different foods and preserving methods lose at different rates.  Eating down the oldest food storage first means that nothing is lost in the back of the cupboard, aging beyond use. 


Pantry Shelf (before organizing)

Signs of Spoilage?  When you have everything out, look for these things:


1)      Appearance: some foods just do not look as appetizing as you hope, that is just the truth of it.  Using citric acid or lemon juice will minimize oxidation; it is oxidation that causes browning in many foods.  That oxidization does not affect food quality, just appearance.  If oxidization is all you see by all means, eat it anyway (even if you have to hide the food as an ingredient so your family will not notice).  If something else looks “off” though, especially something like mold or other growth, discard.  Sometimes you will see a lot of aerobic activity going on there, bubbles and fermentation activity.  These cultures are not the ones you have cultivated by fermenting with whey, do not trust this unexpected stuff!  Along with this symptom of food spoilage, you will also often see a bulging top—even if the seal is not broken.  This means that the food is letting off gases in there from bacterium ingesting the sugars.  Do not trust it!


Dilly Beans with Seepage


2)      Water or liquid levels:  Canned goods should be covered in liquids.  Sometimes the liquid seeps out during the canning process and your green beans are not submerged.  Although these are fine, these foods will begin to discolor. Definitely eat these foods shortly after canning, because it is my experience that these foods are the most likely candidates to succumb to food spoilage.   Fermented foods should always be covered completely with liquid too—so if you see your sauerkraut or kimchi above the water level something is not quite right.  It is normal for these foods to spill out of the jar (leaving a mess on your shelf if you are not careful), do not worry about that.  But if these foods are not submerged,  they should be opened and checked; if they are still healthy, refrigerate and eat immediately.  If they are questionable, pitch!

 Spoilage in Your Food Storage


3)      A firm seal: The first recommendation is that you remove the metal rings off of your canned goods, only leaving the actual canning lid.  The ring is not necessary apart from the actual canning process and it can mask the danger of jars having lost their seal.  Jars can lose their seal for a lot of reasons, but I do find that my Tattler Lids are consistently solid sealers.  My theory is that it is because they are heavier than the cheap metal lids and stay in place better during the canning process (especially during the high-bubbling action of a pressure canner).  In either case, check each jars lid by trying to wiggle the lid, or even picking up the jar by the lid itself.  If any jar does not have a sealed lid, discard immediately and sterilize your jars and reusable canning lids.


Tattler Lids on Beets

4)      Vacuum sealed Bags should still be firmly vacuumed.  If air has seeped in at all, there was a hole or puncture in that bag and you cannot trust that food.  It may look okay, smell okay, but you have no way of knowing.  Do not risk it please.  Start with high quality bags that have a high nylon content.  This will minimize any risk of puncture.  If you are vacuum sealing a dried fruit or vegetable that becomes pointy once the moisture has been removed (pineapple, potatoes, etc), try this trick: put the food into a paper lunch sack first, then vacuum seal that.  The paper bag will do double duty—keeping out the light and preventing sharp food edges from puncturing the bag.

 Get High Nylon Bags at Pantry Paratus


5)      Check the labels: Sometimes my labels have fallen off.  Sometimes I used the wrong marker or pen on that particular type of label and they are fuzzy, difficult to read, or even faded.  If you can still make out what it says, re-label it.  Not only is it convenient to know what you are opening (looks can be deceiving), but having a readable date is a safety concern.  If you aren’t labeling your food, you are missing the first sign of spoilage–the date!

 Check Labels on Jars


6)      Check the pantry shelf itself:  Canned goods can be a lot of weight.  Are the brackets holding the shelf secure?  You would not want to lose all of that hard work when the shelf finally dies (I had that happen, luckily, it was a low shelf and I did not lose much).  Are there any sticky spots, syrup rings, or other gunk on that shelf?  That is a good sign that something is amiss with one of your jars.  It is also a great attraction for the local ant population and it is a great time to just wipe everything clean and start over. 

 Of course, once you open the jars, there are other things to note such as smells and flavors.  But for the Annual Pantry Inventory Day, you are done!  Now, go enjoy those yummy foods that you forgot you had.

annual_pantry_checklisthumbnail.jpg   
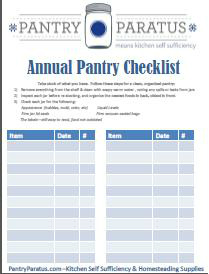
Get a Free Annual Pantry Checklist:

Get a free checklist, among a few other goodies, when you sign up for our mailing list!

Get your Annual Pantry Checklist (among other things):


Where You Would Like Help:

Breaking in a New Cast Iron Pan

 I have to say that I love cast iron and use it for just about everything. 

It seems to play well with my thrifty nature in that if properly cared for it can be given to my great-grandchildren.  Other than being durable, it is in its own way, beautiful.  I love how it hangs on the rack in our kitchen.

cast iron skillet

“Anything that holds food and transfers heat can be considered cookware. . . . ideally [cookware] would heat up quickly, distribute the heat evenly, retain the heat well, and respond quickly to changes in temperature.  Unfortunately, no such material exists” (Joachim & Schloss, p. 160).

 American made cast iron is such a rich tradition that traces back to the very roots of Yankee ingenuity.  Take for example our favorite hand crank appliances made by Chop Rite Two in Pennsylvania.  These truly are built like family heirlooms that can be used for generations, not to mention that all spare parts are available for sale separately.  As a personal policy, whenever I see cast iron at a thrift store, it generally is coming home with us.  Take this recent score, a cast iron pot with lid which will certainly be used over the campfire this summer. 

 cast iron pan

 Whether it comes to pan frying, deep fat frying, campfire cooking, baking, braising or broiling—a good cast iron pan just cannot be beat.  So this week we decided to add one more to the fleet, and bought a new Lodge brand pan (also made in America). 

While I have always been satisfied with the way that cast iron performs when it is heated up, getting it to that temperature can take longer and there is a good reason for that.  “cast iron is only a fair heat conductor (about four times slower than aluminum), but it retains heat well and has a high melting point, making it excellent for high-heat cooking” (Joachim & Schloss, p. 162).


new cast iron skillet

 First off, the question of how to clean cast iron comes up quite a bit.  For an initial cleaning (right home from the store) I will use dish soap and water.  The Lodge cast iron products come already seasoned, but I still want to clean off any yucky stuff picked up in transit or while on display. 

For daily use I typically just wipe out the pan and hang it up until it is used again, avoiding using soap at all—and never put it in the dishwasher.  This can be done largely because we cook with saturated fats or olive oil (although typically not for high heat cooking).  For stuck on food bits, you can try coarse salt or citric acid, or a cup or so of beer simmering in the bottom of the pan does wonders but the definitive treatment on cast iron can be found here in a great article by Paul Wheaton.  Also, here is a great video post from Jocelyn Campbell on how to restart a cast iron pan:

Now let us talk about how to season a cast iron item.  I typically like to do it by cooking with saturated fats, like bacon for example.  As it turned out, the kids were also grooving on BLT’s for lunch, so it was a win-win all the way around. 


bacon in a cast iron skillet

 The synergy between real lard (not the fake stuff) and cast iron is legendary. 

 lard in a cast iron skillet

 Over time, the cast iron skillet will build up a “seasoning” that coats and protects the pan in a way that no non-stick coating ever could as well as help to transfer heat more evenly throughout the pan.  A good seasoning layer does take time to develop. 

One faster method involves coating the cast iron pan with oil, and baking it upside down in an oven at 350°F for two hours (over a baking sheet because it will drip), recoating the cast iron every 30 minutes with fresh oil. 

Now, I normally agree with everything that Joachim and Schloss say in their great book, The Science of Good Food—except perhaps on this point where they say to use highly unsaturated oils like canola, corn or vegetable (soy) to coat the cast iron.  With that last part I would explicitly disagree as those oils are dangerous in the body over time, and saturated fats like those in animal products are far superior. 


saturated fat at room temperature

Cast iron is pretty forgiving and so after I cook something like bacon or lard and I am trying to season the pan for its first couple of runs, I will just cover the cast iron skillet and set it aside.  Remember, saturated fats are highly stable so unless you cooked something really wonky in there, it will be fine.  You can even cover the cast iron pan and put it in the fridge if that suits.  The key is to keep the oil in contact with the pan for awhile.  The repeated heat cycles is what helps to impregnate the cast iron with the oil; “when the oil heats with the metal, it polymerizes, or forms a dense plastic-like layer that keeps out oxygen and prevents rusting” (Joachim & Schloss, p. 160).


iron

If you have a question about cast iron your want to leave a comment about how it worked for you we would love to hear it. 

 Wilson

Pro Deo et Patria


All photos by Pantry Paratus


Works Cited:

Joachim, D., & Schloss, A. (2008). The science of good food. (p. 160). Toronto: Robert Rose.

Erin’s Natural Deodorant Recipe

(produces about a 1/2 pint of deodorant)

 Ingredients:
  • 1/3 cup organic/non-GMO corn starch (or other suitable powdery starch such as arrowroot)
  • Essential oils “to taste;” I like lavender, lemon, rosemary,peppermint, or cinnamon
  • Coconut oil “to consistency”
  • 1/8 cup baking soda

Method:

In a small bowl, mix together the baking soda and starch until combined.  Add the essential oil(s) by drops, mixing with a fork,  until it is to the approximate strength you like. Remember, it will be more diluted once you have added the coconut oil. You can always add more essential oils at the end – it will just be a little harder to mix thoroughly.

Add several tablespoons of coconut oil, and mash and fold into a paste, making sure to mix everything together thoroughly. If it’s too sticky or pasty, add more coconut oil. Optionally, you can melt the coconut oil and add it to your dry ingredients in melted form. This makes it easier to mix; however, the particles of baking soda may drift to the bottom before it solidifies, leaving an uneven product which will require a bit more mixing after setting up.

You can adjust every amount in this recipe – more baking soda, less, none; more starch, no oils. Heck, you can even just use the coconut oil alone, although I can say from experience it is not as effective.

I tend to use less baking soda and more starch, as my skin is very delicate, and too much baking soda abrades.

I like to put mine into a pretty jar with a wide mouth to make it easier to get out.

It honestly is Just That Easy. It’s also cheaper, healthier and (in my opinion) smells better than commercial deodorants.

 Homemade Deodorant Application:


Some folks like to stuff their new deodorant into used, empty stick deodorant containers. That works great until the bathroom gets hotter than 76 degrees and it melts and gets messy. Also, I don’t want any residual toxins left in the container. A jar works great for how I use it.

I simply scoop out a small amount, say 1/4 to 1/2 teaspoon per pit, and rub it into my skin. Depending upon how hard I’m working, I may have fairly stinky pits by the end of the day (we’re all friends here now, right?) To mitigate this, I also apply a thin layer of starch on top of the coconut oil deodorant, which not only helps to absorb moisture, but also helps to control odor.

Garden Fresh Chicken Salad Recipe

Garden Fresh Chicken Salad

A Twist on an old favorite

Hello from Montana.  Our weather has been beautiful lately, with the warmth of the sun and gentle breezes.  This is the time of year when you are thankful for your garden, for the effort and foresight you put into it in the form of grunting and sweating.  But now? Now, you taste victory over that drought, those weeds, and that deer that got into the garden a few weeks ago.


Sugar Snap Peas straight from the garden


Chef Nancy taught me the importance of re-working leftovers into something even better as the days move forward, and I did that with this twist on everybody’s basic recipe for chicken salad.  The inspiration came in the form of picking the day’s harvest.  Highlight the best of your harvest, and do not feel the need to stick to this recipe exactly.


Chicken Salad


The white beets stole the show.  They are much milder than their bolder cousins—and less messy.  Having boiled them for dinner the night before with a taste of honey, they provided a slight crunch to the salad that almost fooled you into thinking there were water chestnuts in there.


Chicken Salad Mixture before sauce


The honey was the perfect compliment.  If you are using white beets that were not sweetened with liquid gold, let me suggest adding a tablespoon to the final recipe.


Sugar Snap Peas with Chicken Salad


Garden Fresh Chicken Salad Recipe

  • 2-3 cups shredded chicken
  • ¾ cup raisins
  • ½ cup raw sugar snap peas, peeled (or try whole, chopped)
  • 1-1 ½ cups sliced white beets (boiled and sweetened slightly with honey)
  • ½ cup-1 cup mayonnaise (based upon ingredient quantities)
  • Salt & pepper to taste
  • Sprinkle of dill—optional

Mix dry ingredients, carefully blending the in the white beets, then add mayonnaise and seasonings.  There are plenty of other chicken salad recipes, but our highlights your hard work in the garden.  Enjoy this chicken salad sandwich recipe on fresh bread, pita, or crackers, lunch in 5 minutes!


–Chaya


All pictures are property of Pantry Paratus.