Preserving Eggs

Pickled Eggs and Beyond
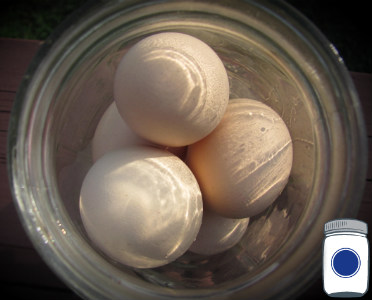
How to Preserve Eggs

Feast or famine: that is the nature of a laying flock.  The bright sunshine and summer smorgasbord of creepy-crawlies will produce eggs a’plenty.  The cold huddle-down winter months, on the other hand, will leave you wishing for more.  Of course, people do put lights on their chickens in the winter to stimulate egg production; we do not do that.  Whether it is for fear of burning the place down or a desire to maintain the healthy rhythm of nature, we have decided to make do with what we get and to extend the summer harvest inasmuch as we can.  People have been preserving eggs since…well…since eggs.

I have attempted freezing the summer surplus of eggs.  I must have seen it on a pinterest board.  Most of my dismal failures come from that.  The  easy-peasy  method (in theory) was to just put the entire raw egg into an ice cube tray.  Have any of you had success with that?  It drastically altered the texture; it is almost as if they are hard boiled.  It’s kinda weird, really more like reconstituted powdered eggs after you factor in the desication from the freezer.  My hope was that I could preserve enough raw eggs to get through the winter’s bread baking.  It was a backup plan anyway, since we have ducks that lay in the winter and produce fine eggs just right for baking.  They just don’t lay quite enough for all of our eggy delights. 


My method of choice is to pickle eggs! 
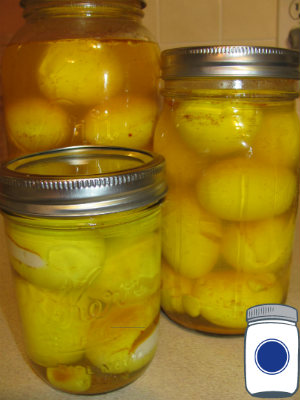
 Pickled Eggs with Turmeric

Oh my, you have to bite into one or you would never believe me.  They are really a delicious food that makes later food preparation all-the-easier. We have been pickling eggs for a few years now, and I cannot tell you that I have an old family recipe or anything; I have chosen to do it differently every time.  I hope that you give it a try with your summer harvest.  But before you do, there are some things you really ought to know.

Eggs are extremely alkaline.  As you know, anything that is not acidic must be pressure canned, not water bath canned.  This is because botulism can only grow in low-acid environments.  The pressure canning method has a much higher heat than water bath canning, and it is enough to kill the botulism spores found in a low pH.   Adding vinegar certainly makes it acidic, but only the outside of the eggs, not the interior.  Therefore, if an egg has a cut or nick than the low-acid interior might harbor botulism spores.  The eggs should be pristine for making pickled eggs.
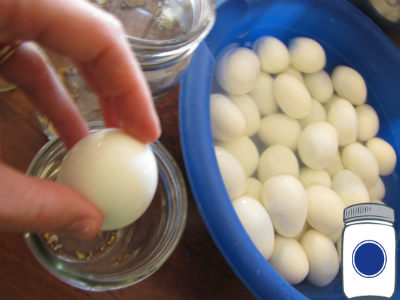
 Eggs with no nics

Eggs should not be pressure canned.  But did I not just say that pressure canning is the only approved method for non-acidic foods, such as green beans or venison?  Yup, that is right.  So it would stand to reason that you could just pressure can the eggs to kill the spores and then the low acid environment of the eggs would not matter.  Right? Wrong.  Eggs are too sensitive, too volatile for the pressure canning method.  The heat is too high and too long and you have a nasty rubbery mess that you will not want to consume.  For all I know they could be safe, but there is nothing left worth saving.  Many say that they do not care for pickled eggs that were even water bath canned.  Those who advocate a water bath canning generally suggest that you only boil the eggs just enough to peel them but not to cook them entirely—that way, the actually canning method will cook the egg and hopefully not overcook it. 

  I do water bath can my pickled eggs, and I probably overcook them.  Are they rubbery? Well, I do not think it is extreme and they still work rather well in recipes in which I smash or cut them.  I like them as is, but I can see that it might be a matter of preference.  In either case, the process-on-record is that you should still refrigerate them.
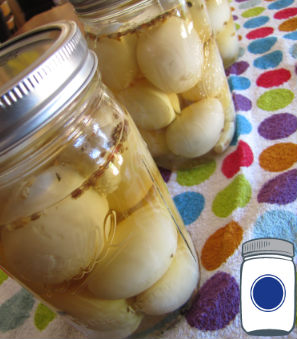
 Cidered Eggs

There is not an approved  canning method for pickled eggs that is shelf stable.  The recipes generally do not require canning at all; you simply heat the brine and pour it over the eggs and spices in the jar, seal, and refrigerate.  Even water bath canning recipes still call for refrigeration because of the potential for botulism.  Although the risk of getting botulism from home canned foods is extremely low, the results are catastrophic.  It is like playing with matches; the likelihood of your house catching fire might be low but since the result is catastrophic, you use prudence in the matter and avoid the danger altogether.
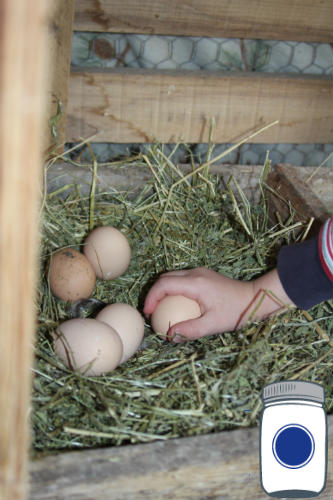
Collecting Eggs 

People have been preserving eggs since…well….eggs.  We know so much more about safety measures now than ever before, and we need to follow the advice given.  With that said, however, I simply do not have room in my refrigerator for many pickled eggs.  I do not see it as a viable way of preserving eggs if they are taking the same electricity-dependent space in my fridge that the raw eggs occupied.  Do I have other options besides pickling?  Perhaps not from a protecting-myself-legally standpoint. 

I can tell you that eggs were traditionally root cellared.  We currently understand that they must maintain a fairly consistent temperature between 32-40°F, which is colder than most any  root cellars.  Many times, they were placed in sand, oats, or other dry goods in an upside down (skinny-side-down) position and they remained there for many months as fresh as the day there were laid, so they say.  The eggs were candled before use, meaning that the eggs were checked for fertilization by using a candle to see through their semi-translucent shells.  

Another root cellar method that was common beyond pickling was to use “water glass”.  This chemical (potassium silicate) is still available today, and it seals up the pores of the egg. Since this included silica, the stuff in the packets that warns not to eat it, you would not be able to recycle the egg shells for animal feed calcium (and I would not personally add them to compost, either). 

I have never personally used either of the traditional oat-burial or water glass methods.  I would love to hear from someone who has (or who remembers grandma’s use of these methods).  I do pickle my eggs and I do maintain the correct temperature range (and whether I use electricity or not is not the discussion here).  The temperature must remain fairly consistent, that is the key. 

Pickled eggs are absolutely delicious and—especially if you skip the water bath canning—as easy as pouring water.  I wish I could invite you over for a salad, or for a barbecue featuring my famous potato salad as a show-stopping side dish (thank you, pickled eggs).   Try a jar out just so that you can experiment with the flavors and using pickled eggs in recipes.  You will get hooked, just you wait and see. 


Looking for more info about eggs? Check out these resources:

Pickled Eggs HACCP by Peter Snyder Jr, Ph.D.

How To Can Pickled Eggs the Safe Way (with 2 recipes)

CDC: Information on the singular known case of botulism through preserved eggs


Interested in building a root cellar?

Country Wisdom Bulletin: Build Your Own Underground Root Cellar

Root Cellaring

Recipes from the Root Cellar (a cookbook)
Signs of Spoilage in Food Storage

Signs of Spoilage in your pantry

This is a busy time of year indeed for food preservers!  We often get into such a frenzy canning and dehydrating that we miss a very basic first step—taking inventory of what is left in the pantry from last year!

 Before you put the first jar away you need to pull everything else out.  Rotating your food storage is the key to successful long-term food storage because it minimizes waste—both wasted food and wasted money! It is also much healthier; all food storage will lose nutritional value over time, different foods and preserving methods lose at different rates.  Eating down the oldest food storage first means that nothing is lost in the back of the cupboard, aging beyond use. 


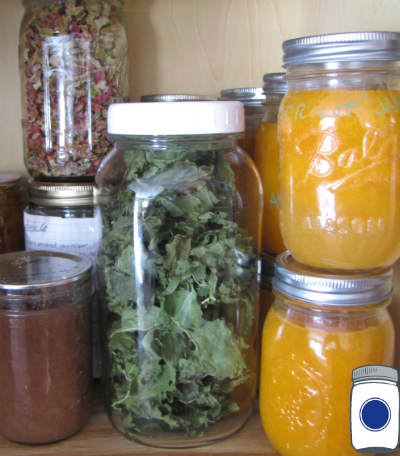
Pantry Shelf (before organizing)

Signs of Spoilage?  When you have everything out, look for these things:


1)      Appearance: some foods just do not look as appetizing as you hope, that is just the truth of it.  Using citric acid or lemon juice will minimize oxidation; it is oxidation that causes browning in many foods.  That oxidization does not affect food quality, just appearance.  If oxidization is all you see by all means, eat it anyway (even if you have to hide the food as an ingredient so your family will not notice).  If something else looks “off” though, especially something like mold or other growth, discard.  Sometimes you will see a lot of aerobic activity going on there, bubbles and fermentation activity.  These cultures are not the ones you have cultivated by fermenting with whey, do not trust this unexpected stuff!  Along with this symptom of food spoilage, you will also often see a bulging top—even if the seal is not broken.  This means that the food is letting off gases in there from bacterium ingesting the sugars.  Do not trust it!


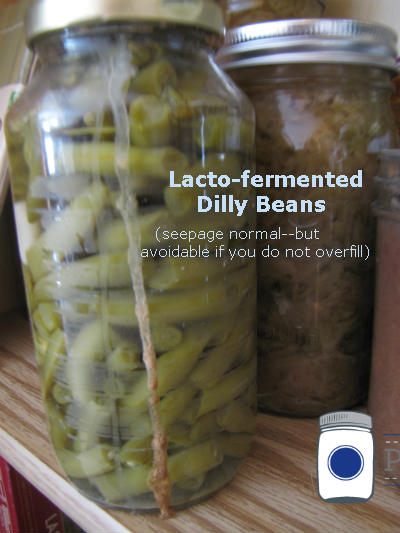
Dilly Beans with Seepage


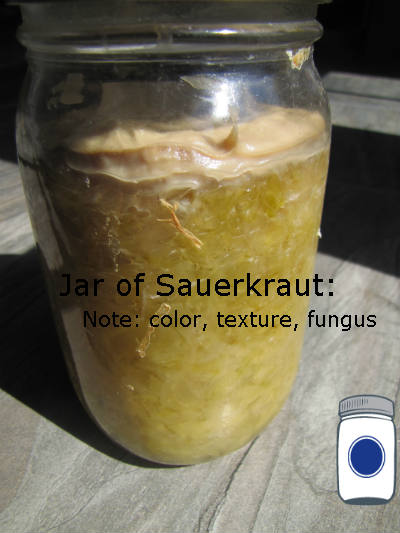
2)      Water or liquid levels:  Canned goods should be covered in liquids.  Sometimes the liquid seeps out during the canning process and your green beans are not submerged.  Although these are fine, these foods will begin to discolor. Definitely eat these foods shortly after canning, because it is my experience that these foods are the most likely candidates to succumb to food spoilage.   Fermented foods should always be covered completely with liquid too—so if you see your sauerkraut or kimchi above the water level something is not quite right.  It is normal for these foods to spill out of the jar (leaving a mess on your shelf if you are not careful), do not worry about that.  But if these foods are not submerged,  they should be opened and checked; if they are still healthy, refrigerate and eat immediately.  If they are questionable, pitch!

 Spoilage in Your Food Storage


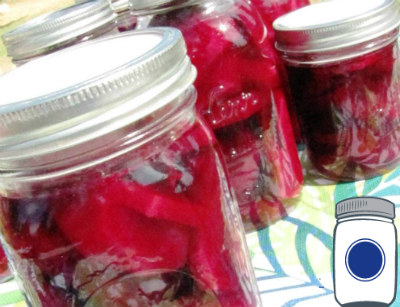
3)      A firm seal: The first recommendation is that you remove the metal rings off of your canned goods, only leaving the actual canning lid.  The ring is not necessary apart from the actual canning process and it can mask the danger of jars having lost their seal.  Jars can lose their seal for a lot of reasons, but I do find that my Tattler Lids are consistently solid sealers.  My theory is that it is because they are heavier than the cheap metal lids and stay in place better during the canning process (especially during the high-bubbling action of a pressure canner).  In either case, check each jars lid by trying to wiggle the lid, or even picking up the jar by the lid itself.  If any jar does not have a sealed lid, discard immediately and sterilize your jars and reusable canning lids.


Tattler Lids on Beets

4)      Vacuum sealed Bags should still be firmly vacuumed.  If air has seeped in at all, there was a hole or puncture in that bag and you cannot trust that food.  It may look okay, smell okay, but you have no way of knowing.  Do not risk it please.  Start with high quality bags that have a high nylon content.  This will minimize any risk of puncture.  If you are vacuum sealing a dried fruit or vegetable that becomes pointy once the moisture has been removed (pineapple, potatoes, etc), try this trick: put the food into a paper lunch sack first, then vacuum seal that.  The paper bag will do double duty—keeping out the light and preventing sharp food edges from puncturing the bag.

 Get High Nylon Bags at Pantry Paratus


5)      Check the labels: Sometimes my labels have fallen off.  Sometimes I used the wrong marker or pen on that particular type of label and they are fuzzy, difficult to read, or even faded.  If you can still make out what it says, re-label it.  Not only is it convenient to know what you are opening (looks can be deceiving), but having a readable date is a safety concern.  If you aren’t labeling your food, you are missing the first sign of spoilage–the date!

 Check Labels on Jars


6)      Check the pantry shelf itself:  Canned goods can be a lot of weight.  Are the brackets holding the shelf secure?  You would not want to lose all of that hard work when the shelf finally dies (I had that happen, luckily, it was a low shelf and I did not lose much).  Are there any sticky spots, syrup rings, or other gunk on that shelf?  That is a good sign that something is amiss with one of your jars.  It is also a great attraction for the local ant population and it is a great time to just wipe everything clean and start over. 

 Of course, once you open the jars, there are other things to note such as smells and flavors.  But for the Annual Pantry Inventory Day, you are done!  Now, go enjoy those yummy foods that you forgot you had.

annual_pantry_checklisthumbnail.jpg   Get a Free Annual Pantry Checklist:
Get a free checklist, among a few other goodies, when you sign up for our mailing list!

Get your Annual Pantry Checklist (among other things):


Where You Would Like Help:

Rhubarb Harvest: Dehydrate It!

How to Dehydrate Rhubarb

Rhubarb Harvest

–Dehydrating Your Surplus


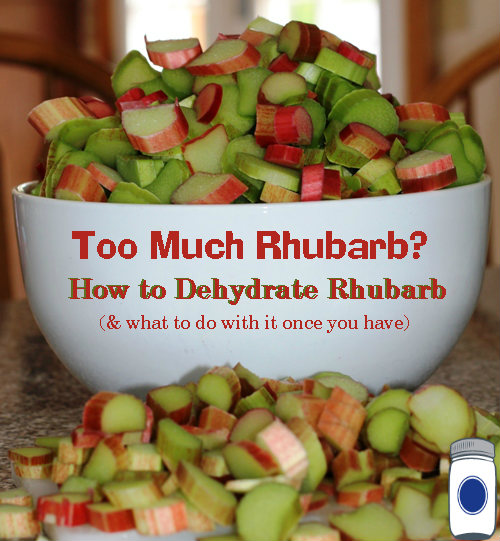
  Rhubarb is a natural spring-time treat.  Its beautiful greenery brightens up the yard and it gives you an excuse to share something with your neighbors.  We all know how delicious it can be in preserves or muffins, in sauces or other recipes…but with the tangy-tartness not many of us can eat much at once!

  Dehydrate Your Extra Rhubarb

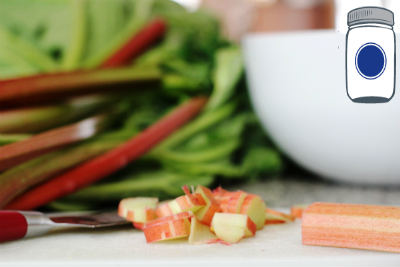
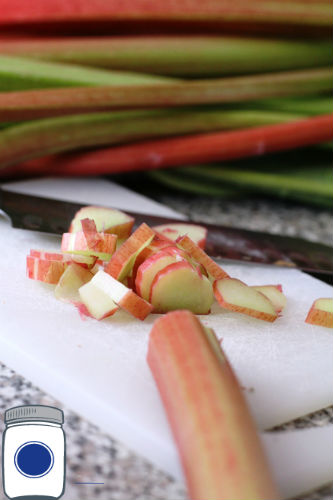
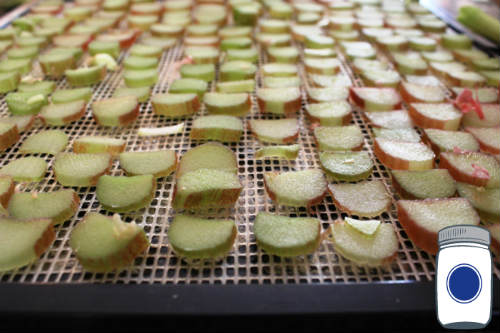
 It’s a matter of slicing it and arranging it onto the Excalibur dehydrator tray.  You do not have to do anything to it prior to dehydration.  Make sure you start with clean, healthy, freshly-picked stalks.  Remember that the leaves are poisonous and must be discarded onto your compost.  The best way to keep them away from young children is by snipping them off of the stocks before even bringing them in to the kitchen counter.  Little hands have a dangerous way of surfing the countertops for something that looks appetizing, so help protect your little ones by eliminating the temptation.


Rhubarb Leaves Are Poisonous 

Although you really need to start with the freshest rhubarb possible, dehydrating it is a great way to preserve stalks picked earlier that are starting to bend (like celery).


Slicing Rhubarb 

 Turn the temperature on your Excalibur to 125º.  Because the water content is so high, expect extreme shrinkage.  You might want to use paraflexx sheets (easier but not necessary on these).   In our dry Montana weather, it takes about 8 hours to dehydrate; it can take you longer depending on your climate.

 Dehydrating Rhubarb

 Ways to Use Dehydrated Rhubarb

 You can really use it in all of the same summertime rhubarb recipes you love.  Just remember that if you are baking with it that you will need to either reconstitute the rhubarb in water first, or to adjust the recipe’s liquids to reflect the addition of a dehydrated ingredient.

Dehydrated Rhubarb 

Meat Sauce:

Put approximately ½ cup dehydrated rhubarb in a saucepan with 1 cup water and 1 cup apple juice.  Stir over low-to-medium heat, adding either a starch (non-gmo cornstarch, tapioca starch, etc) or a pinch of flour that you have mixed separately into warm water, to prevent clumping. 

 It is so delicious with pork, that I rarely serve porkchops without this sauce served on the side.

 Meat glaze:

Pulse  dehydrated rhubarb in a coffee/herb grinder, and mix it in just like that into some homemade strawberry preserves.  Baste onto your pork chops—delicious!

 Kombucha & herbal tea flavoring:

This is how I have been drinking kombucha (fermented tea) all week.  I have been adding the dehydrated rhubarb to the jar of kombucha and refrigerating it until I am ready to drink it.  When I am ready to drink it, I strain all of the rhubarb (and the stringy bits associated with the fermenting culture) out.  Very refreshing!


Homemade Marshmallows:

 Making marshmallows at home has become extremely popular for lots of reasons.  The ones from the store taste like cardboard, filled with terribly unhealthy ingredients, and cannot compare to the delight of a homemade confection.  In fact, homemade marshmallow recipes abound  and I need not clutter the blogosphere with my adaptations of other recipes (maybe if I can perfect it, I will).  But this is what I do:  I pulse the dehydrated rhubarb in my coffee/herb grinder, and mix with organic cane sugar for sprinkling on the finished marshmallow.  It is wonderful!

 Sour Candy: 

I am sure you will come up with your own creative uses—my children like to eat it as a sour candy.  I have been known to sneak a piece or two for the same reason, but it’ll nearly make your eyes water! 

 Leave a message below and tell us how you incorporate the dehydrated version of a summertime favorite!


Please feel free to pin or share any of the pictures, but please keep proper attribution.  They are property of Pantry Paratus.

Pantry Paratus is a small, family-owned company that provides top-notch resources for food preservation.

Chocolate Truffle Recipe: 4 nourishing ingredients for this no-bake treat

Chocolate Truffle Recipe: 4 nourishing ingredients by Pantry Paratus

Chocolate Truffle Recipe

Only 4 nourishing ingredients for this no-bake delicacy


A Nourishing Truffle Recipe

I have never been so keenly aware to the superfluous –and harmful–ingredients used in some of my favorite indulgences.  Now that we have identified food allergies within our family, we cannot “cheat” on our whole foods (real, nourishing, traditional food) diet.  Oh, and did I ever cheat.

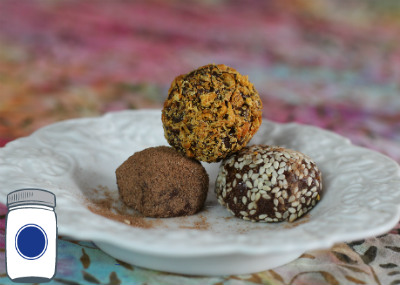
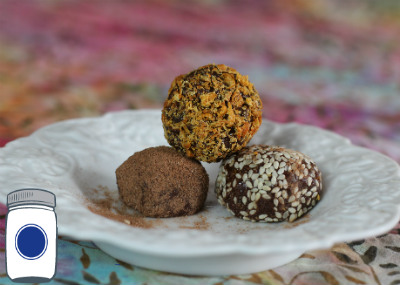
Chocolate Truffles

I created this recipe to reinvent one of my favorite indulgences–the classic truffle.  This truffle has the look, the melting sensation in your mouth, the spark of a perfectly balanced topping, and the deep rich chocolate aftertaste that instinctively required you to close your eyes and savor.   

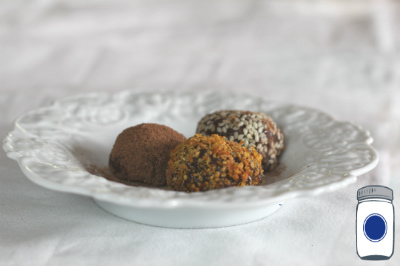
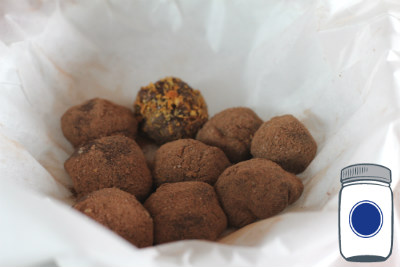
 Here is the catch: this nourishing truffle recipe should make a full dozen.  You cannot eat every other one for me to keep my promise on that. See my remnants: 

 Chocolate Truffles


 Nourishing Chocolate Truffle Recipe

 1.  Soak the nuts for approximately ½ hour (overnight is really best for your health, but not necessary for the recipe).

2. Put the nuts and honey into your food processor until a smooth paste.  Add Frontier Organic Hot Cocoa powder and salt; combine until a thick, sticky paste.

 3. Place the batter into the freezer for 20-30 minutes  (just put the whole food processor bowl in there). 

 4. Once they have been stiffened in the freezer, roll out the balls onto a flat surface covered in the toppings of  your choice.  I use more cocoa, homemade dehydrated orange peel, and sesame seeds

 5. Place truffles onto baking paper in a pan, and store in refrigerator.

 Truffled,

Chaya

Looking for something more gourmet?  Check out this downloadable!


Looking for the ingredients?

Explore Baking at Pantry Para

Please feel free to pin or share any of the pictures, but please keep proper attribution.  They are property of Pantry Paratus.


Breaking in a New Cast Iron Pan

 I have to say that I love cast iron and use it for just about everything. 

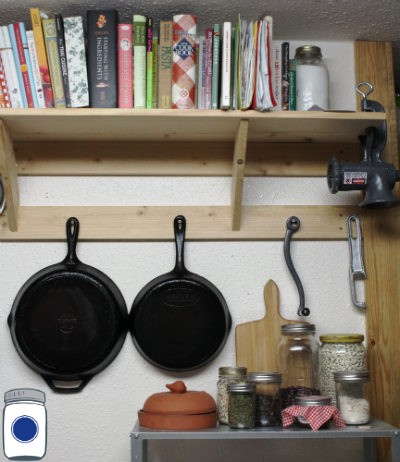
It seems to play well with my thrifty nature in that if properly cared for it can be given to my great-grandchildren.  Other than being durable, it is in its own way, beautiful.  I love how it hangs on the rack in our kitchen.

cast iron skillet

“Anything that holds food and transfers heat can be considered cookware. . . . ideally [cookware] would heat up quickly, distribute the heat evenly, retain the heat well, and respond quickly to changes in temperature.  Unfortunately, no such material exists” (Joachim & Schloss, p. 160).

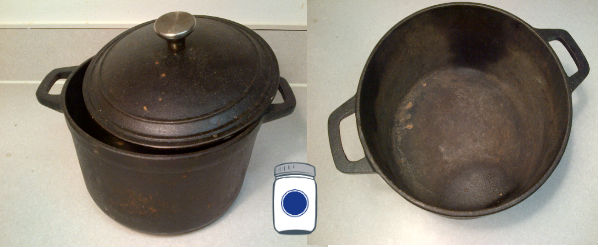
 American made cast iron is such a rich tradition that traces back to the very roots of Yankee ingenuity.  Take for example our favorite hand crank appliances made by Chop Rite Two in Pennsylvania.  These truly are built like family heirlooms that can be used for generations, not to mention that all spare parts are available for sale separately.  As a personal policy, whenever I see cast iron at a thrift store, it generally is coming home with us.  Take this recent score, a cast iron pot with lid which will certainly be used over the campfire this summer. 

 cast iron pan

 Whether it comes to pan frying, deep fat frying, campfire cooking, baking, braising or broiling—a good cast iron pan just cannot be beat.  So this week we decided to add one more to the fleet, and bought a new Lodge brand pan (also made in America). 

While I have always been satisfied with the way that cast iron performs when it is heated up, getting it to that temperature can take longer and there is a good reason for that.  “cast iron is only a fair heat conductor (about four times slower than aluminum), but it retains heat well and has a high melting point, making it excellent for high-heat cooking” (Joachim & Schloss, p. 162).


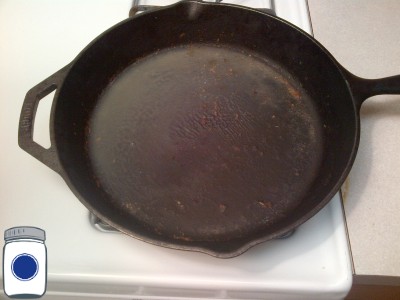
new cast iron skillet

 First off, the question of how to clean cast iron comes up quite a bit.  For an initial cleaning (right home from the store) I will use dish soap and water.  The Lodge cast iron products come already seasoned, but I still want to clean off any yucky stuff picked up in transit or while on display. 

For daily use I typically just wipe out the pan and hang it up until it is used again, avoiding using soap at all—and never put it in the dishwasher.  This can be done largely because we cook with saturated fats or olive oil (although typically not for high heat cooking).  For stuck on food bits, you can try coarse salt or citric acid, or a cup or so of beer simmering in the bottom of the pan does wonders but the definitive treatment on cast iron can be found here in a great article by Paul Wheaton.  Also, here is a great video post from Jocelyn Campbell on how to restart a cast iron pan:

Now let us talk about how to season a cast iron item.  I typically like to do it by cooking with saturated fats, like bacon for example.  As it turned out, the kids were also grooving on BLT’s for lunch, so it was a win-win all the way around. 


bacon in a cast iron skillet

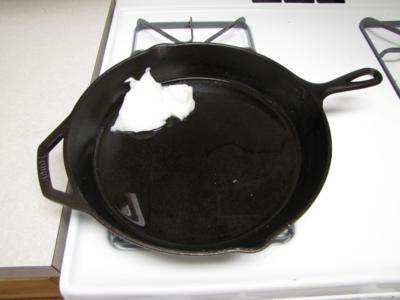
 The synergy between real lard (not the fake stuff) and cast iron is legendary. 

 lard in a cast iron skillet

 Over time, the cast iron skillet will build up a “seasoning” that coats and protects the pan in a way that no non-stick coating ever could as well as help to transfer heat more evenly throughout the pan.  A good seasoning layer does take time to develop. 

One faster method involves coating the cast iron pan with oil, and baking it upside down in an oven at 350°F for two hours (over a baking sheet because it will drip), recoating the cast iron every 30 minutes with fresh oil. 

Now, I normally agree with everything that Joachim and Schloss say in their great book, The Science of Good Food—except perhaps on this point where they say to use highly unsaturated oils like canola, corn or vegetable (soy) to coat the cast iron.  With that last part I would explicitly disagree as those oils are dangerous in the body over time, and saturated fats like those in animal products are far superior. 


saturated fat at room temperature

Cast iron is pretty forgiving and so after I cook something like bacon or lard and I am trying to season the pan for its first couple of runs, I will just cover the cast iron skillet and set it aside.  Remember, saturated fats are highly stable so unless you cooked something really wonky in there, it will be fine.  You can even cover the cast iron pan and put it in the fridge if that suits.  The key is to keep the oil in contact with the pan for awhile.  The repeated heat cycles is what helps to impregnate the cast iron with the oil; “when the oil heats with the metal, it polymerizes, or forms a dense plastic-like layer that keeps out oxygen and prevents rusting” (Joachim & Schloss, p. 160).


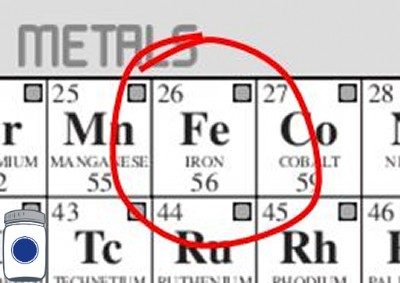
iron

If you have a question about cast iron your want to leave a comment about how it worked for you we would love to hear it. 

 Wilson

Pro Deo et Patria


All photos by Pantry Paratus


Works Cited:

Joachim, D., & Schloss, A. (2008). The science of good food. (p. 160). Toronto: Robert Rose.

The End of the Harvest: Preserving Apples & Potatoes

The End of the Harvest

  Preserving Apples and Potatoes


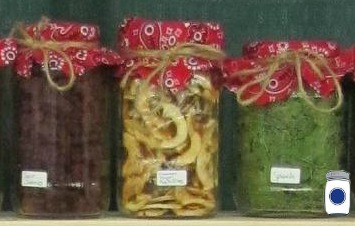
Apple Rings in the Center


Farmer’s Market season is well over now, and oh how I am missing those beautiful summer days.  There is a rumor that one neighbor still has u-pick cabbage and kale, but for the majority of the produce—summer has been eaten or root cellared or “put up”.  As any standard year, I had a bounty of some things and only teases of others.  It is why I preserve the bounty—next year may not fare so favorably in what served as this year’s redundancy. 


There are several things you may have been keeping in cold storage that can stay there much longer if you prefer.  I am beginning to think that I am not the best at that method, because I begin losing food to poor quality if I am not constantly checking and maintaining the conditions.  We do not have a true root cellar right now (but I caught hubby reading this book, so I’m sure it’s coming next summer).    I have to just maximize these garden foods through delicious recipes designed to feature their homegrown flavors.


When it comes to onions, potatoes, apples, and garlic, I do use the cold storage method during the craziness of harvest time.  But this time of year when food preservation has normally come to a standstill, I pull them out of the cupboard and preserve what is noticeably more than we can eat within the next 2-3 months.  Truthfully, I prefer to have many of these foods in their dehydrated form because of the flavors and versatility.  A cold storage apple becomes “mealy” to me about 4-5 months (again, I need that true root cellar!), but an apple ring?  I can hardly keep those on my shelf!


Apple Rings

 The standard apple ring is simple.  Use your apple corer to make the rings.  Fill a large bowl with water and either some lemon juice or citric acid, and then drop the apples into that bowl until you are done coring/peeling them.   Our family prefers apple rings to be peeled, and I think most people do, because the peel gets a tough texture on the dehydrated apple ring.  When your bowl is full, place them on the Excalibur dehydrator trays, turn it on and walk away!  These are so delicious by themselves. 


Apple Rings


You can often find a bag of them in my glove compartment or diaper bag as an emergency snack-of-choice.  If you do them as listed above, they are perfect for snacking or for baking (remember to add extra water to your recipe to make up the difference for having used a dehydrated fruit).   My children have decided that their adopted “grandma” makes them better than I do, though, because after using lemon juice she sprinkles them with cinnamon and sugar before dehydrating!


Potatoes

A homegrown potato cannot be beaten by its store-bought counterpart.  Ever.  And so I must argue for cold storage on those, unless you are getting too many eyes and black spots.  This time of year, storebought potatoes are generally on good sales with Thanksgiving over and I will often stock up.  Our potato patch does not currently sustain our family through the year (it is a goal for next summer, though!). 


I prefer a store potato in its dehydrated form.  They tend to be dry and dull-flavored anyway (can you see my gardening bias showing through?), and a dehydrated potato slice saves the day on a weary “what’s for dinner” kind of evening?  


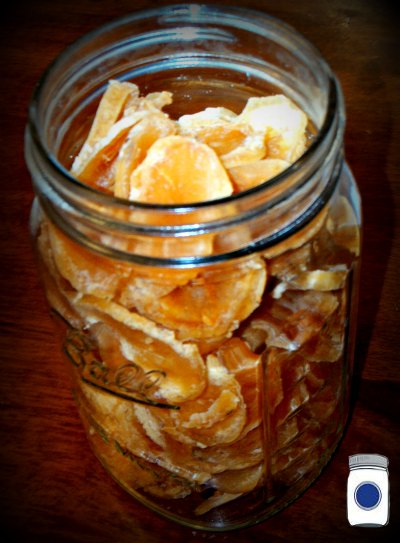
Dehydrated Potatoes


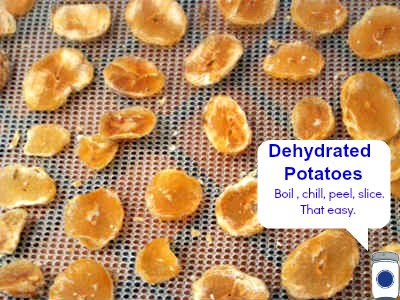
First, you must boil the potatoes until they are soft in the middle.  You cannot skip this step!  You do not want to over-boil them until they are falling apart, but just until soft.  I say that this is about a half hour.  I throw them into a metal bowl and place it into the refrigerator.  I save the potato water for the next day’s bread baking.  Once the potatoes are chilled, peeling is easily achieved with a paring knife.  Next, you will want to pull out your Nesco Food Slicer.  Remember, even slicing means that food will dehydrate at the same rate in your Excalibur.  Pop the slices onto the tray—it is really that easy. 


Potatoes on tray


Dehydrated potatoes reconstitute in a saucepan of water in about 15 minutes.  So my go-to meal is this:  I start the saucepan of water and dump potatoes in right away.  I pull out the cutting board and slice an onion and whatever veggies I might have on hand (Carrots? Cabbage? Garlic?).  By the time I’m done with that, the potatoes have rehydrated and everything is ready for a buttery skillet.  15 minutes in a skillet with whatever leftover meat I found in the refrigerator, served with homemade sauerkraut and…WOW!  It’s a delicious home cooked meal and an extremely healthy one in…about 15 minutes worth of work. 


Enjoy,

Chaya


Proviso:

Nothing in this blog constitutes medical advice.  You should consult your own physician before making any dietary changes.  Statements in this blog may or may not be congruent with current USDA or FDA guidance.


The Perfect Cookie. Yes, with Home Milled Flour.

The Perfect Cookie

Troubleshooting Flat Cookies, & a Foolproof Whole Foods Recipe

(All while using home milled flour)


Home milled flour has a learning curve.  I am often asked about cookies, even from expert bread bakers.  We often think of “whipping up a batch of cookies” as something so simple, something we have done our entire lives.  Why would someone who can produce a perfect loaf of artisan sourdough question how to make cookies?  Because when you venture into the world of milling your own flour—or into whole foods– you find that the rules change.  What you could do on “autopilot” now must be deliberately re-thought:  Crisco®, nope, not using that artery-clogging stuff.  White sugar?  Ooof, not with our diabetic family history!  Home milled flour? It is so much heavier than the dead bleached stuff from the grocery store.Cookies with Whole Ingredients

Many people say that the cookies flatten.  If that is what you have, here are a few suggestions:

 1)       Use a regular cookie sheet, not a baking stone.  If you insist on the stone, place it in the oven to pre-heat along with the oven, then pull it out to put the cookies on it.  The stones just take too long to come to heat and the cookie will flatten in the meantime.  Keep in mind that the bottoms of cookies will burn easily on the stone for the opposite problem, too: those stones keep cooking long after they are removed from the oven.  So be sure to remove the cookies immediately from the stone and you might need to adjust baking times.

 Homemade chocolate chip cookies with home milled flour

2)      Check your oil-to-flour ratio.  Does your cookie dough feel thick or more wet than normal?  Too much oil/butter/lard will flatten your cookie every time. 

 The Perfect Cookie with Home-Milled Flour3)      Use lard!  Lard and tallow are my secret ingredient for a fluffy, perfectly-browned cookie.  These were how cookies were invented, remember.  The Fake Stuff (shortening) came later and we have a whole generation (maybe 2?) that haven’t an idea on how to cook the real way.   When I first swore off the fake stuff, I tried oil and butter and every combination, with inconsistent results.  If you must use something other than lard or tallow (vegetarian?) I would suggest coconut oil.  I will not guarantee perfectly consistent
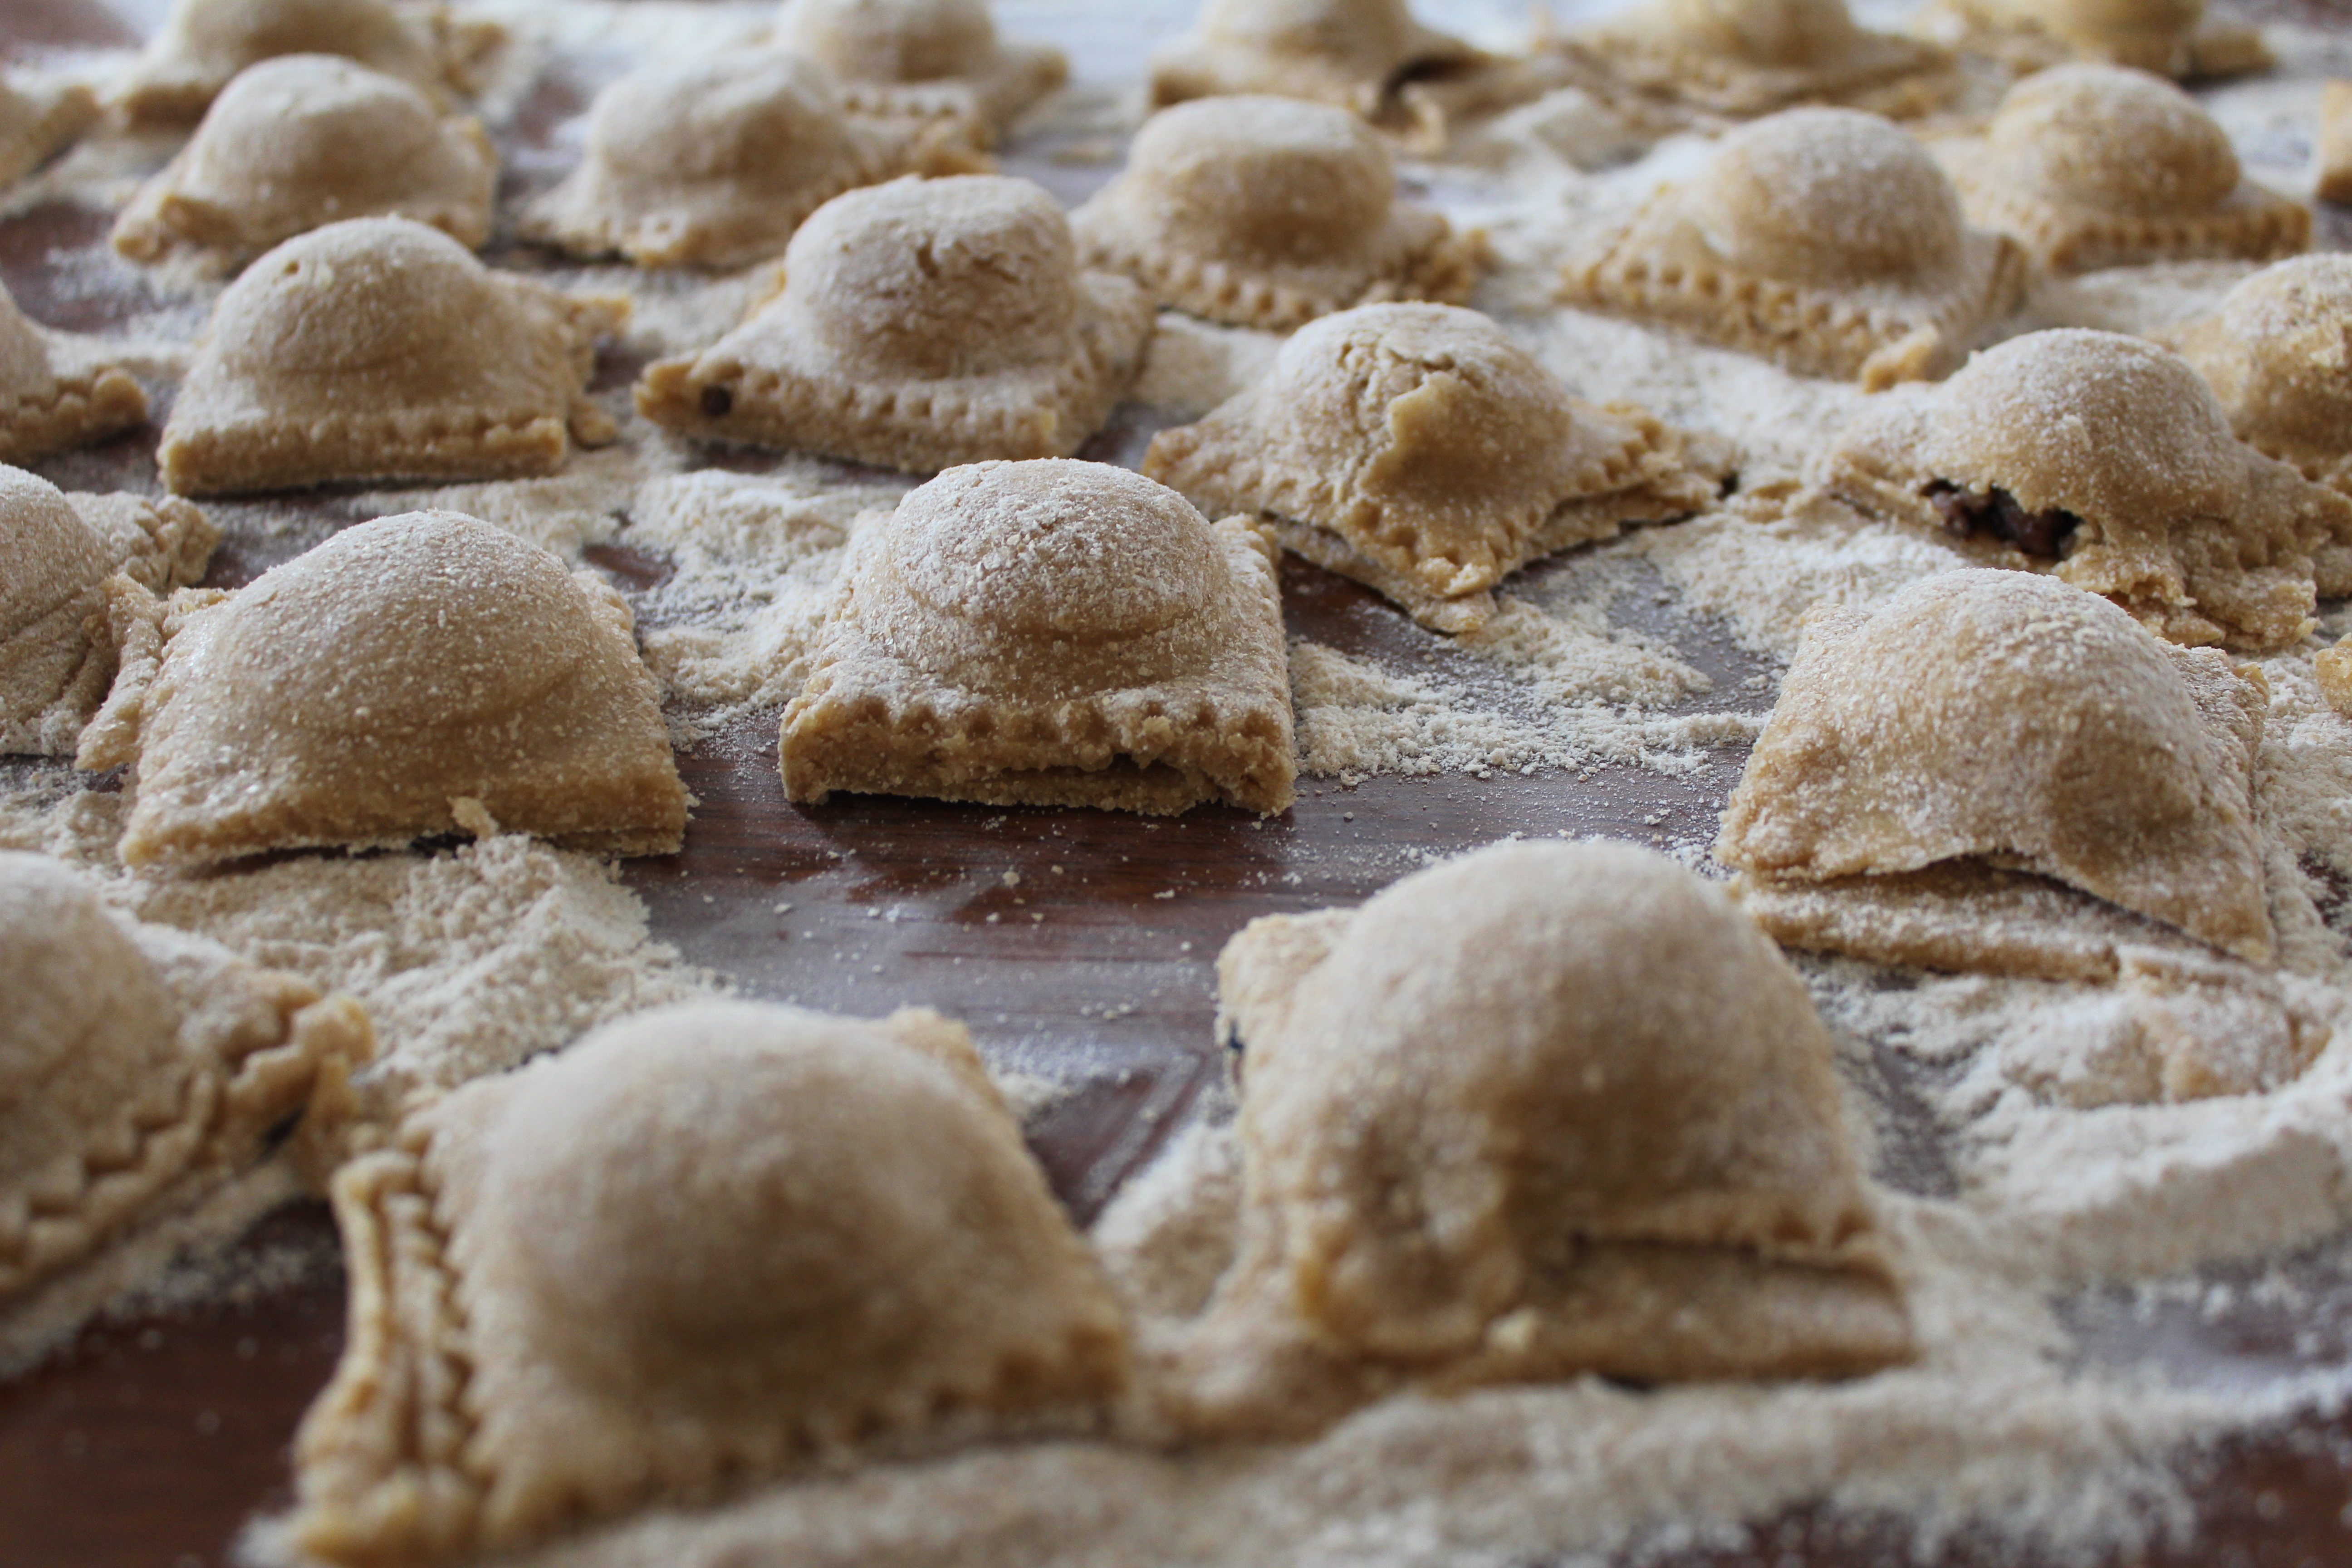
Delicious chocolate chip cookies from home milled flour

results with the recipe below, though.  Play with it and let us know what you find. 

 FLOUR:  I prefer to mill oat groats for cookies.  I find that the cookie is lighter in color and texture than with wheat, although spelt flour and soft white wheat work well too, and sometimes I mix oat, spelt, or soft white.   Oat flour will make this cookie indistinguishable from the cookies you remember from childhood.


 The Perfect Whole Foods Cookie

 Put your favorite nut or chip in these.  I often do chocolate chips because it is what my family prefers.  These pictures have both chocolate chips and Macadamia nuts.  Consider this a “basic” cookie recipe and do what you want with it!


Preheat oven 375°                                             Makes over 3 dozen medium-sized cookies

  •  ½ cup beef tallow (or lard)
  • ½ cup grass fed butter
  • ½ cup honey
  • 2 eggs
  • 1 tsp vanilla
  • 1 cup Sucanat
  • ½ tsp baking soda
  • 2 ½ cups Oat flour (or spelt, or up to half soft white wheat)
  • 2 cups chocolate chips (optional)
  • 1 ½ cup nuts of your choice (optional)


  1.     Using mixer, blend butter, tallow, honey, vanilla, and eggs in a medium bowl.  Set aside.
  2.     In another bowl, mix the dry ingredients: Sucanat, baking soda, flour.  Combine bowls.
  3.     Fold in chips and nuts.
  4.     Drop the dough onto a lightly buttered cookie sheet, and bake for 8-9 minutes (or until slightly brown around edges).  Remove from sheet to cool. 

 Enjoy!

Chaya


The Perfect Cookie with Home-Milled Flour
Thick, fluffy cookies made with home milled flour

Homemade Ravioli

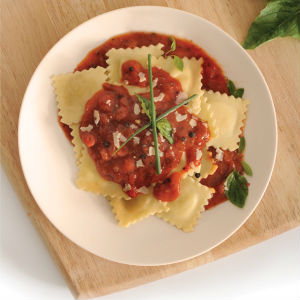
ravioli in Chaya's kitchen

Homemade Ravioli

Techniques & Tools

Ready for Guests: Ravioli


Homemade Ravioli is the world’s best make ahead meal…the flavor compares to nothing you can buy in the store, and unexpected dinner guests can have a gourmet meal in 10 minutes flat (with the help of the freezer, of course).  I have made ravioli multiple times but I did them the “old fashioned way” that meant I was cutting and stuffing the squares by hand.  Delicious though they may be, the presentation was lacking.  They always looked rough (especially since my kiddos like to help).    I’m really excited about the simplest tool that transformed my end result!  Some people prefer to do it the hand-shaping way with a ravioli wheel, so we have one in stock if that’s your preference; but today I’m going to show you my favorite cheat for homemade ravioli–the ravioli press.

 Start with a basic pasta recipe.  If you do not normally put eggs in your pasta, I do recommend them now, because you will be manipulating the dough and the egg serves to hold the dough together very well.   I also recommend using your pasta machine to roll the pasta out into sheets; it’s way too difficult to get them thin enough by hand (and takes longer, too).

 For your filling, consider anything that suits your fancy…such as cheeses, sausage, spinach, pesto, pumpkin, the list goes on.   The pictures below were taken with the following recipe:

½ cup ricotta cheese, 3 cheese Italian, Cheddar Cheese, and sausage.   Mix in 2 eggs and salt & pepper to taste.    


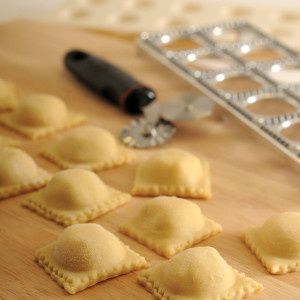
So here is how to get ravioli to look like this:

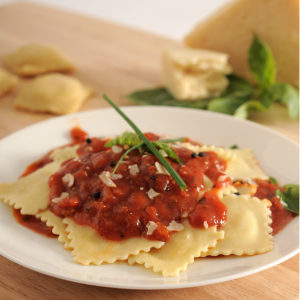
 Ravioli


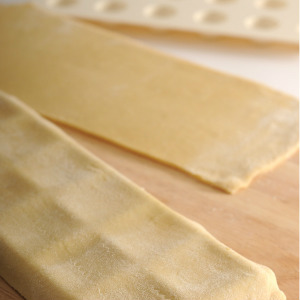
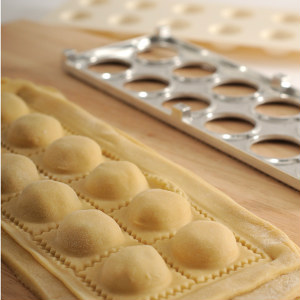
(1) Place one strip of dough over the frame of the ravioli maker.

Step 1: Place Dough over Ravioli Frame


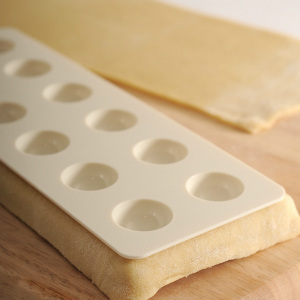
(2) Press the dough into the frame with the indented tray.

Step 2: Press dough into frame with indented tray


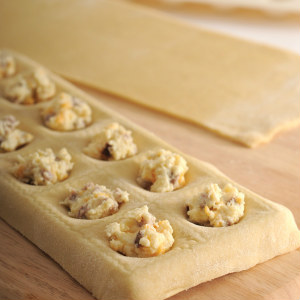
(3)Fill the pouches with the filling as desired (don’t overstuff!), and place a second strip of the pasta dough over it.  Press the strips together with your fingers. 

Step 3: Add filling

Tip:  A few drops of water or egg white run in between the strips will help create a good seal.


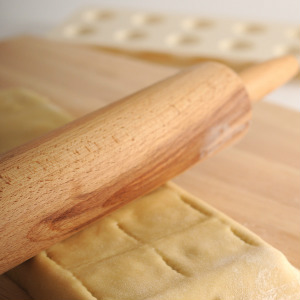
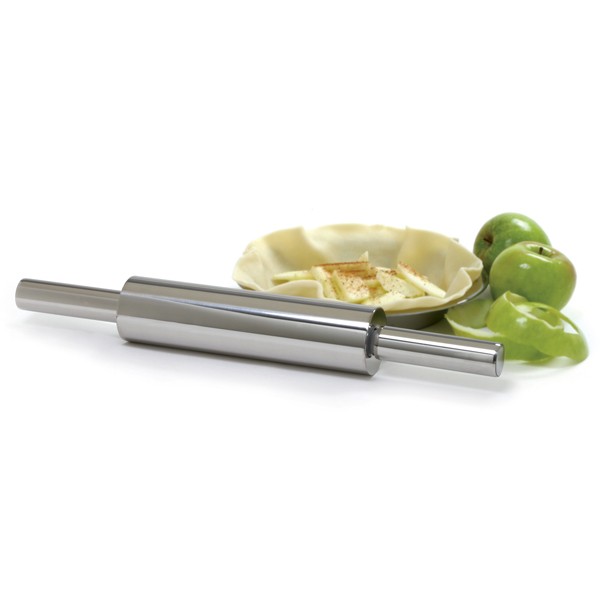
(4) Seal by running a rolling pin over the top of the dough-covered frame, gently at first and then increase pressure until the zig-zag edges of the frame are visible through the pasta.

Step 4: Use a rolling pin


(5) Remove ravioli from the frame by tapping them onto the counter.

Step 5: Tap out of the frame


(6)Trim out squares using a ravioli wheel or knife.  Remove excess dough and re-roll.  Repeat the procedure until the dough and filling are used. 

Step 6: Trim Ravioli


(7) Place ravioli on a heavily floured cookie sheet and let dry for 1 hour.  Turn over and let dry for another hour.  Put ravioli in the freezer and thaw before cooking…

OR…go ahead and cook the ravioli for 8 minutes or until tender.  Remember that the cooking time will vary depending upon your dough’s thickness. 


Tip:  If making a pumpkin ravioli filling, serve with a sage butter sauce!  Yum!


Enjoy,

Chaya


Looking for the right tools?

Atlas Pasta Machine

        Stainless Steel Rolling Pin

Pasta Maker (Machine)          Marble Rolling Pin


Ravioli WheelRavioli Maker with Press

Ravioli Wheel                Ravioli Maker with Press


Pictures courtesy of Norpro, with the exception of the flour-dusted table–that’s my delicious mess.


Erin’s Natural Deodorant Recipe

(produces about a 1/2 pint of deodorant)

 Ingredients:
  • 1/3 cup organic/non-GMO corn starch (or other suitable powdery starch such as arrowroot)
  • Essential oils “to taste;” I like lavender, lemon, rosemary,peppermint, or cinnamon
  • Coconut oil “to consistency”
  • 1/8 cup baking soda

Method:

In a small bowl, mix together the baking soda and starch until combined.  Add the essential oil(s) by drops, mixing with a fork,  until it is to the approximate strength you like. Remember, it will be more diluted once you have added the coconut oil. You can always add more essential oils at the end – it will just be a little harder to mix thoroughly.

Add several tablespoons of coconut oil, and mash and fold into a paste, making sure to mix everything together thoroughly. If it’s too sticky or pasty, add more coconut oil. Optionally, you can melt the coconut oil and add it to your dry ingredients in melted form. This makes it easier to mix; however, the particles of baking soda may drift to the bottom before it solidifies, leaving an uneven product which will require a bit more mixing after setting up.

You can adjust every amount in this recipe – more baking soda, less, none; more starch, no oils. Heck, you can even just use the coconut oil alone, although I can say from experience it is not as effective.

I tend to use less baking soda and more starch, as my skin is very delicate, and too much baking soda abrades.

I like to put mine into a pretty jar with a wide mouth to make it easier to get out.

It honestly is Just That Easy. It’s also cheaper, healthier and (in my opinion) smells better than commercial deodorants.

 Homemade Deodorant Application:


Some folks like to stuff their new deodorant into used, empty stick deodorant containers. That works great until the bathroom gets hotter than 76 degrees and it melts and gets messy. Also, I don’t want any residual toxins left in the container. A jar works great for how I use it.

I simply scoop out a small amount, say 1/4 to 1/2 teaspoon per pit, and rub it into my skin. Depending upon how hard I’m working, I may have fairly stinky pits by the end of the day (we’re all friends here now, right?) To mitigate this, I also apply a thin layer of starch on top of the coconut oil deodorant, which not only helps to absorb moisture, but also helps to control odor.

Sun Dried Tomatoes

Sun-Dried vs. Dehydrated

The Comparison and the How-to

 Dehydrated Tomatoes


The fancy-gourmet-$$$$$ restaurant plates always have them.  It is always the last thing in the title, too, and I imagine a maitre’ d slowing his speech and accentuating the words with a foreign accent…. “Mediterranean Lamb Marsala Florentine….with sun-dried tomatoes.”  I just made that up, but you get the idea. 


I just saw the prices online for sun dried tomatoes, and it was about $20 for 16 ounces, oof. 


Here is my math:

The Complete Guide to Saving Seeds ($24.95) = Infinite Pounds of Non-GMO garden fresh tomatoes forever.


Sun-drying anything can be a bit risky; you have airborne spores and insects, vermin, humidity, and inconsistent temperatures.  Other than that, it’s easy, right?  Sure, but I personally go for consistent result that ensure top-quality, so I prefer the Excalibur Dehydrator that allows me to choose the perfect temperature regardless of the environmental factors. 


Sun Dried vs. Dehydrated


Sun Dried vs. Dehydrated


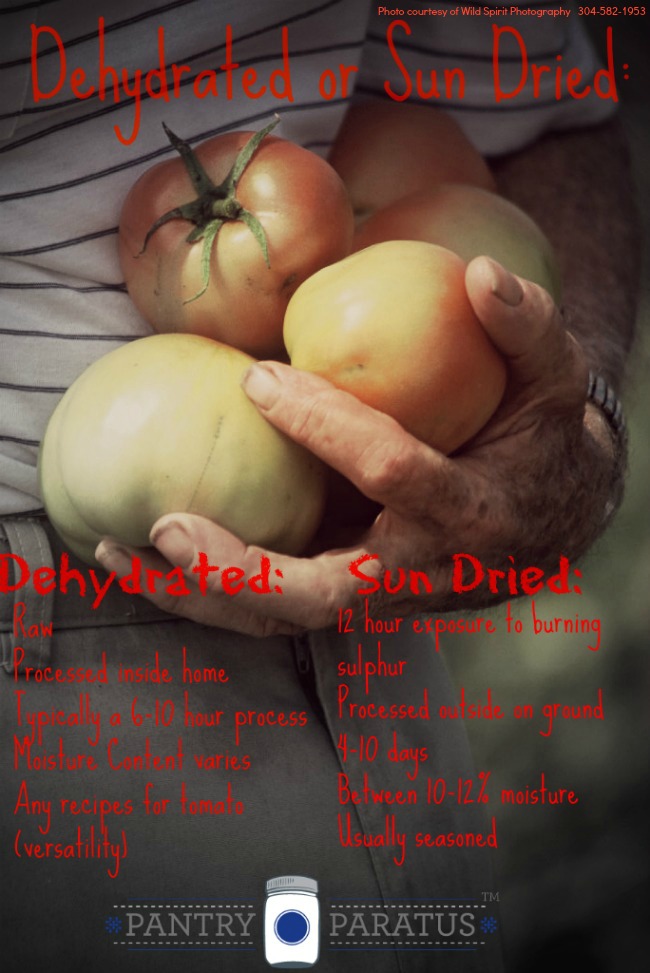
No, the sun dried tomato is not the same as dehydrated, but with a few tricks  you would never know.  You’ll have to decide just how gourmet you want to be, but here’s the shakedown:


Dehydrated Tomatoes Sun-Dried Tomatoes
Raw 12 hour exposure to burning sulphur (cooked) *
Processed in safety of  home (usually countertop) Processed in a “fenced in area” on the ground*
Typically a 6-10 hour process 4-10 days
Moisture Content varies due to dehydrator run time
Between 10-12% moisture (not for long-term storage)
Any recipes for tomato (versatility) Usually seasoned with Italian Seasonings


*The sulphur helps hold the color longer in the tomato; the dehydrated might lighten over time.   The sulphur is also stinky and helps keep rodents away.  Mmmm, yummy.


The Dehydrated do-it-yourself version of the “Sun Dried” Tomato


Remember that you can store dried tomatoes for years (plural)—if stored properly with vacuum sealing and proper environmental factors (dark, cool, free of vermin, moisture, etc.).  A dried tomato can be eaten as-is like a chip (I prefer some ranch dressing, yum), used in any recipe with a quick reconstitution, or you can powder it for a sneak attack in pastas, soups, or other foods.   


Rehydrating Tomatoes on the Stovetop

Side note—if you want to reconstitute a dried tomato, put it in a boiling saucepan of water for 15 minutes.  


If you want the flavor of a sun dried tomato with your do-it-yourself variety, you may try this:


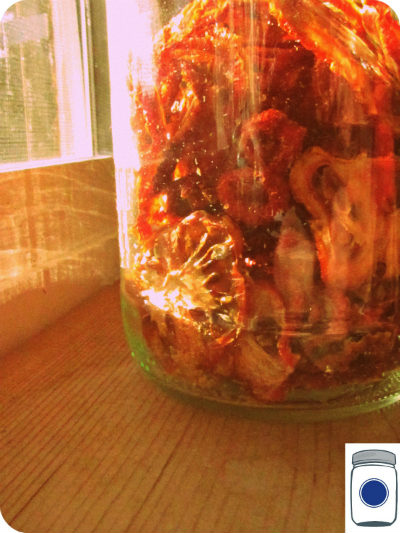
1)      Place the tomatoes in a jar and cover with olive oil (must be covered).

2)      Add a clove of garlic

3)      Add either:  a pinch of homemade pesto, Italian Seasoning, or your own Italian blend. 

4)      Keep refrigerated for up to 1 month


Rehydrating Tomatoes in Oil


Stay tuned—in the next blog I will give you my pizza crust and focaccia bread recipe, along with some mouthwatering pictures of how I use my dehydrated tomatoes as though they are sun dried tomatoes.  Leave us a comment, let me know how these turn out for you.


Enjoy,

Chaya


I learned about the sun drying process through manufactures like this one.


Want to do this?

Find these resources and more at Pantry Paratus:

Mortar & Pestle—for grinding dehydrated tomatoes into powder

Excalibur Dehydrators

VacUpak Vacuum Sealing Machines and Supplies

The Complete Guide to Saving Seeds

Frontier Italian Seasoning


Pantry Paratus Radio Episode 006: Interview with Lynn Donaldson Food and Travel Photojournalist

Pantry Paratus Radio Banner

Every now and again you get to meet someone with a job so cool, you did not even know that people get paid to do such neat things.  Meet Lynn Donaldson, she is a food and travel photojournalist and she does fabulous work (and she gets bonus points for being from Montana).  Take a listen from our favorite food and travel blogger as we get her perspective on capturing the soul of a travel destination by getting to know the people through their food.


Food and Travel


Right Click Here to Download This Episode


Listen to internet radio with Preparedness Radio on Blog Talk Radio


Lynn Donaldson Photo Composite

We talk about:

-Bio


-Lynn’s experience with the MT office of tourism


-Food is what gets you out of your car and to experience the people and the places.


-How and why certain people succeed


-10,000 hours to be an expert in any field


-Growing up on a wheat farm, looking through the perspective of “farm to fork.”  Being connected to the food.


-Facebook and yelp to find out about a place before hand


-How to ask for where the good places to eat are


-How do you get to know a place or event while on assignment.


-Photo equipment that she uses: Nikon D700, a 20-35mm wide and a fixed 50mm.  Best food close up lens 1.4, “It just makes the light sing.”  I say, “Cool!”


-Lynn was not able to pick her favorite photo shoot, but she retells a story of her latest shoot up in Northeast Montana where she stumbled upon the local favorites—every place has a favorite.  It is like a scavenger hunt for a photographer. 


-Being a professional tumbleweed: how she explores the great outdoors with a young family.  Finding and celebrating those little things about a place that make it special.  Make the memories!


-Lynn’s new professional project, a cook book called Open Range written by Patrick Dillon and Chef Jay Bentley who owns The Mint in Belgrade.

Links:

LynnDonaldson.com

PlacesBetweenSpaces.com

Get Lost in Montana video clip—how we first found Lynn’s work.

-A travel photo piece Lynn did for Big Sky Journal

-One more video clip featuring Lynn’s great work, “Food gets me off the road and out of my truck.”

-Dusan Smetana’s work in a video clip

-Malcolm Gladwell’s book, Outliers

Sweetwater Travel Company (hint: check out the photo gallery)

-Another great travel food article about Yellowstone National Park by Lynn

– Michael and Jane Stern wrote many books, have a blog called Road Food and also had a column in Gourmet Magazine for which they won three James Beard journalism awards!

-Lynn likes the SpoonForkBacon blog

NY Magazine article about Brooklyn how it has become artisanal and very farm to fork focused

-Lynn recommends the Tartelette food blog as a great example of food photography

-wrap up about food and travel with Lynn


Wilson

Pro Deo et Patria


Photo Credits:

All photos are by Lynn Donalson


3 Pathways for $30.00


As you know, we moved just at the end of winter into our homestead!  What you cannot read on a flat screen is the giddy squeal in my voice when I say that.  Oh, it is a great deal of work, do not misunderstand, but it is the work of my heart. 


Moving in just before the spring thaw, we quickly realized that walking paths would be a first order of business.  The house has three doors that we use almost equally depending on which part of the land or deck we intend to use, and none of them had sidewalks.  Our busy feet quickly trampled the grass into a muddy mess.  The immediate crisis of muddy children was alleviated by dragging home some pallets from the local hardware store, free to a good home. 


Pallets, free to good home


So the pallets lay for a month.  The kids thought it was fun at first, like jumping on rocks at the local creek.  Bugaloo, the two-year-old, quickly wearied of the long jumps and of the fear that her tiny foot would fall through the cracks.  This was definitely not a safe option, nor a practical one, as the others in the house just started walking in the grass around them! 

 After the pallets were removed


We live in Northwestern Montana, a place once known for its logging industry.  Although there are hauntings of the logging industry, by and large, it is no more.  One such shadow is a small operation on the edge of town, affectionately known as “Tom’s place”.    One day I stopped in.

“Do you have woodchips?”

“Not nice ones.  No one ever wants ‘em.”

“I think I do.  How much are they?”

“No, really.  No one wants these.  They are rough pieces of cedar, not the nice garden variety you get at the hardware store.  These have some greenery in them.”

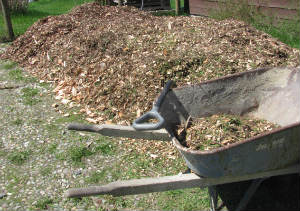
Now, I happen to know that cedar is terrible for growing anything.  It is terrible for a garden bed, ideal for a walkway!  When he said that no one wanted them, it left him with an ecological dilemma.  He ethically harvests trees for his business, and he wants to see that excellent carbon source used for the maximum benefit of the local land. 

 Cedar Woodchips, straight from the logger


We live rather far out of town, and he was so pleased to find a good home for his cedar woodchips, he delivered a dump truck full for only $30!  That barely covered gas, and certainly didn’t touch the labor of loading and delivering. 


The kids and I spent several sunny days combing our land for just the right sized rocks.  With the snow melting and the much anticipated sunshine, this was a labor of love.  It was a wonderful excuse for all of us to study the nature surrounding us and we made a few discoveries along the way. Ants on our land


I found by studying the rocks on the ground that there was an overgrown flower bed, long forgotten.  My children discovered an unusual variety of ant, and the land and our family officially began the introductions. 


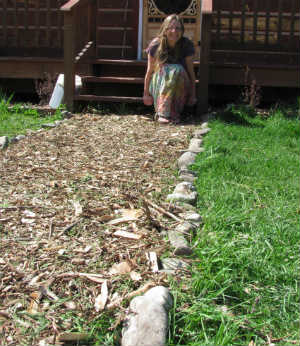
Chaya in front of new path


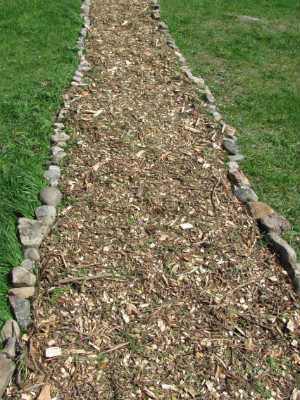
I have a total of three paths to make.  Free rocks and $30 in mulch.  Sunshine and a job completed—what a wonderful return on our money!


Pathway  


Enjoy your next job well done,

Chaya


Guest Blog—Tips for Natural Living – Coconut Oil Body Scrub

Title PhotoWelcome Tanya from www.perfectlyflawedwoman.com


Tips for Natural Living – Coconut Oil Body Scrub

In my never ending quest to be as plastic-free as possible, I’ve been taking a closer look at the products our family uses on a daily basis.  Which of them, if not all, can we DIY to eliminate the need to purchase yet another plastic container?  Well, while researching the endless amounts of things that one can do with coconut oil, I came across this recipe by Deliciously organized for a Coconut Oil Body Scrub.  I decided to tweak it a bit and go for it!


Ingredients

Ingredients:

1 cup organic raw brown Turbinado sugar
1/3 cup dead sea salts or other sea salt
1/2 cup organic coconut oil
2 tablespoons almond oil
1/2 tablespoon Vitamin E Oil
1/2 cup crushed Lavender Flowers (optional)
5-7 drops Lavender Essential Oil


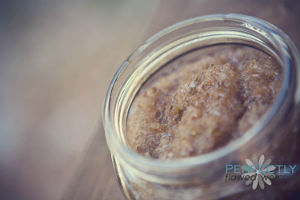
Coconut Body Scrub in a jar

Combine sugar and salt, then add in oils one at a time checking for consistency. If too dry at the end, add a bit more  coconut oil.  Then mix in any dried flowers and essential oils.  I also love to combine Sweet Orange essential oil with Lavender or for a pick me up scrub use a combination of Peppermint and Rosemary!

This scrub is wonderful in the bath or bath or shower for all your edges and rough parts.  Or by the sink as a nice hand softener. Just rinse with warm water and you’ll have yummy soft skin.

Have fun!

Be sure to check out Tanya’s website and blog: http://perfectlyflawedwoman.com/


Coconut Body Scrub photo


Looking for supplies?  Be sure to check out our Pantry Staples for things like sea salt and spices, & our Kitchen Hardware and Everyday Tools for your everyday kitchen tools!