Dehydrating: A simple Q & A

We just finished a wonderful weekend in Dallas, Texas, as a store and as teachers, at the Self-Reliance Expo.  What a wonderful venue—if you ever have one come near you, please take the time to go.  You’ll find a wide variety of things, from homeschooling to homesteading to survival supplies.


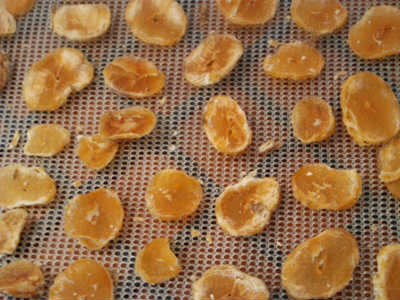
The first reaction most people have when walking into our store is this—they head straight to our “pantry”, a 6 foot shelf full of jars.  The colors range from the bright yellow pickled eggs steeped in tumeric to the deep green of dehydrated spinach, to the red homemade jams and jellies.  The fruit leathers, the jerky, the thinly sliced dehydrated peaches, and the raspberries that melt in your mouth—these draw passers-by into our booth.  They take in the colors and produce.

pantry shelf


“I didn’t know you could dehydrate that!”

“I tried dehydrating potatoes once but mine turned black.”

We love these conversations because we often learn something new, too.  We also find that many questions are echos of the ones asked by others coming to our booth earlier.  Because of this, we thought that perhaps we’ll relate some common dehydration questions now in case you share them.


Q: How do I know if the food is fully dehydrated?


A:  If this food item is going to be an immediate snack food, such as fruit leather or chewy apple rings, you will want to leave moisture in and dehydrate to taste.  This will be based on your personal preference, and this process stops short of what you will need to store foods over long-term.  If you are dehydrating for long-term food storage you should be able to hear a “clunk” when you drop it onto the table, or it should snap when you break it in half.  Remember, these foods will partially rehydrate with moisture in the air (and start the rotting process) if you do not immediately package them properly.


Q:  How do you clean out your dehydrator?


A:  The bottom of an Excalibur is easily wiped clean with a cloth and your cleaner of choice, but it is true that the sticky trays are sometimes frustrating.  We found a foolproof way (through a customer’s brilliant suggestion) to clean the trays.  Run warm water in your bathtub and add Epsom Salts.  Let the trays soak overnight.  They will usually only need a quick rinse when you return to them.  If they need further cleaning, it will just be a simple wipe-down.
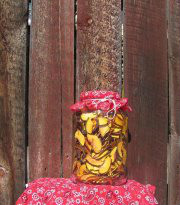
jar of dehydrated peaches


Q:  Those jars are beautiful—where did you get them?


A:  Many are standard canning jars and we pick as many up as possible at thrift stores and yard sales.  Others are empty product jars, such as spaghetti sauce.  We always save glass jars!


Q:  Can I put my food in glass jars for long term food storage?


A:  Yes!  Any jar of spaghetti sauce that comes home from the store with us is on a one way trip.  After the commercially packed contents are consumed, we save the jar.  Why would we do that?  Because the jar can either go into the waste pile or the asset column.  If I preserve part of my food surplus, I will need to put it some where.  A glass jar is impermeable by vermin, is portioned properly for use (I do not want to open up a 5 gallon bucket of cornmeal when I only need 4 cups).


The biggest variable is the lid of the jar. If the vulcanized rubber ring on the inside of the far is still pliable when you poke it with your finger nail, then chances are it will seal just fine with an oxygen absorber on the inside of the jar.  If the oxygen absorber is valid, it will mitigate the oxygen and create a seal.  Keep your long term food storage in a dark, cool place, and remember to ROTATE!


Q: What considerations are there for storing dehydrated food?


A: There are four enemies of food storage: Moisture, Oxygen, Light and Heat.  Any living thing needs moisture and oxygen to live.  Dehydrating will eliminate the moisture.  The oxygen can be mitigated with an oxygen absorber.  This also (depending on the condition of the jar and lid) create a sealed container where the “button” on the lid does not pop.  Lastly you need to protect the food from light.  The energy carried on a ray of light will have a negative effect on the nutritive value of the food according to the Second Law of Thermodynamics.  If you store the food in a mylar bag, this is much better for protecting from light.  Lastly heat, think cool and a dark place for your food storage.


Q: What is “case hardening”?


A:  It is when the outside of the food dries out too quickly and the interior has moisture locked in it.  When I am trying to cook a roast, I set the oven to a high temperature and put the meat in there to sear the outside, then continue to cook it a much lower temperature so that it stays juicy.  When I want to dehydrate a food, I want to avoid doing that.  Dehydrating is best done with low heat over a longer time.  Case hardening is when the outside is dry and the moisture has sealed into the interior of the food product and it will deteriorate and rot.  There are a few things that can cause this.  Many dehydrators have the bottom-to-top heating unit that means some trays get too much heat while others are dried insufficiently which requires rotating the trays.  Because of this, we highly recommend a dehydrator like the Excalibur because of the back-to-front design where all trays heat evenly.  We also recommend lower heat for a longer time!  Even using Excalibur’s suggestions, we typically turn the heat down ever-so-slightly and plan for a longer dehydration time (36 hours is typical).


Q:  What is “blanching” and do I need to do it?


A:  Foods that are high in cellulose and fiber such as a carrot will need to be blanched.  I suggest looking at the Preserve It Naturally book for food-by-food instructions as to whether an item needs this process.  (Note: We give this book free with the purchase of a 5 tray or a 9 tray Excalibur Dehydrator or you can purchase the book separately).  Blanching softens the outer skin of food and is easy to do.  Get a pot of boiling water and drop the food in very briefly.  Blanching does not generally take more than a minute or two (if you are at a full rolling boil).  Other items can be quickly steamed instead such as cauliflower.  Items like a potato are best to be boiled thoroughly until cooked, cooled, sliced then dehydrated.

Dehydrated potatoes

Basically, foods with a thicker outer surface than interior, such as cherries and other berries, carrots, etc. should be blanched. If an item needs to be blanched prior to freezing, it should also be blanched prior to dehydrating.  Here’s our favorite trick:  If you find frozen vegetables on a great sale, stock up!  Any items that require blanching will have already received the necessary treatment by the vegetable packers.  Just put the veggies straight onto the trays without thawing!  You have now saved substantially in both the purchase, labor and in the storage.


Q:  Did you really do this yourself??


A: This is our most common question, and I think that it conveys the notion that this is too much work or too difficult.   The home economics of dehydration means that I save exponentially by being able to buy sale items in bulk and preserve my own summer harvest—no wasted spinach for us!  With this in mind, dehydration and food storage becomes a natural way of life.  An Excalibur Dehydrator is the work horse for the do-it-yourself food storage minded family.  And yes, you can do it too.  I promise.


Parenting, Peels & Pinwheels: Confessions, Dehydration, and a Recipe

Seven years old, sitting in the Radio Flyer wagon with my best friend, handle turned in and racing down the steep hill, middle of the road.  Thrilling, fun, and scary.  Fast forward 28 years.  Parenting.  I have not experienced the outer rim of sanity since I was seven years old and flirting with a traumatic brain injury, and here I am.


I was excited about converting this recipe for you.  I’ve re-written and adapting old ones, knowing what I do about flavors and textures, aesthetics.  For a week I’ve anticipated this day when I knew I’d have time to attempt these delicious and gourmet cookies.  I’ve cheered and assigned duties (“you scoop sugar” and “can you crack that egg for me?”) and I’ve had those grandiose delusions of being Mom of the Year with baking time—and I succumb to this emotionally destructive roller coaster practically daily (the “oh yeah, THIS will secure the ‘Mom of the Year’ title!” delusion).


Everything was going well.  Kids were having fun.  And then they got bored and meandered off.  The pinwheels were rising on the cookie sheet, covered with a tea towel. The most beautiful ones on the first sheet inspired my photographic creativity and I thought “THESE will be the ones for the pictures, for the blog!”   My four year old decided to come join in again, and touches the edge of the cookie sheet which I had haphazardly shoved to the edge of the table…not the edge, just beyond the edge.  His little hand hit the corner and flipped the cookie sheet into the air.  Pinwheels indeed pinwheeled into the air, beautiful cream cheese pinwheels spinning in slow motion, crashing onto the floor.


My reaction was immediate—I drew a deep breath which was to be exhaled in some form of overdramatic disappointment, and on the exhale I looked down.  A beautiful baby boy stood before me, his blonde hair sticking up in the back, his blue eyes welling up with tears, his lip quivering.  I exhaled deeply.  I wanted to scream about how he ruined them.  I wanted to shout “OOOOOUUUUTTTT OF MOMMY’S KITCHEN!!!”

But what was my prayer just this morning, about the atmosphere in our home?  Dear Lord help me!  He stood there looking up, with teardrop-shaped eyes and a look of utter fear and disappointment on his cute little cheeks, his fingers clutching the brown neck strap of his CARS movie apron.


“Peanut, do you know you are more important to me than cookies?” The muscles in his face relaxed and he dropped his hands to his sides, making eye contact.


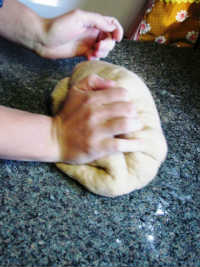
And you know what, the cookies taste better than they look.  I was at a friend’s home last week to make Challah bread with her.  She was kneading and looked up to tell me, “I always pray for the eater when I knead.  My most important ingredient is love.” Kneading Challah

So I could have had perfect pinwheels.  The picture would have been beautiful, you might have forwarded the link on Facebook, and everyone would forget them two days later.  But I would have not experienced the love of sharing cookie-baking time with my children.  My son might not learn what a cup of something looks like, or what it means to whip the egg white.  And I might have permanently damaged a hurt little boy who needed unconditional love in the face of his mistake.


So my cookies, this time, were made with love.  I hope that you enjoy this recipe.


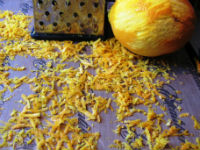
Dehydrating Orange PeelDehydrating Orange Peel

Be very sure to by organic and/or local oranges if at all possible.  If not, please wash them extremely well with a vegetable wash to get any type of residue off of the peel.   Simply grate the peel, place it onto a paraflexx sheet, and approximately 12 hours later you will have dehydrated orange peel for your pantry!

 I would put this recipe into an Intermediate category because of the number of steps and the various rise times.  Also, these are not very sweet cookies and compliment a cup of tea very nicely! My husband thought that a few minor modifications would transform this into an appetizer recipe!

Oh, and make sure you don’t dangle your cookie sheets off the edge of the table!

Pinwheels

Orange Cream Cheese Pinwheels

Makes 2 dozen


  • 3 3/4 cups flour (soft white is best)
  • 1/3 cup brown sugar
  • 1 Tbs yeast
  • 1 ½ Tbs grated orange peel (less if dehydrated)
  • 1/2 teaspoon salt
  • 1/2 cup milk
  • 1/2 cup butter
  • 1/4 cup water
  • 1 egg
  • 1 egg white

FILLING:

  • 1 (8 ounce) package cream cheese
  • ¼- ½  cup brown sugar
  • 1 Tbs lemon juice
  • Chocolate Chips, optional, or…
  • Apple Butter, optional

EGG WASH:

  • 1 egg white
  • 1 teaspoon water
  • Powdered sugar, optional


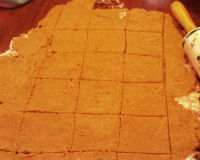
Step 1: In a mixing bowl, combine 2 cups flour, sugar, yeast, orange peel and salt. In a saucepan, heat milk, butter and water just until the butter has melted, and then add it to the dry ingredients. Stir just until moistened. Whip the egg & egg white in a separate bowl for 2 minutes. Stir in enough remaining flour to form soft dough. Cover and let rest for 10 minutes. Turn onto a lightly floured surface. Roll out into a square and cut into smaller squares (approximately 3 inches).

Cut into squares

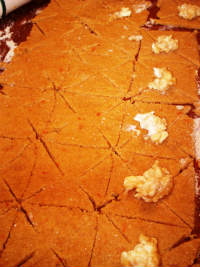
Step 2: In a saucepan (re-use the original from step 1), warm/melt the filling ingredients, careful not to burn (or use the microwave for 15 seconds).  To form pinwheels, diagonally cut dough from each corner to within 3/4 in. of the center. Then put the dime-sized dollop of filling into each one, placing a chocolate chip or two in there if desired.  Fold every other point toward the center, overlapping pieces. Pinch to seal at the center. Place 3 in. apart on greased baking sheets. Cover and let rise in a warm place for 30-45 minutes.

Cut slits, dab of filling

Step 3:  Grease cookie sheets. Beat egg white and water; brush over pinwheels. Sprinkle with sugar, extra orange peel, or leave plain. Bake at 350 degrees F for 15 minutes or until lightly browned. Remove from pans to cool on wire racks.


ENJOY!

Gear Review: Stronghold Haywire Klamper

We plan on rolling out a lot of new products in 2012.  This is a review of the Stronghold Haywire Klamper.

I am especially proud to present this product because not only are we the only retailers for this product on the internet, it is also made right here in NW Montana where we live.

We called upon our independent gear review staff member Jackson to put this item through the paces, assess its strengths, weaknesses and possible uses.

Gear Review: The Stronghold Haywire Klamper by Jackson


I received this interesting little tool after Wilson contacted me about this product.  He was looking for someone to test it out for functionality, durability, usefulness and uses.  I never buy a tool or an item unless I can come up with multiple uses for it.  Granted I do have tools that only have one use but not every tool can be used for multiple tasks.  This little Haywire Klamper is one that has untold amounts of useful applications.


I received the Haywire Klamper in the mail and excitedly pulled it out of the plastic bag and all I could do was gaze at it. I then said out loud, “What in the world is this thing?”  As I moved it between my hands turning it over and over trying to figure out how it was used my smarter side walked up and grabbed the instructions and began to read.  She quickly showed me how it was supposed to go.  If only I would have looked at the instructions I would have seen the pictures showing its proper use.  I like having pictures as that is the kind of guy I am.


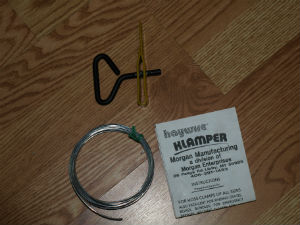
The instructions are extremely clear and easy to understand, even for a simple guy like myself.  As mentioned though the pictures help for those more inclined towards that method of learning.  The instructions also include proper lengths of wire needed for the size of clamp you are making.  I pulled the rest of the items out of the bag which included a roll of 14 gauge wire and a pre-made 5/8 double strength clamp.

Contents

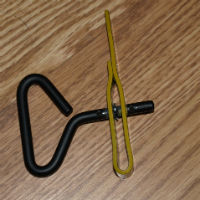
Here is the tool itself.

close up


Of course next on the agenda was to find my first klamping victim.  I grabbed my wooden hammer to just see how the tool worked.  It does not take a lot of force to tighten down the wire as I discovered as it sunk deeply into the wood.  Twisting the handle is very easy and you do not encounter a lot of resistance while doing it, yet the klamp is extremely tight, but with just the lifting of the wire ends the klamp becomes loose and can be removed.


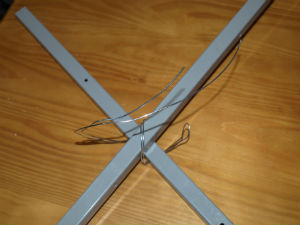
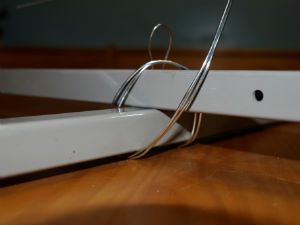
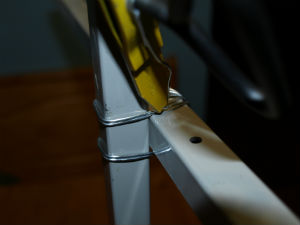
The first step is to cut your wire to the proper length.  The instructions give you the length of wire needed for klamping ¾ inch all the way to 4 inch hose.  Here we are experimenting with klamping two metal pipes together.  Form a loop in your cut wire.


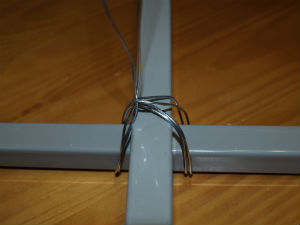
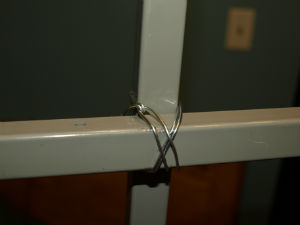
Now rotate the wire in a “x” pattern around the metal bars.


Picture4


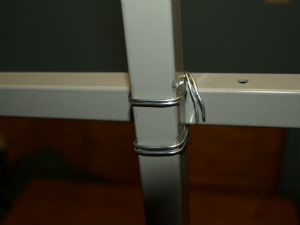
You can see the loop just sticking over the metal bars.


Picture 5


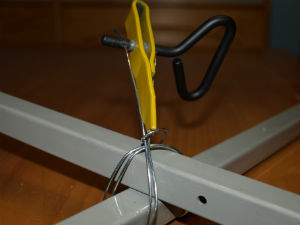
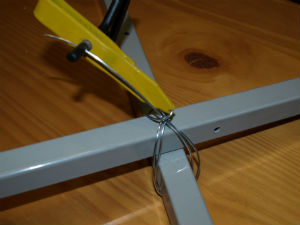
Insert your free ends into the loop and connect the Haywire Klamper.


Picture 6


Picture 7


Begin tightening by rotating the handle until it is as tight as you need it and then rotate the klamper (by pivoting on the notch) off of the wire and trim the ends.


Picture 8


Picture 9


The final product should look something like this.


Picture 10


Picture 11


 It takes a little practice but once you have the hang of it, it proceeds very quickly and easy.


I took this over to a friend who does a lot of work on cars and motorcycles.  He absolutely loved it because of all the clamping he does and the cost of wire versus buying clamps.  He attempted to distract me and get me to forget the tool as I was leaving.  No such luck.


I also took it out to my uncle’s farm.  Showed it to him and he was amazed that he hadn’t thought of it first.  (Things tend to work that way.)   But he used it to mend one of his fences, lashed a bale of hay and banded a bundle of wood with a little loop on the free end side to be able to carry a lot easier.


The applications for this tool are only limited by your imagination.  I am going to experiment with building a shelter in the woods and continue to look for “outside of the box” ideas.  This is a definite for your shop, emergency kit or bug out bag, its light, durable and extremely handy.


Remember, hope for the best, prepare for the worst, and keep looking up as our redemption draws near.


Jackson

Pantry Paratus Gear Reviewer

Canning Ground Beef

Canning Ground Beef

Canning Meat ? Yes!

Using Tattler Lids for meat canning


Home canning meat, especially ground beef, is a simple process.  The canning of meat is unlike acidic tomatoes because you will need to use pressure canner.  Pressure canning beef is the only safe way to do it, since water bath canning does not get to a high enough temperature to keep meat (and other nonacidic foods) safe.  

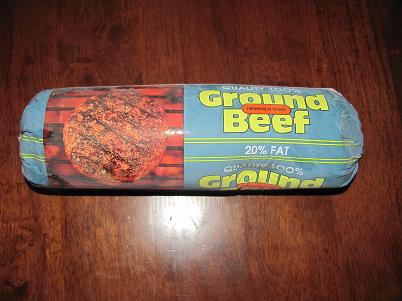
 We had a meat sale here at the local grocery store, and I wanted to try to duplicate the results from Patrice Lewis’ post about Tattler reuseable canning lids on her blog on meat canning.  I highly recommend getting grass fed meat where you can, but for this post I am just using the prepackaged grocery store fare.

ground beef sale


In full disclosure, I used 6 lbs ground beef because it was what was on sale—Patrice Lewis used ground beef because,

 “ . . . it’s meat, so it requires a high processing time in a pressure canner. And, it’s greasy and nasty and would thus put the maximum amount of stress on the lids.”

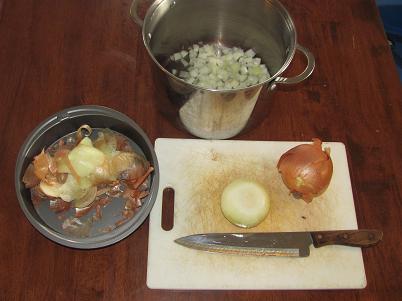
Agreed!  Since onions were also on sale (“genius!”) I chopped up two onions into chunks and put them right into the pot.  The onion outer skin (along with any other vegetable scraps in our house) goes out to the compost bin.  


chopped onions


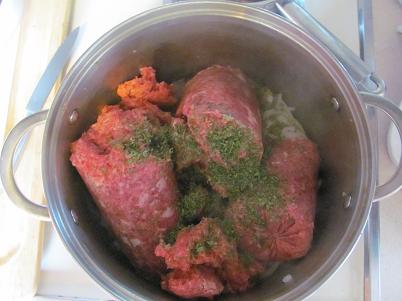
I added salt and pepper to taste as well as parsley.  How much parsley?  Well to quote my Italian aunt, “There is no such thing as too much parsley.” 


seasoned for browning

There are many canning recipes for meat, but I prefer to keep this one simple especially when I am trying to get everything prepared for winter.  After browning the meat, I load it into the canning jars with 1 ½” head space.  It is best to use the hot pack method when home canning meat and fill any remaining space with boiling water up to the 11/2” head space mark.. 

meat packed in jars


In the interest of saving time, I am also prepping the All-American pressure canner with the lid off by warming up the water in the bottom of it.  We personally use the venerable All American Model 921 pressure canner/cooker.  It has the all metal seal and is built to be used for years and years.  Anyone who is apprehensive about the rubber bullet (aka “pressure bomb” canners) that make up the bulk of the horror stories/urban legends revolving around pressure canner mishaps will be amazed at the engineering, craftsmanship and ease of use of the All American brand pressure canners.  I fully intend to leave mine to my children as an heirloom because it is built that well.  Did I mention that it is made in America?

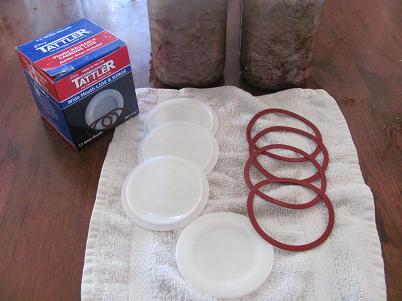
For home meat canning, I recommend the Tattler Reusable Canning Lids.  They work just as well as the lids that you can buy at the grocery or hardware store, but these are reusable and are American made.   They stay in place well and the grease does not prevent a seal under the lids quite like it does with the metal ones.   I put them in hot water for a few minutes before use.  One question we get about the Tattler lids is, “Do I have to heat them up before I use them?”  My answer remains the same, “I can with everything hot.”  My lids, gaskets, canner, water, jars and what I am canning are all hot for safety reasons.


 The instructions are printed right on the box and are easy to follow.  Here is a pictorial:

 Tattler lids and rings


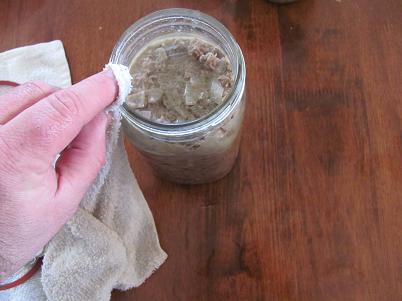
 I religiously wipe off the rims of the jars before putting the lids on the canning jar.

  wipe off the rim


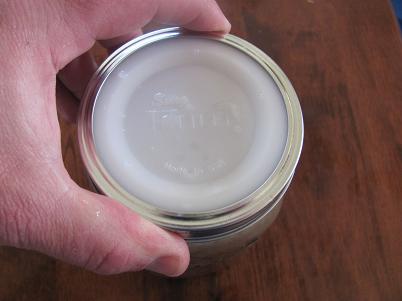
Apply the lids and rings.  Following the directions on the box, the Tattler lids new instructions call for you to screw the lids finger tight—that is it.  If you have any problems with these lids, it will be from omitting this step.  If you screw them on too tightly, it does not allow air to escape.

finger tight


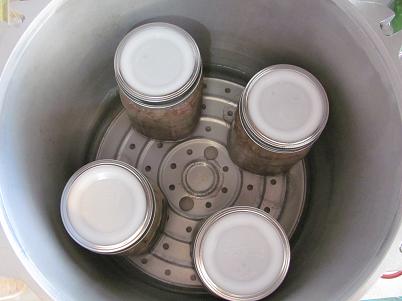
Then put the jars into the canner—simple.  Note: the spacer at the bottom of the canner.  The All American pressure canners come with a very good manual that Chaya and I have read and re-read a dozen times and have out on hand whenever we can (or “jar” if you will). 


Jars in the Canner


Follow the directions for your pressure canner and bring the unit up to boiling.  For our All American Model 921 we wait seven minutes then apply the weight on the top spout.  Note: without the weight, the canner is an “open system” and is not any different from any other pot with a tight fitting lid that you may already own.  We live just over 2000’ altitude and can everything at 15 lbs of pressure. 


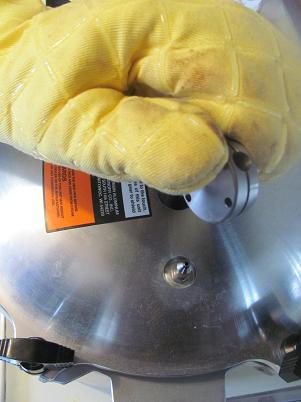
Safety tip: When putting the weight on top, please use an oven mitt;

the steam emitted from the canner can burn you.


put weight on with an oven mit


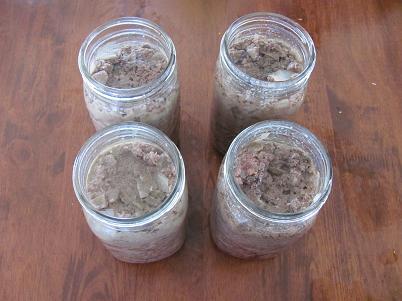
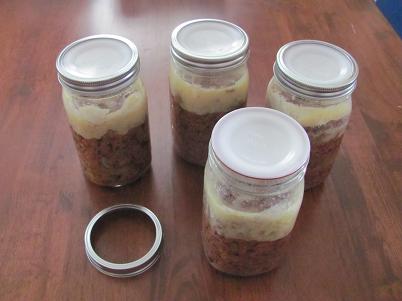
After processing for 90 minutes we now have four jars or just slightly short of 6 lbs of ground beef  perfectly sealed under the Tattler lids.  Since these are made of BPA free plastic they do not have the quintessential “ping” sound as they seal under the ambient atmospheric pressure.  However, if you look at them from the side you can see if they are sealed or not.  Chaya applies the “wiggle test”.  She uses her thumb on the lid to see if it will push or give.  If it does not budge, it is sealed.   I have very few failures with Tattler lids.  And I can pinpoint them to user error—either over-screwing on the ring, or failing to screw the ring on tightly afterwards, etc.  If the lids are good enough for meat canning, then they are certainly good enough to can your other foods as well.


Jars of Properly Canned Beef


Once the jars are removed from the canner I prefer to let them set undisturbed.  An old tip from days gone by is to flip the jars upside down; this seems to be controversial to some.  I have done it both ways with success both ways.

 Before I called this done, I removed the rings and washed the jars gently with dish soap because they will likely be greasy to the touch and have grease especially around the ring . 

 If you are new to canning, or just like to watch someone who really knows what they are doing with canning please visit SimplyCanning.com.  It is run by Sharon who is a good friend to Pantry Paratus.  Whether you have been canning for a day or a decade you can get some very good information from her website. 

 Regarding the finished product: “Oh look at the fat, isn’t that gross?” 

 My answer—“Not really.”  What is in the jar, is what was with the ground beef (20% fat as packaged—I did not add any oil during the process); after the temperature cooled with the cooked product in a clear jar you can now see it. 

 Despite the typical body composition of today’s average process food fed person, if food becomes hard to get, one of the hardest items to get into your diet will be fat. Having your own animals to produce this resource that every healthy body metabolism needs may be the only reliable way to get this into your regular diet.  Store bought industrial processed seed ois wil not last long, go rancid after awhile depending on temperature and humidity and are horrible for you.  JWR has had great results deep freezing olive oil for up to five years.  

Canning meat at home is not hard, anyone can do it.  I recommend having the right tools, and for that it starts with the right pressure canner and quality lids.  Leave a comment if you like on canning meat at your place–we would love to hear from you. 

 Wilson

Pro Deo et Patria


Proviso:

 Pressure canning done in the proper way is safe, but if you do not follow the instructions of your canner, then you will run the risk of serious injury.  We sell, personally use and recommend the All-American pressure canner because it is very well constructed, reliable and very safe—when used properly.

Homemade Bread Recipe–Pantry Paratus Style

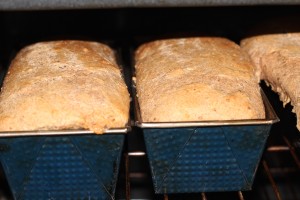
Bread in Oven

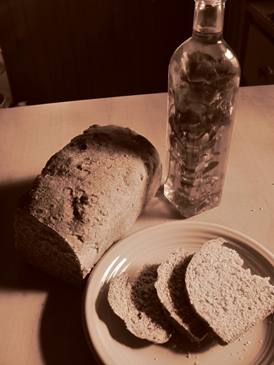
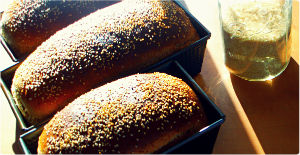
 Pantry Paratus bread with infused olive oil

Pantry Paratus Style


This is my personal homemade bread recipe; I hope you enjoy it.  I use this dough for many purposes as it is the base for herbed breads, rolls, hamburger buns, stuffed loaves—YUM. 

 Bread in Norpro Nonstick Pans

I have worked with this recipe for bread over the years and am confident with it.  It also continues to evolve from time to time.   Get creative, and leave a comment below telling me what you have tried and how you have modified it to fit your family’s needs.  If you need a high altitude version click here.

If you avoid all soy, skip the lecithin.  Use it if you want to give your bread a longer shelf life or if you have had problems with the bread being too crumbly in the past (and you had difficulty using it for sandwiches).   If you want to skip the soy but troubleshoot crumbly bread, consider grinding flax seed and letting it soak in a tablespoon of water for a minute–it will serve well as a binder.

Recipe for Whole Wheat Bread

 Yields:  three loaves in 10’’ pans

  • 4 cups warm water (leftover water from boiling potatoes is great)
  • 3 tablespoons yeast
  • ½ cup flax seed, ground (optional)
  • 3 tablespoons lecithin (optional; if omitted, consider 3rd egg as a binder)
  • ¼ cup gluten (recommended but optional)
  • 2 tablespoons salt
  • 14-17 cups hard red or hard white flour (I use 15 cups at 3,000 ft altitude, average weather)
  • 1 cup olive oil
  • 1 cup honey
  • 2-3 eggs
  • Sesame seeds (optional)

Pull out all ingredients and have them handy to speed up the process and cut down on the mess.

 I Crack my eggs into a separate bowl, stir, and let them warm to room temperature for best results.


  Step 1: Add yeast to warm water (approx. 110-115 degrees) and proof to ensure the yeast is viable.  Add oil and honey (oil allows the honey to pour easily from your measuring cup).  Let this sit until you see bubbling yeast activity. 

 Step 2:  Stir in flax, gluten, lecithin, salt, and eggs. 

 Step 3:   Add flour.  If you want to proof your flour (to lower the Phytic acid content) do this now by only adding 5-10 cups of the flour, stirring, and letting it sit as desired.  Otherwise, add all the flour you can still stir.  I recommend that you mill flour fresh for highest nutritional values.

 Step 4: Oil or flour your work surface.  Dump your flour out onto the table, adding the rest of the flour.  Remember to oil your hands to eliminate sticking as you knead the dough. 

 Step 5: Knead the dough approximately 10-12 minutes (I sing through “The Lord’s Prayer” twice), or until the dough is soft to the touch, firm and yet still pliable.  Avoid adding too much flour during the kneading process—it is a common mistake that can make your bread dry. 

 Step 6: Place the dough back into the bowl and cover.  Let sit for one hour.  If you have a cold kitchen, remove the trays from your Excalibur dehydrator and proof the bread in there at approximately 80°.

 Step 7: Punch down your dough to release the gases.  Then form into loaves with the seam down and place into the greased or floured bread pans.  Lightly oil and add seeds if desired.

 Step 8: Preheat your oven to 350 degrees. 

 Step 9: Cover your loaves again and let them sit for 15-30 minutes longer (not necessary at higher altitudes). 

 Step 10: Bake for approximately 30 minutes.  Check for even browning and rotate if needed (every oven is different).  If they brown too quickly, cover with foil for the first half of baking.  

 I also did a separate blog entry to give the why every ingredient appears in the wheat bread recipe, some science behind the reactions and what happens if you omit or substitute an ingredient.  Bread baking is so much fun, I hope that you enjoy it as much as I do.

For best nutrition results, use a whole wheat bread recipe like this one to ensure that you are getting the healthiest results.  Flour that you mill at home has superior nutrition to the dead flour that you buy on the shelf at the grocery store. 

Bread in Oven
Bread in Oven

High altitude tip:  I thought that I knew how to bake bread until I tried it at my best friend’s house in Colorado Springs.  If your altitude is anything higher than approximately 2,000 ft, you might find you need to add more moisture to your bread dough, adjust your rise time, and adjust your cooking time. Try this high altitude bread recipe variant.

If you would like to see a video of this bread recipe, simply sign up for our news letter and you will receive a video link in your email walking you through step by step.  I recently had tasted someone’s second loaf of bread (ever) that she made after watching my video-and it came out great! 

If anyone modifies this specific recipe, or if you have another bread recipe altogether,  please leave a comment.  I would love to hear what works for you!


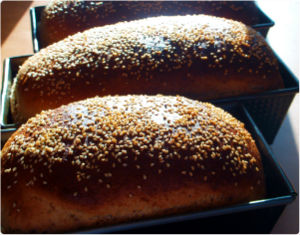
Bread with Frontier Sesame Seeds


Enjoy!

 Chaya