
Pantry Paratus Style
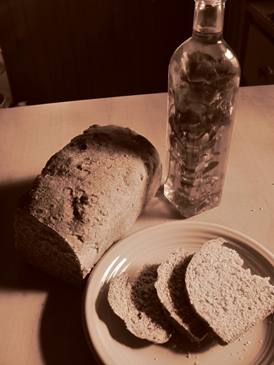
This is my personal homemade bread recipe; I hope you enjoy it. I use this dough for many purposes as it is the base for herbed breads, rolls, hamburger buns, stuffed loaves—YUM.

I have worked with this recipe for bread over the years and am confident with it. It also continues to evolve from time to time. Get creative, and leave a comment below telling me what you have tried and how you have modified it to fit your family’s needs. If you need a high altitude version click here.
If you avoid all soy, skip the lecithin. Use it if you want to give your bread a longer shelf life or if you have had problems with the bread being too crumbly in the past (and you had difficulty using it for sandwiches). If you want to skip the soy but troubleshoot crumbly bread, consider grinding flax seed and letting it soak in a tablespoon of water for a minute–it will serve well as a binder.
Recipe for Whole Wheat Bread
Yields: three loaves in 10’’ pans
- 4 cups warm water (leftover water from boiling potatoes is great)
- 3 tablespoons yeast
- ½ cup flax seed, ground (optional)
- 3 tablespoons lecithin (optional; if omitted, consider 3rd egg as a binder)
- ¼ cup gluten (recommended but optional)
- 2 tablespoons salt
- 14-17 cups hard red or hard white flour (I use 15 cups at 3,000 ft altitude, average weather)
- 1 cup olive oil
- 1 cup honey
- 2-3 eggs
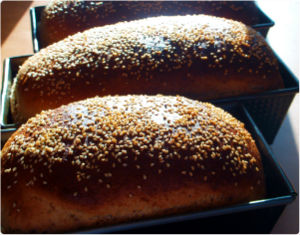
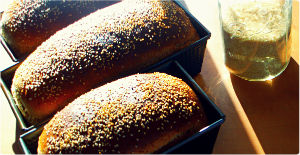
- Sesame seeds (optional)
Pull out all ingredients and have them handy to speed up the process and cut down on the mess.
I Crack my eggs into a separate bowl, stir, and let them warm to room temperature for best results.
Step 1: Add yeast to warm water (approx. 110-115 degrees) and proof to ensure the yeast is viable. Add oil and honey (oil allows the honey to pour easily from your measuring cup). Let this sit until you see bubbling yeast activity.
Step 2: Stir in flax, gluten, lecithin, salt, and eggs.
Step 3: Add flour. If you want to proof your flour (to lower the Phytic acid content) do this now by only adding 5-10 cups of the flour, stirring, and letting it sit as desired. Otherwise, add all the flour you can still stir. I recommend that you mill flour fresh for highest nutritional values.
Step 4: Oil or flour your work surface. Dump your flour out onto the table, adding the rest of the flour. Remember to oil your hands to eliminate sticking as you knead the dough.
Step 5: Knead the dough approximately 10-12 minutes (I sing through “The Lord’s Prayer” twice), or until the dough is soft to the touch, firm and yet still pliable. Avoid adding too much flour during the kneading process—it is a common mistake that can make your bread dry.
Step 6: Place the dough back into the bowl and cover. Let sit for one hour. If you have a cold kitchen, remove the trays from your Excalibur dehydrator and proof the bread in there at approximately 80°.
Step 7: Punch down your dough to release the gases. Then form into loaves with the seam down and place into the greased or floured bread pans. Lightly oil and add seeds if desired.
Step 8: Preheat your oven to 350 degrees.
Step 9: Cover your loaves again and let them sit for 15-30 minutes longer (not necessary at higher altitudes).
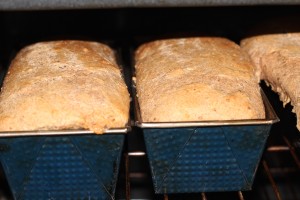
Step 10: Bake for approximately 30 minutes. Check for even browning and rotate if needed (every oven is different). If they brown too quickly, cover with foil for the first half of baking.
I also did a separate blog entry to give the why every ingredient appears in the wheat bread recipe, some science behind the reactions and what happens if you omit or substitute an ingredient. Bread baking is so much fun, I hope that you enjoy it as much as I do.
For best nutrition results, use a whole wheat bread recipe like this one to ensure that you are getting the healthiest results. Flour that you mill at home has superior nutrition to the dead flour that you buy on the shelf at the grocery store.

High altitude tip: I thought that I knew how to bake bread until I tried it at my best friend’s house in Colorado Springs. If your altitude is anything higher than approximately 2,000 ft, you might find you need to add more moisture to your bread dough, adjust your rise time, and adjust your cooking time. Try this high altitude bread recipe variant.
If you would like to see a video of this bread recipe, simply sign up for our news letter and you will receive a video link in your email walking you through step by step. I recently had tasted someone’s second loaf of bread (ever) that she made after watching my video-and it came out great!
If anyone modifies this specific recipe, or if you have another bread recipe altogether, please leave a comment. I would love to hear what works for you!

Enjoy!
Chaya
