Preserving Summer’s End (Part 1)

salting zucchini for the dehydrator

Preserving Summer’s End (Part 1)

How to Dehydrate: Apples, Zucchini, Onions, Carrots

If you are like me, you loathe paying $4 for mealy tomatoes in January.  There are two things that really put me over the edge about that: one is that tomatoes are cheaper in the summer, much cheaper! And secondly,  a January tomato from the store does not even taste like a tomato.  So, I have done all that I can over the years to leverage food preservation to our advantage because I really like tomatoes, but not at $4 lb!

$18 at the Farmers Market

In the last blog, I gave a shout out to all the people faithfully manning the booths at the farmer’s market, we really do appreciate it.  In the above picture, here is my haul for $18—not bad.  Now to preserve it all.  As a reminder, nothing goes to waste.  If you cannot use it, your soil can so compost it.


Apples

Dehydrated Apples

The first thing that I processed was the apples by running them through the dehydrator.  In retrospect, I wish that I would have done the herbs first because they go so quick, but are so aromatic that they can impart flavor to other things in the dehydrator like the apples and should be dehydrated alone.  But back to the apples: here is how to do it:


Apple Peeler

We use this apple peeler from Pantry Paratus, but you can check out our other great apple tools in our Fruits & Nuts section.


You will find that nutritious apples with dense juicy flesh dehydrate best when they are sliced to uniform thin slices.  The best way to do this is the apple peeler.  We leave the skin on as fiber is always good to have, but if you like them peeled by all means the apple peeler and slicer will make you wonder why you ever did this with a paring knife.  It’s also great fun with kids.


How to dehydrate apples

Next, I take the “apple spring” and run a knife down one side to cut the coils and make the rings from the coil-sliced apple.  To control the amylase sugar browning on the apples, I dip them in lemon juice (about a ¼ cup to 2 cups of water).  Chaya juiced & froze an entire box of lemons earlier in the season; I used that but I also used the stuff from the grocery store too.

Dip in lemon juice

I happen to have this handy thrift store glass cup (picture above)  which is exactly the size of the apples so that I can economize my lemon juice and make it go further.


Apple Rings

Before

Dehydrated Apple Rings

After


I like to do my apples low and slow.  That is put them in the dehydrator on low heat for a longer period of time.  To me, the apple rings are dehydrated and ready to put away when they have a noticeable click and bounce when you drop them on the table.  I like mine to snap when you break them, but other people like theirs chewy so pull them out of the dehydrator when you like their texture.


Zucchini

Dehydrated Zucchini


I know, I know.  I am probably the only person who cannot grow zucchini well, but these beauties are actually going to make one of my favorite snacks—zucchini chips!  Careful though, you do not want to eat too many of them, they are higher in fiber than you think!

zucchini

First thing is first, slice them up into discs.  Since zucchini dehydrates so well, you do not need to worry (as much as with other foods) about uniformity, but just get them onto the tray.

lighltly salt the zucchini

Next for zucchini chips, I like to lightly salt them.  You will be surprise how little salt you need here.  If you are putting zucchini away for long term storage, skip the salt as it will not be optimal for storage.  If you feel adventurous, sprinkle some garlic powder on them as well for a real treat.  Still not enough?  Find your favorite fresh herbs and make a pesto, dip the zucchini discs in the pesto, then dehydrate them.  I will bet that you cannot eat just one!

Dehydrated Zucchini on tray

Zucchini (especially with the light salt) dehydrates very quickly, so you can usually turn these around in a day or less.


Onions

Dehydrated Onions

These onions from the farmer’s market were so tasty, we were eating them like an apple.  Usually, this indicates low sulfur in the soil, but I am not complaining here.  Actually, I found a new side salad dish: fresh lentil sprouts, some finely chopped fresh farmer’s market onions, light sea salt, parsley and some nutritional yeast to taste.  Wow!

Cut Onions

Slice the onions and lay them out on the tray.  I was not all that particular here, so the object is to just get them onto the tray.  Since they shrink so much, you can overlap them if need be.  This may mean that you have to break them apart at the end, but the increase in throughput makes up for it.


Dehydrated Onions


Chaya adds: It’s hard to explain, but the flavor seems to get even better.  If you are from the Midwest, you remember those chemical-laden onion-things that people put on green bean casserole, right? Well, these are better, way better.  Very nearly a candy.

 Carrots

Dehydrated Carrots

The last thing that I wanted to show you today is the carrots.  These were itty bitties that the kind lady at the farm stand gave to Bugaloo, my daughter,  a token for how brave she was to even come out with her rain coat and boots.

Shred Carrots

The first thing that I do is to pick off the stems (which are actually related to parsley and are edible) as well as the stringy root bits and I set them aside.  Stop by for part 2, and I will show you what to do with those.  Since these carrots were so small, they were hard to shred.  You can dehydrated carrots sliced, too, but Chaya prefers them shredded because they rehydrated much more thoroughly and quickly.


Shredded Carrots

Shredded carrots can be placed directly on the tray.  Actually, I just shred them right over the mesh dehydrator mat—done!  If you are going to cut the carrots into coins, I recommend blanching the cut slices first, then dehydrating them as this will prevent case hardening.

Dehydrated Carrots

Come back next time for Preserving Summer’s End Part 2.  I will show you how to dehydrate herbs (read: $avings!) as well as my Montana Kimchi.  See you then!

Pro Deo et Patria,

Wilson


Knives


P.S. Do you know what the difference is between these two knives?  Why is this difference important for dehydrating?  Leave a comment with your answer.


Proviso:

Nothing in this blog constitutes medical or legal advice.  You should consult your own physician before making any dietary changes.  Statements in this blog may or may not be congruent with current USDA or FDA guidance.

Vegetable Powders: Making Them, Using Them, & Long-Term Food Storage

Vegetable Powder

 Vegetable Powders

Making Them, Using Them, and Long-Term Food Storage


Vegetable Powder


The Moms were eating lunch while the kids—claiming they were full—exited to play tag.  The subject  discussed was by no means gloriously thrilling.  Spinach.  We were talking about spinach.

“I got it on sale, overbought it, and not even the husband will touch it.  I am doomed to salads three meals a day for a week.” 

Nods of sympathy. 

I asked if she had a dehydrator; no, but it is on the wishlist she said.  I nearly prefer spinach in its dehydrated form because it makes for great pasta (or my meatballs with bechamel sauce) and is a wonderful nutritional boost to anything while the family is completely oblivious.  Sure, some might say it’s a passive-aggressive way to achieve optimal health; I prefer the term clever.   I do not think most nutrition should be sneaked; kids should understand what constitutes a healthy diet and be encouraged to eat fresh, raw fruits and vegetables.  However, complex flavors unaware to them will ultimately expand their palate so that the next time you introduce that icky green, it won’t seem so foreign—or icky.  I have personally experienced this.

 And it started with vegetable powder.

My kids were not keen on spinach, but I found that powdered spinach could work as a thickener and, if in small amounts, boost the nutrition without changing the flavor (color but not flavor).  Over time, I got lazy and then used it as flakes; I think they know it’s in there.  Like I pretend not to notice stuff the kiddos do on my weary days, I think they pretend not to notice the increased spinach flakes.  Maybe I’m wearing them down.


Dehydrated Spinach


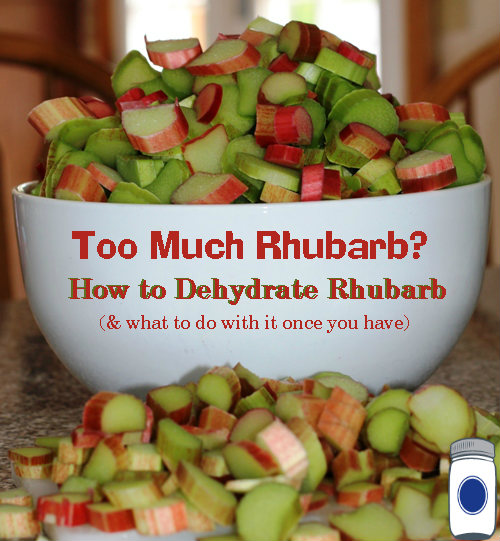
And just like my children increase the actions to which I turn a blind eye, their silence has only emboldened me.  Why stop at spinach?  Tomatoes, carrots, the possibilities are endless!  I personally powder celery, onion, garlic, tomato, carrot, and spinach.  A few weeks ago I got 5 pounds of asparagus from the local co-op.  I checked in my “Preserve It Naturally” book (which comes with an Excalibur from Pantry Paratus), and guess what????   I can powder asparagus for use in soups!  I really had no plan when I ordered 5 pounds of asparagus.  It just sounded good.  Other great soup and sauce additions are green beans, broccoli, cucumber, peas, and peppers.


Dehydrating Asparagus


 I was a primary caregiver for a child that was underweight and came from a difficult circumstance.  She just would not eat.  In desperation I turned to a  cookbook that, although had  some poor nutritional suggestions in it like vegetable oil, was written on the notion of making vegetable purees that could go virtually undetected in nearly anything.  I made spinach brownies and chickpea chocolate chip cookies, stuff like that.  The difficulty was that the pureed vegetables had to be either refrigerated for immediate use or frozen.  This, for me, was not practical.  In fact, we wrote a whole article about the hidden costs of the deep freeze (which do not even include things like losing food to freezer burn or power outages). 

Enter the Excalibur Dehydrator.  Seriously in love.  But if you really wanna hear me gush, go check out this article.  

Beyond the nutritional boost from powders, here are a few other reasons I love them:

Pantry Paratus To use as a thickener to soups, stews, and casseroles

Pantry Paratus To add a depth of flavor in unsuspecting ways (carrot powder is great in meatloaf, for instance, and a little is great in your oatmeal cookies)

Pantry Paratus Vegetable powder is seriously boots long-term food storage because its density means less quality-compromise from air exposure, and is far less bulky.

Pantry Paratus Wonderful for thickening (and nutri-boosting) your smoothies

Pantry Paratus I can jump on great vegetable deals without panic that I have more than I can use

 To make Vegetable Powders: Check the food-by-food list in the Preserve It Naturally book available at Pantry Paratus, to determine the best method for that specific food.  If the food requires blanching, see the basic method here.  Here’s a basic breakdown, so you know what you are getting into:

Spinach and other leaves (herbs, raspberry leaves, kale, etc) get a rinse and then go straight into the dehydrator.  To powder leafy greens you can pulse them in a food processor,  break them up with your hands, or use a mortar and pestle.

Garlic and onion get sliced or chopped, and then you simply arrange them onto trays.  Once dehydrated, pulse in a food processor or use a mortar and pestle for small, immediate-use quantities.

Overwhelmed by Carrots

Other vegetables such as carrots and asparagus should be cooked (boiled or steamed). Once cooked, you can puree them and spread onto a paraflexx sheet.  This is by far the simplest method, although you can blanch, slice, and dehydrate.  However, I find that dehydrated sliced vegetables are more difficult to pulse into a fine powder. 

Dehydrating Vegetables as Leather


Once these vegetable leathers have dehydrated to a dry crispness, you can use them in cooking as sheets or flakes, or powder them using a food processor or mortar and pestle.

Putting Dehydrated Vegetables in Food Processor

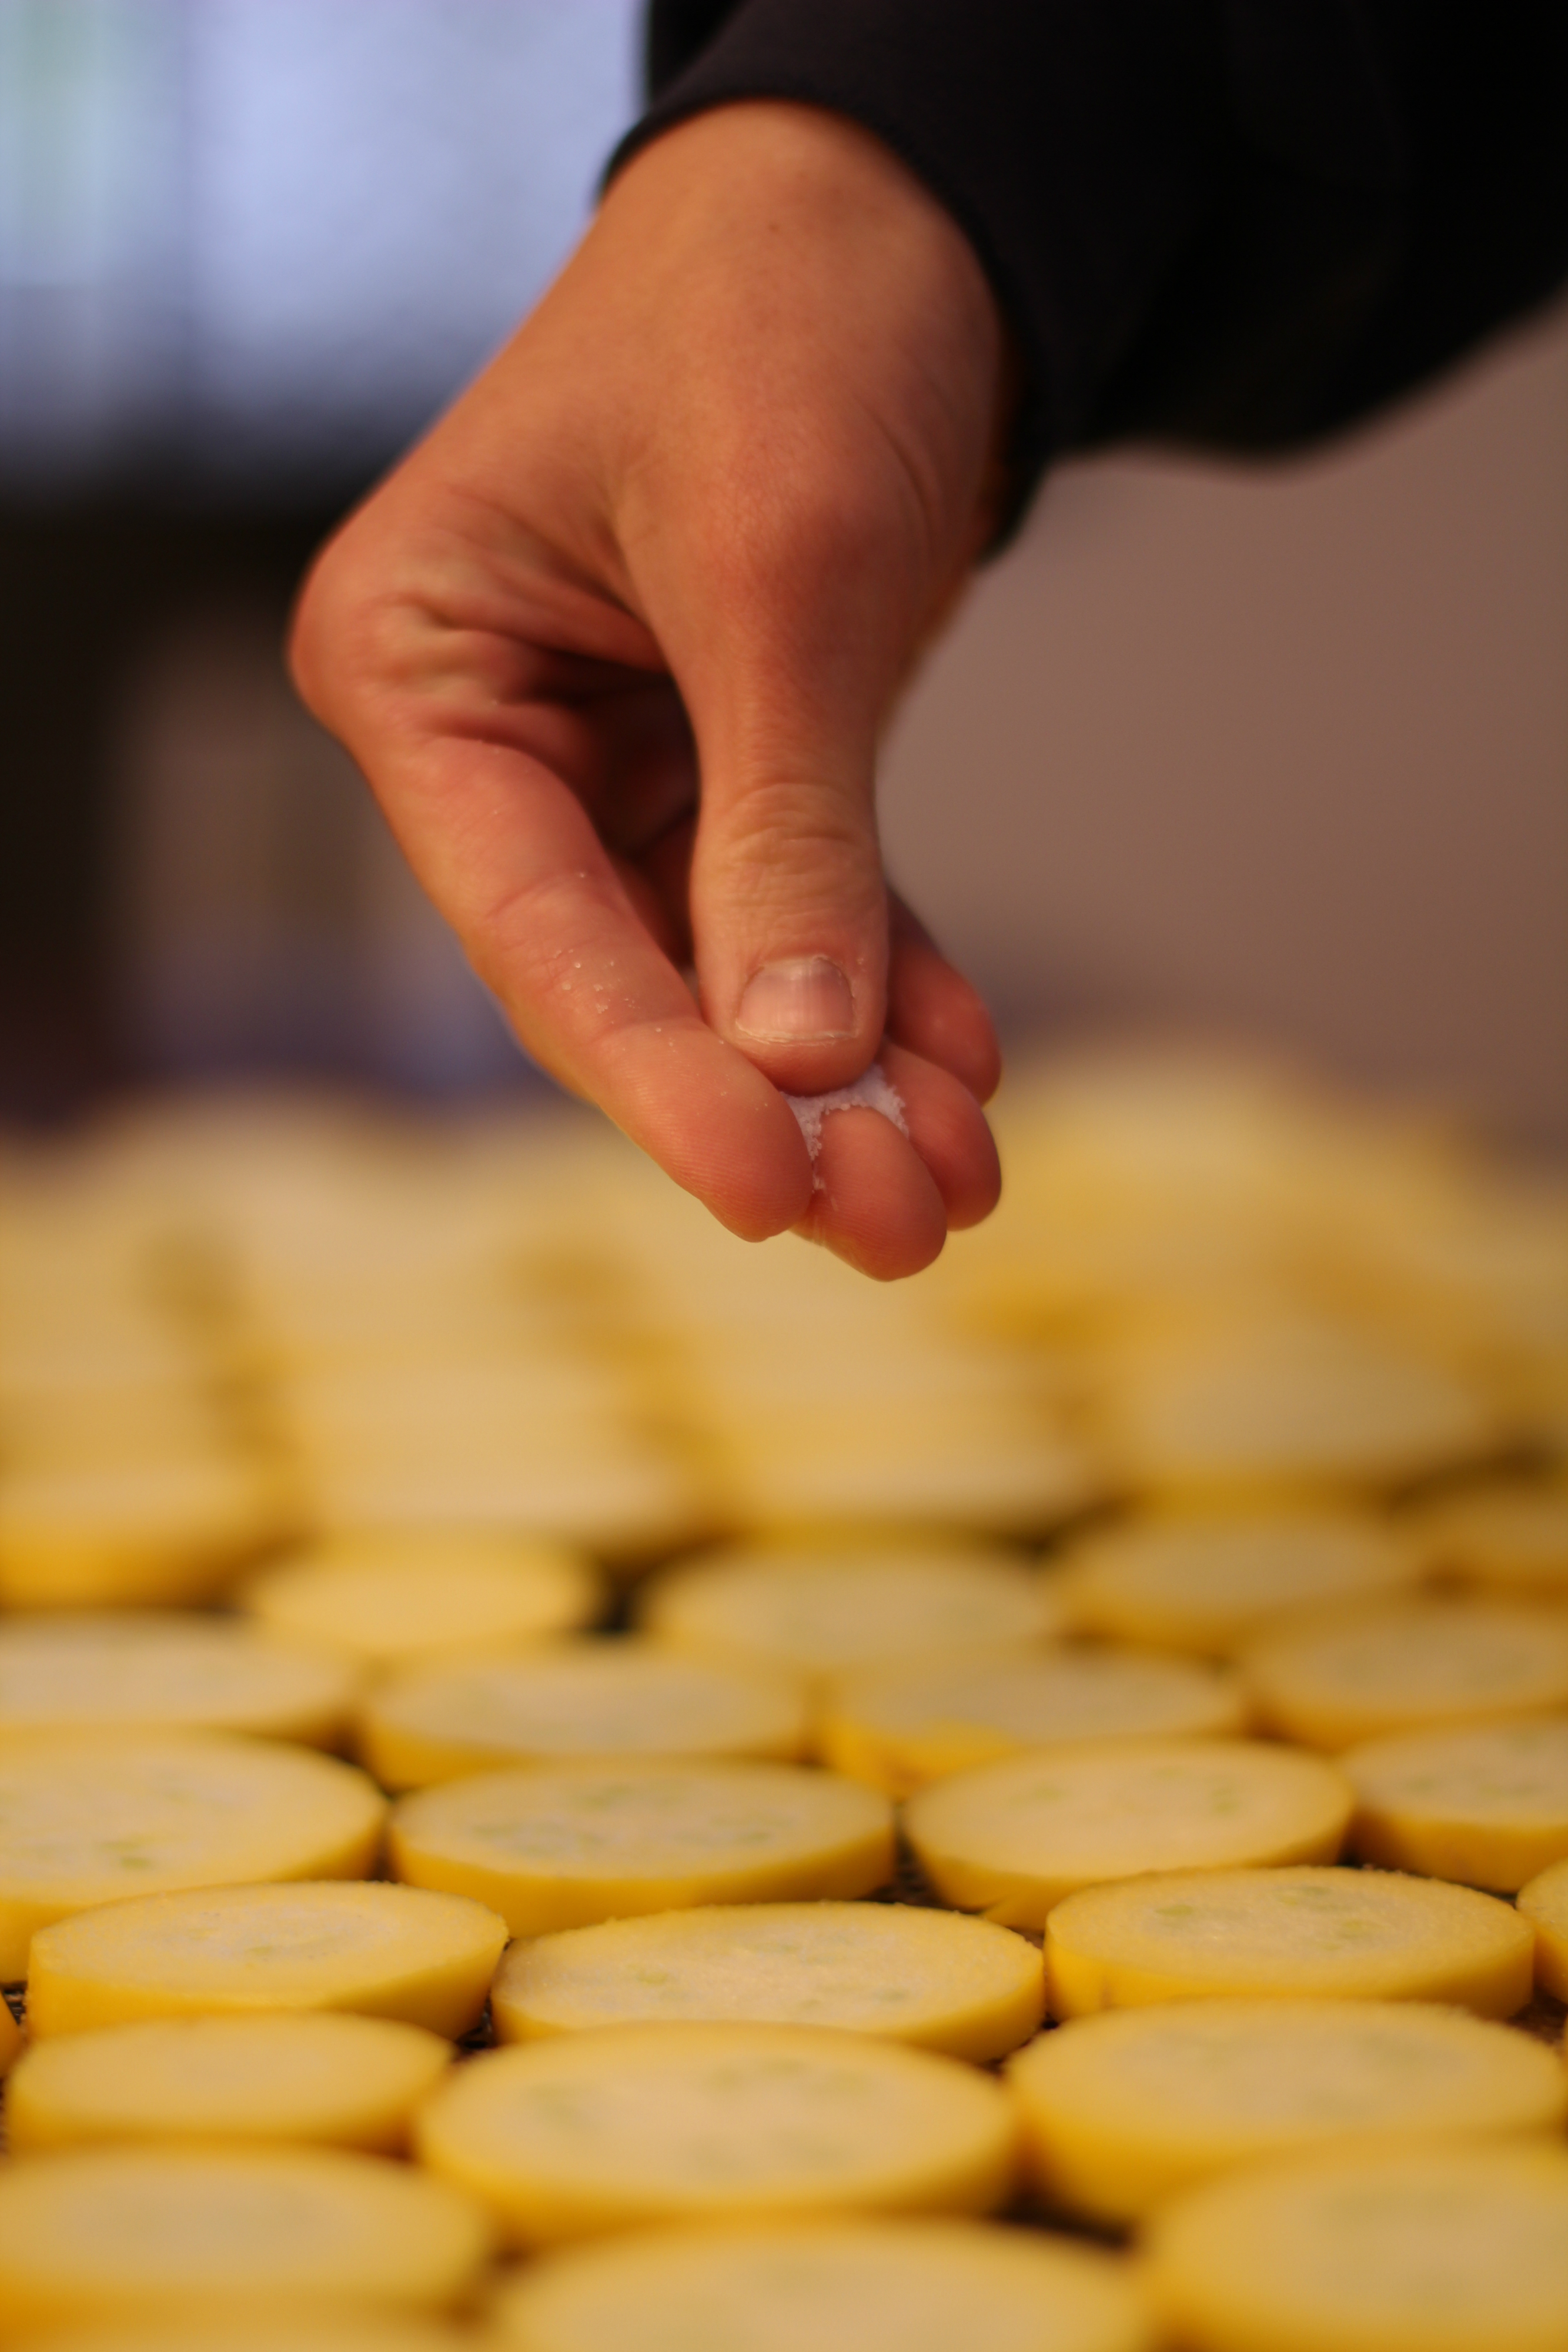
Tomatoes and zucchini can be done to your preference; cooked or raw, peeled or unpeeled, sliced then in food processor, or as vegetable leather.  My preference for these is to puree, make leather, and then keep some as sheets and powder the rest.

Some Basic Guidelines:

1)      Dehydrate the food item according to specifications given in Preserve It Naturally until it passes the “clink test.”  Many foods should snap when you break them, and you can check them by dropping onto a table.  If they make a clinking sound, you have sufficiently removed the moisture. 

2)      Some foods will powder easily with mortar and pestle, but a food processor will be required for most foods and for larger quantities. 

3)      Store the powdered vegetable in vacuum sealed bags for long term food storage, and mylar bags will help eliminate the light and other variables.

4)      For immediate use, place the powder in a pint-sized jar with an oxygen absorber and keep it away from heat, steam, and light.


Put this on your calendar for this week.  Then come back here and share your ideas with us!

Produce, Prepare, and Preserve,

Chaya

Proviso: Nothing in this blog constitutes medical or legal advice. You should consult your own physician before making any dietary changes. Statements in this blog may or may not be congruent with current USDA or FDA guidance.

Rhubarb Harvest: Dehydrate It!

How to Dehydrate Rhubarb

Rhubarb Harvest

–Dehydrating Your Surplus


  Rhubarb is a natural spring-time treat.  Its beautiful greenery brightens up the yard and it gives you an excuse to share something with your neighbors.  We all know how delicious it can be in preserves or muffins, in sauces or other recipes…but with the tangy-tartness not many of us can eat much at once!

  Dehydrate Your Extra Rhubarb

 It’s a matter of slicing it and arranging it onto the Excalibur dehydrator tray.  You do not have to do anything to it prior to dehydration.  Make sure you start with clean, healthy, freshly-picked stalks.  Remember that the leaves are poisonous and must be discarded onto your compost.  The best way to keep them away from young children is by snipping them off of the stocks before even bringing them in to the kitchen counter.  Little hands have a dangerous way of surfing the countertops for something that looks appetizing, so help protect your little ones by eliminating the temptation.


Rhubarb Leaves Are Poisonous 

Although you really need to start with the freshest rhubarb possible, dehydrating it is a great way to preserve stalks picked earlier that are starting to bend (like celery).


Slicing Rhubarb 

 Turn the temperature on your Excalibur to 125º.  Because the water content is so high, expect extreme shrinkage.  You might want to use paraflexx sheets (easier but not necessary on these).   In our dry Montana weather, it takes about 8 hours to dehydrate; it can take you longer depending on your climate.

 Dehydrating Rhubarb

 Ways to Use Dehydrated Rhubarb

 You can really use it in all of the same summertime rhubarb recipes you love.  Just remember that if you are baking with it that you will need to either reconstitute the rhubarb in water first, or to adjust the recipe’s liquids to reflect the addition of a dehydrated ingredient.

Dehydrated Rhubarb 

Meat Sauce:

Put approximately ½ cup dehydrated rhubarb in a saucepan with 1 cup water and 1 cup apple juice.  Stir over low-to-medium heat, adding either a starch (non-gmo cornstarch, tapioca starch, etc) or a pinch of flour that you have mixed separately into warm water, to prevent clumping. 

 It is so delicious with pork, that I rarely serve porkchops without this sauce served on the side.

 Meat glaze:

Pulse  dehydrated rhubarb in a coffee/herb grinder, and mix it in just like that into some homemade strawberry preserves.  Baste onto your pork chops—delicious!

 Kombucha & herbal tea flavoring:

This is how I have been drinking kombucha (fermented tea) all week.  I have been adding the dehydrated rhubarb to the jar of kombucha and refrigerating it until I am ready to drink it.  When I am ready to drink it, I strain all of the rhubarb (and the stringy bits associated with the fermenting culture) out.  Very refreshing!


Homemade Marshmallows:

 Making marshmallows at home has become extremely popular for lots of reasons.  The ones from the store taste like cardboard, filled with terribly unhealthy ingredients, and cannot compare to the delight of a homemade confection.  In fact, homemade marshmallow recipes abound  and I need not clutter the blogosphere with my adaptations of other recipes (maybe if I can perfect it, I will).  But this is what I do:  I pulse the dehydrated rhubarb in my coffee/herb grinder, and mix with organic cane sugar for sprinkling on the finished marshmallow.  It is wonderful!

 Sour Candy: 

I am sure you will come up with your own creative uses—my children like to eat it as a sour candy.  I have been known to sneak a piece or two for the same reason, but it’ll nearly make your eyes water! 

 Leave a message below and tell us how you incorporate the dehydrated version of a summertime favorite!


Please feel free to pin or share any of the pictures, but please keep proper attribution.  They are property of Pantry Paratus.

Pantry Paratus is a small, family-owned company that provides top-notch resources for food preservation.

The End of the Harvest: Preserving Apples & Potatoes

The End of the Harvest

  Preserving Apples and Potatoes


Apple Rings in the Center


Farmer’s Market season is well over now, and oh how I am missing those beautiful summer days.  There is a rumor that one neighbor still has u-pick cabbage and kale, but for the majority of the produce—summer has been eaten or root cellared or “put up”.  As any standard year, I had a bounty of some things and only teases of others.  It is why I preserve the bounty—next year may not fare so favorably in what served as this year’s redundancy. 


There are several things you may have been keeping in cold storage that can stay there much longer if you prefer.  I am beginning to think that I am not the best at that method, because I begin losing food to poor quality if I am not constantly checking and maintaining the conditions.  We do not have a true root cellar right now (but I caught hubby reading this book, so I’m sure it’s coming next summer).    I have to just maximize these garden foods through delicious recipes designed to feature their homegrown flavors.


When it comes to onions, potatoes, apples, and garlic, I do use the cold storage method during the craziness of harvest time.  But this time of year when food preservation has normally come to a standstill, I pull them out of the cupboard and preserve what is noticeably more than we can eat within the next 2-3 months.  Truthfully, I prefer to have many of these foods in their dehydrated form because of the flavors and versatility.  A cold storage apple becomes “mealy” to me about 4-5 months (again, I need that true root cellar!), but an apple ring?  I can hardly keep those on my shelf!


Apple Rings

 The standard apple ring is simple.  Use your apple corer to make the rings.  Fill a large bowl with water and either some lemon juice or citric acid, and then drop the apples into that bowl until you are done coring/peeling them.   Our family prefers apple rings to be peeled, and I think most people do, because the peel gets a tough texture on the dehydrated apple ring.  When your bowl is full, place them on the Excalibur dehydrator trays, turn it on and walk away!  These are so delicious by themselves. 


Apple Rings


You can often find a bag of them in my glove compartment or diaper bag as an emergency snack-of-choice.  If you do them as listed above, they are perfect for snacking or for baking (remember to add extra water to your recipe to make up the difference for having used a dehydrated fruit).   My children have decided that their adopted “grandma” makes them better than I do, though, because after using lemon juice she sprinkles them with cinnamon and sugar before dehydrating!


Potatoes

A homegrown potato cannot be beaten by its store-bought counterpart.  Ever.  And so I must argue for cold storage on those, unless you are getting too many eyes and black spots.  This time of year, storebought potatoes are generally on good sales with Thanksgiving over and I will often stock up.  Our potato patch does not currently sustain our family through the year (it is a goal for next summer, though!). 


I prefer a store potato in its dehydrated form.  They tend to be dry and dull-flavored anyway (can you see my gardening bias showing through?), and a dehydrated potato slice saves the day on a weary “what’s for dinner” kind of evening?  


Dehydrated Potatoes


First, you must boil the potatoes until they are soft in the middle.  You cannot skip this step!  You do not want to over-boil them until they are falling apart, but just until soft.  I say that this is about a half hour.  I throw them into a metal bowl and place it into the refrigerator.  I save the potato water for the next day’s bread baking.  Once the potatoes are chilled, peeling is easily achieved with a paring knife.  Next, you will want to pull out your Nesco Food Slicer.  Remember, even slicing means that food will dehydrate at the same rate in your Excalibur.  Pop the slices onto the tray—it is really that easy. 


Potatoes on tray


Dehydrated potatoes reconstitute in a saucepan of water in about 15 minutes.  So my go-to meal is this:  I start the saucepan of water and dump potatoes in right away.  I pull out the cutting board and slice an onion and whatever veggies I might have on hand (Carrots? Cabbage? Garlic?).  By the time I’m done with that, the potatoes have rehydrated and everything is ready for a buttery skillet.  15 minutes in a skillet with whatever leftover meat I found in the refrigerator, served with homemade sauerkraut and…WOW!  It’s a delicious home cooked meal and an extremely healthy one in…about 15 minutes worth of work. 


Enjoy,

Chaya


Proviso:

Nothing in this blog constitutes medical advice.  You should consult your own physician before making any dietary changes.  Statements in this blog may or may not be congruent with current USDA or FDA guidance.


Dehydrating: A simple Q & A

We just finished a wonderful weekend in Dallas, Texas, as a store and as teachers, at the Self-Reliance Expo.  What a wonderful venue—if you ever have one come near you, please take the time to go.  You’ll find a wide variety of things, from homeschooling to homesteading to survival supplies.


The first reaction most people have when walking into our store is this—they head straight to our “pantry”, a 6 foot shelf full of jars.  The colors range from the bright yellow pickled eggs steeped in tumeric to the deep green of dehydrated spinach, to the red homemade jams and jellies.  The fruit leathers, the jerky, the thinly sliced dehydrated peaches, and the raspberries that melt in your mouth—these draw passers-by into our booth.  They take in the colors and produce.

pantry shelf


“I didn’t know you could dehydrate that!”

“I tried dehydrating potatoes once but mine turned black.”

We love these conversations because we often learn something new, too.  We also find that many questions are echos of the ones asked by others coming to our booth earlier.  Because of this, we thought that perhaps we’ll relate some common dehydration questions now in case you share them.


Q: How do I know if the food is fully dehydrated?


A:  If this food item is going to be an immediate snack food, such as fruit leather or chewy apple rings, you will want to leave moisture in and dehydrate to taste.  This will be based on your personal preference, and this process stops short of what you will need to store foods over long-term.  If you are dehydrating for long-term food storage you should be able to hear a “clunk” when you drop it onto the table, or it should snap when you break it in half.  Remember, these foods will partially rehydrate with moisture in the air (and start the rotting process) if you do not immediately package them properly.


Q:  How do you clean out your dehydrator?


A:  The bottom of an Excalibur is easily wiped clean with a cloth and your cleaner of choice, but it is true that the sticky trays are sometimes frustrating.  We found a foolproof way (through a customer’s brilliant suggestion) to clean the trays.  Run warm water in your bathtub and add Epsom Salts.  Let the trays soak overnight.  They will usually only need a quick rinse when you return to them.  If they need further cleaning, it will just be a simple wipe-down.

jar of dehydrated peaches


Q:  Those jars are beautiful—where did you get them?


A:  Many are standard canning jars and we pick as many up as possible at thrift stores and yard sales.  Others are empty product jars, such as spaghetti sauce.  We always save glass jars!


Q:  Can I put my food in glass jars for long term food storage?


A:  Yes!  Any jar of spaghetti sauce that comes home from the store with us is on a one way trip.  After the commercially packed contents are consumed, we save the jar.  Why would we do that?  Because the jar can either go into the waste pile or the asset column.  If I preserve part of my food surplus, I will need to put it some where.  A glass jar is impermeable by vermin, is portioned properly for use (I do not want to open up a 5 gallon bucket of cornmeal when I only need 4 cups).


The biggest variable is the lid of the jar. If the vulcanized rubber ring on the inside of the far is still pliable when you poke it with your finger nail, then chances are it will seal just fine with an oxygen absorber on the inside of the jar.  If the oxygen absorber is valid, it will mitigate the oxygen and create a seal.  Keep your long term food storage in a dark, cool place, and remember to ROTATE!


Q: What considerations are there for storing dehydrated food?


A: There are four enemies of food storage: Moisture, Oxygen, Light and Heat.  Any living thing needs moisture and oxygen to live.  Dehydrating will eliminate the moisture.  The oxygen can be mitigated with an oxygen absorber.  This also (depending on the condition of the jar and lid) create a sealed container where the “button” on the lid does not pop.  Lastly you need to protect the food from light.  The energy carried on a ray of light will have a negative effect on the nutritive value of the food according to the Second Law of Thermodynamics.  If you store the food in a mylar bag, this is much better for protecting from light.  Lastly heat, think cool and a dark place for your food storage.


Q: What is “case hardening”?


A:  It is when the outside of the food dries out too quickly and the interior has moisture locked in it.  When I am trying to cook a roast, I set the oven to a high temperature and put the meat in there to sear the outside, then continue to cook it a much lower temperature so that it stays juicy.  When I want to dehydrate a food, I want to avoid doing that.  Dehydrating is best done with low heat over a longer time.  Case hardening is when the outside is dry and the moisture has sealed into the interior of the food product and it will deteriorate and rot.  There are a few things that can cause this.  Many dehydrators have the bottom-to-top heating unit that means some trays get too much heat while others are dried insufficiently which requires rotating the trays.  Because of this, we highly recommend a dehydrator like the Excalibur because of the back-to-front design where all trays heat evenly.  We also recommend lower heat for a longer time!  Even using Excalibur’s suggestions, we typically turn the heat down ever-so-slightly and plan for a longer dehydration time (36 hours is typical).


Q:  What is “blanching” and do I need to do it?


A:  Foods that are high in cellulose and fiber such as a carrot will need to be blanched.  I suggest looking at the Preserve It Naturally book for food-by-food instructions as to whether an item needs this process.  (Note: We give this book free with the purchase of a 5 tray or a 9 tray Excalibur Dehydrator or you can purchase the book separately).  Blanching softens the outer skin of food and is easy to do.  Get a pot of boiling water and drop the food in very briefly.  Blanching does not generally take more than a minute or two (if you are at a full rolling boil).  Other items can be quickly steamed instead such as cauliflower.  Items like a potato are best to be boiled thoroughly until cooked, cooled, sliced then dehydrated.

Dehydrated potatoes

Basically, foods with a thicker outer surface than interior, such as cherries and other berries, carrots, etc. should be blanched. If an item needs to be blanched prior to freezing, it should also be blanched prior to dehydrating.  Here’s our favorite trick:  If you find frozen vegetables on a great sale, stock up!  Any items that require blanching will have already received the necessary treatment by the vegetable packers.  Just put the veggies straight onto the trays without thawing!  You have now saved substantially in both the purchase, labor and in the storage.


Q:  Did you really do this yourself??


A: This is our most common question, and I think that it conveys the notion that this is too much work or too difficult.   The home economics of dehydration means that I save exponentially by being able to buy sale items in bulk and preserve my own summer harvest—no wasted spinach for us!  With this in mind, dehydration and food storage becomes a natural way of life.  An Excalibur Dehydrator is the work horse for the do-it-yourself food storage minded family.  And yes, you can do it too.  I promise.


Parenting, Peels & Pinwheels: Confessions, Dehydration, and a Recipe

Seven years old, sitting in the Radio Flyer wagon with my best friend, handle turned in and racing down the steep hill, middle of the road.  Thrilling, fun, and scary.  Fast forward 28 years.  Parenting.  I have not experienced the outer rim of sanity since I was seven years old and flirting with a traumatic brain injury, and here I am.


I was excited about converting this recipe for you.  I’ve re-written and adapting old ones, knowing what I do about flavors and textures, aesthetics.  For a week I’ve anticipated this day when I knew I’d have time to attempt these delicious and gourmet cookies.  I’ve cheered and assigned duties (“you scoop sugar” and “can you crack that egg for me?”) and I’ve had those grandiose delusions of being Mom of the Year with baking time—and I succumb to this emotionally destructive roller coaster practically daily (the “oh yeah, THIS will secure the ‘Mom of the Year’ title!” delusion).


Everything was going well.  Kids were having fun.  And then they got bored and meandered off.  The pinwheels were rising on the cookie sheet, covered with a tea towel. The most beautiful ones on the first sheet inspired my photographic creativity and I thought “THESE will be the ones for the pictures, for the blog!”   My four year old decided to come join in again, and touches the edge of the cookie sheet which I had haphazardly shoved to the edge of the table…not the edge, just beyond the edge.  His little hand hit the corner and flipped the cookie sheet into the air.  Pinwheels indeed pinwheeled into the air, beautiful cream cheese pinwheels spinning in slow motion, crashing onto the floor.


My reaction was immediate—I drew a deep breath which was to be exhaled in some form of overdramatic disappointment, and on the exhale I looked down.  A beautiful baby boy stood before me, his blonde hair sticking up in the back, his blue eyes welling up with tears, his lip quivering.  I exhaled deeply.  I wanted to scream about how he ruined them.  I wanted to shout “OOOOOUUUUTTTT OF MOMMY’S KITCHEN!!!”

But what was my prayer just this morning, about the atmosphere in our home?  Dear Lord help me!  He stood there looking up, with teardrop-shaped eyes and a look of utter fear and disappointment on his cute little cheeks, his fingers clutching the brown neck strap of his CARS movie apron.


“Peanut, do you know you are more important to me than cookies?” The muscles in his face relaxed and he dropped his hands to his sides, making eye contact.


And you know what, the cookies taste better than they look.  I was at a friend’s home last week to make Challah bread with her.  She was kneading and looked up to tell me, “I always pray for the eater when I knead.  My most important ingredient is love.” Kneading Challah

So I could have had perfect pinwheels.  The picture would have been beautiful, you might have forwarded the link on Facebook, and everyone would forget them two days later.  But I would have not experienced the love of sharing cookie-baking time with my children.  My son might not learn what a cup of something looks like, or what it means to whip the egg white.  And I might have permanently damaged a hurt little boy who needed unconditional love in the face of his mistake.


So my cookies, this time, were made with love.  I hope that you enjoy this recipe.


Dehydrating Orange PeelDehydrating Orange Peel

Be very sure to by organic and/or local oranges if at all possible.  If not, please wash them extremely well with a vegetable wash to get any type of residue off of the peel.   Simply grate the peel, place it onto a paraflexx sheet, and approximately 12 hours later you will have dehydrated orange peel for your pantry!

 I would put this recipe into an Intermediate category because of the number of steps and the various rise times.  Also, these are not very sweet cookies and compliment a cup of tea very nicely! My husband thought that a few minor modifications would transform this into an appetizer recipe!

Oh, and make sure you don’t dangle your cookie sheets off the edge of the table!

Pinwheels

Orange Cream Cheese Pinwheels

Makes 2 dozen


  • 3 3/4 cups flour (soft white is best)
  • 1/3 cup brown sugar
  • 1 Tbs yeast
  • 1 ½ Tbs grated orange peel (less if dehydrated)
  • 1/2 teaspoon salt
  • 1/2 cup milk
  • 1/2 cup butter
  • 1/4 cup water
  • 1 egg
  • 1 egg white

FILLING:

  • 1 (8 ounce) package cream cheese
  • ¼- ½  cup brown sugar
  • 1 Tbs lemon juice
  • Chocolate Chips, optional, or…
  • Apple Butter, optional

EGG WASH:

  • 1 egg white
  • 1 teaspoon water
  • Powdered sugar, optional


Step 1: In a mixing bowl, combine 2 cups flour, sugar, yeast, orange peel and salt. In a saucepan, heat milk, butter and water just until the butter has melted, and then add it to the dry ingredients. Stir just until moistened. Whip the egg & egg white in a separate bowl for 2 minutes. Stir in enough remaining flour to form soft dough. Cover and let rest for 10 minutes. Turn onto a lightly floured surface. Roll out into a square and cut into smaller squares (approximately 3 inches).

Cut into squares

Step 2: In a saucepan (re-use the original from step 1), warm/melt the filling ingredients, careful not to burn (or use the microwave for 15 seconds).  To form pinwheels, diagonally cut dough from each corner to within 3/4 in. of the center. Then put the dime-sized dollop of filling into each one, placing a chocolate chip or two in there if desired.  Fold every other point toward the center, overlapping pieces. Pinch to seal at the center. Place 3 in. apart on greased baking sheets. Cover and let rise in a warm place for 30-45 minutes.

Cut slits, dab of filling

Step 3:  Grease cookie sheets. Beat egg white and water; brush over pinwheels. Sprinkle with sugar, extra orange peel, or leave plain. Bake at 350 degrees F for 15 minutes or until lightly browned. Remove from pans to cool on wire racks.


ENJOY!