Pre-storm shopping list, finding items often overlooked at the store

Pre-storm Shopping List

Some of the items often overlooked you do not have to refrigerate– and other useful supplies


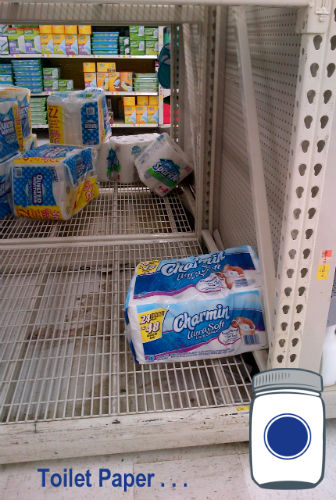
Look for nature to flex its muscles from time to time.  This past week was such an event when Hurricane Sandy hit the Eastern Seaboard of the US.  When this happens, the topic of a pre-storm shopping list is on just about everyone’s mind.  Generally there is a clamoring for bottled water, toilet paper and flash lights as can be evidenced by these photos below:

 

Bottled Water


Toilet Paper


Flashlights


While people may not realize the limitations of a “just in time” delivery system in their store from day to day, everyone generally understands what a storm means to any distribution system—no trucks equals no stuff on the shelves.  On a normal day, if you pick up the last jar of apple sauce the truck is probably just rolling to a stop behind the store with more…it is literally “just in time.” What you see is the entire stock of apple sauce that store has to sell.  That being said, the typical store’s supply of food is measured in days.  During the few days before a storm hits, people tend to be much keener on the next few days’ or even a week’s food supply.  The industry calculates this resupply rate on the current American habit to shop every few days.


 Note:  We hope that these pictures encourage you to start your preparations now, with no looming emergency.  I am not suggesting that the items below are ideal, only that they are functional in an emergency and may still be on the shelf as these items tend to be overlooked.


I had a friend living near DC go to America’s favorite place to shop on a photo mission for me on Monday morning (the day the storm hit) looking for items often overlooked in a hurried shopping trip before bad weather.   Some of them may surprise you:


Bleach: Not to eat, but if you had to purify water in the absence of a Berkey Water filter, then you could add some bleach to the water to chemically purify it.  This will not help the taste one bit if you are getting water from say a bath tub, but it will make it so that it will not hurt you.  About half a cap full to a cap full per gallon should make the water potable.   Additional time to let that chlorine evaporate will help some . . . but it is still going to taste horrible. 


Bleach


Canning supplies: Not that your pre-storm shopping list is going to include canning supplies, it just made me sad to see this picture of old school technology just sitting there unused when those jars could be holding perfectly good food from a garden or farmer’s market up on someone’s shelf making them very prepared indeed.


canning supplies


Chocolate: It should rightfully be its own food group, I agree.  However this treat eaten in moderation any other day can actually keep for a long time without refrigeration.   Be sure to check the ingredients label, not all chocolates are equal.


chocolate


Fig Newtons: We are talking about food to keep you alive that does not need to be refrigerated right?  Fig newtons in my opinion are barely on the healthy side of empty calories.  Actually their only redeeming quality are the figs inside.  The ingredient list should clue you in: UNBLEACHED ENRICHED FLOUR, FIGS, HIGH FRUCTOSE CORN SYRUP, CORN SYRUP, SUGAR, SOYBEAN OIL . . .


fig newtons


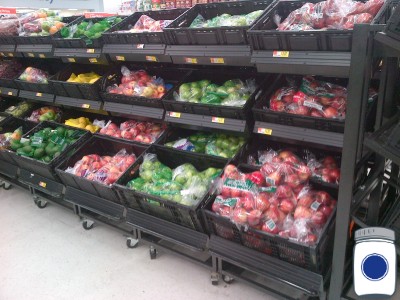
Fresh produce: I am already in the habit of dehydrating food routinely in our house with my trusty Excalibur dehydrator.  Dehydrating fresh produce will preserve it long term if done before the power goes out ahead of time.  Even if you did not, the produce can last on the counter top unrefrigerated—how would I know that?  Produce shipped to the store has been selected to look nice, not taste nice so it has to last a long time.
 

fresh produce


Honey: These wonderful calories from nature with built in immune system boosters should make their way into the shopping basket for this storm anyway.  If you are not typically a honey consumer, do not worry– the honey will still be good for the next storm.  It will last a long time just the way the bees make it.


honey


Pet food: Not for you to eat, but do not forget that your pets need to eat even during a storm or bad weather situation.  There was still plenty of pet food on the shelf the day the storm hit. 


pet food


Protein powder: Not in any way good for you as a daily part of your diet.  In fact Sally Fallon Morell spoke to us about the evils of protein powder in a podcast recently.   However, you are looking at hundreds of thousands of calories sitting right here in a very stable manner on this shelf.  Definitely not something you want to try out in big quantities if your system is not used to it, but it will provide a lot of calories in a small quantity and it will get you through the storm and its aftermath.


protein powder


Soap: So the store’s stock of toilet paper ran out?  Well, Plan B may be as simple as soap-lots of it.  Besides, you will likely have plenty of cleaning up to do.  But since toilet paper is a nonperishable anyway, go ahead and stock up pre-storm!


Soap


sponges


Vitamins: Can keep you healthy when you are under stress—still plenty of them here on the shelf. We tend to gravitate towards the more natural items in this section, like essential oils.  Try lavender and chamomile for stress!


vitamins


Non-Food stuff items often overlooked:


Duct tape: While the normal duct tape was likely out, this still qualifies in the academic definition of duct tape.  It would have to be the end of the world as I knew it to use this particular duct tape pictured here, but in an emergency it will certainly do the job no matter how many cool points a guy would lose with his buddies afterwards.


duct tape, sort of


Hand tools: Not very yummy, but something that may help you pick up the pieces or secure items before the wind takes them away.  Power tools need power by necessity, so have some good hand tools on stand by.


Hand tools


Hand tools 2


Here are a few other items that I thought of that were not captured in photos:


Eggs: In Europe it is not unusual to see eggs sitting on a store aisle’s end cap like you would find Fig Newtons when the go on sale.  That is because this great source of protein will last for up to a week when fresh even in warmer weather, they will also be fine on your counter for a few days—especially if you coat them in oil (thanks facebook follower for the tip!).  You can always test them in a glass of water.  If they float, they have already desiccated and the air bubble inside is an indicator that they are not good anymore. 


Hard Cheeses and salt cured meat: Before the days of refrigeration, people actually did not starve.  Hard cheeses (dipped in wax) will be fine on the counter as well as summer sausage or pepperoni sticks.  You will be surprised at how many people overlook these on their way to clamor over the last value added can of nasty ravioli in orange sauce.


Devotional candles: These are often found in the ethnic aisle of the grocery store.  They are inexpensive and burn for a long time.  While you are there, pick up a bulk bag of rice, beans and/or lentils.  Also, if you cannot find matches by the part of the store that sells candles, check the area by the barbeque grills or the camping section.  A multi-pack of lighters is “cheap insurance” as my Dad used to say.


This empty spot on the rack was for hand cranked can openers . . . you would be surprised how many people buy long term storage food by the pallet and do not have adequate non-electric can openers! 


can openers


Everyone has some kind of pre-storm shopping list to fill albeit on paper or in their mind.  Storms and bad weather mean that you are going to likely experience a disruption of supply or at least access to a store.  Stocking up before hand is the way to stay out of the stressful shopping experiences as limited resources are bought up.  These items often overlooked are worth while to keep in your mind next time you are preparing for the next storm.


Wilson

Pro Deo et Patria


Storm Preparation


Check out our other great blogs, many emphasize being ready for anything!  Here is one on creating a “bug out bag“.


Proviso:

Nothing in this blog constitutes medical advice.  You should consult your own physician before making any dietary changes.  Statements in this blog may or may not be congruent with current USDA or FDA guidance.


Photo Credits:

All photos by Pantry Paratus


Works cited:

Fig newton ingredient list is taken from Nabisco’s website: http://www.nabiscoworld.com/Brands/ProductInformation.aspx?BrandKey=newtons&Site=1&Product=4400002244

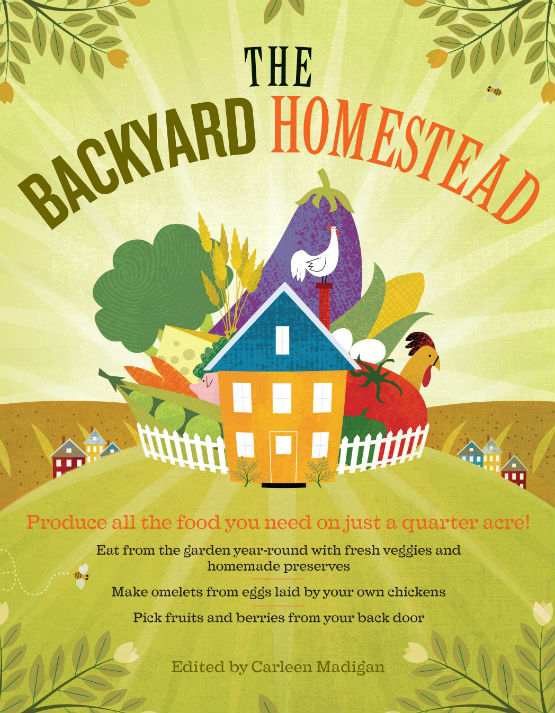
Wilson’s Book Review: The Backyard Homestead

Wilson’s Book Review: The Backyard Homestead


Carleen Madigan writes on everything from chickens to gardening


Chaya actually read this book first and had always recommended it to customers at various expos that we have been to across our great nation.  So on a particularly rainy afternoon I found myself not being able to put this book down as Carleen Madigan covered just about every major topic involved with running a homestead. 


The Backyard Homestead


Written in 2009, this book is the real deal, a contemporary classic in my opinion.  If I may respectfully do so, I would liken it to a modern digest of Carla Emery’s quitessential classic The Encyclopedia of Country Living.  Yes, it is that good.  When people talk about a homestead they normally are talking about food production—and this book does not disappoint! 


Navigating the book is a cinch.  You probably will find it largely intuitive as I did, and you will likely be dreaming about your own homestead.  You start off in chapter one talking about gardening; naturally when people think about producing food they think gardening.  Chapter two is fruits and nuts, then you are onto herbs, grains, then all things poultry, meat & dairy, and capped off with foraging food from the wild.  Just about anyone can start here and enjoy a large measure of success; the book is sprinkled with pictures, recipes, shortcuts, advice on pitfalls and plenty of straight common sense.


Carleen Madigan


The book is not technical like Carla Emery’s, you are not going to find half a dozen recipes for duck liver, the best cross cut saw for woodland chores or advice on calving—but what you will find is that in one long afternoon The Backyard Homestead will take you through all the topics you wanted to know about, but did not want to drill through hours of web searches. 


Whether you’re starting off with an acre or two or just an apartment with a small patio, there’s something you can do to provide some of your own food (Madigan, 2009).


From chickens to chutney, I am blown away with how much I walked away with and was able to retain from this book.  And you do not have to be a large land owner to make use of this book.  Page 10 walks you through considerations before you start a homestead, but by page 13 you are already getting plot designs from a professional (utilizing great artwork I might add) on how to set up 1/10 th of an acre for viable food production! 


If you’re deep into gardening and self-sufficiency, sooner or later you’ll want to try growing your own wheat, if only to get yourself away from the commercial process that grows a perfectly good grain, scrapes off the bran, peels out the germ, and bleaches the flour, and then sells all those things back to you separately (Madigan, 2009).


Chaya could have made that quote—I love this book.  The chapter of the book that deals with grains is both amazingly complete and concise which is actually characteristic of the whole book itself.  I highlight the grains part because we deal so much with bread baking in our house and with Pantry Paratus.  Taken as a whole I am thoroughly pleased that she starts at the precept of grinding your own flour before she mentions baking bread.  Truthfully, whether or not you plan on brewing your own beer (yes, she covers that too) the fact that you can grow the grain that you use to bake your bread is a heroic concept on the order of Jackie Clay. 


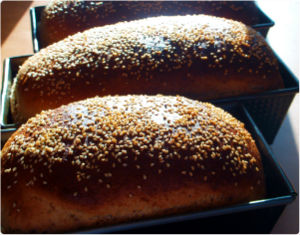
Bread


Since the rest of us likely did not grow up on working farms or with family members close to us to pass along all of this knowledge to us, we find ourselves at an informational disadvantage.  If that is you and you dream of a homestead where you grow more than just grass, then you need The Backyard Homestead on your shelf. 


Wilson

Pro Deo et Patria


Works Cited:

Madigan, M. (2009). The backyard homestead. (p. 10). North Adams, MA: Storey Publishing.

Ibid (p. 186)


Fish Stock, yep it is time to try it for myself

Fish Stock


Wilson explains this fish stock recipe


fish stock


There may be a line to my thriftiness, like trying to recycle my own paper—I think that I will just leave that to the pros.  However, as it turns out a lot of our ancestors really got along great with a lot less food waste (and nearly zero processed food) by using all of the animal or plant they were eating.  “So, how do you make fish stock?”  If you were to have asked me that ten years ago, I surely would have quipped with, “Why would you ever want to make fish stock?”


While there are detractors from the science of what Round Up® (glyphosphate) will or will not kill (albeit ever so slowly perhaps), one thing it is pressed into service to combat with great regularity are dandelions.  These bright yellow reminders that nature is still pretty wild were actually harvested for food and wine production by my Italian ancestors. 


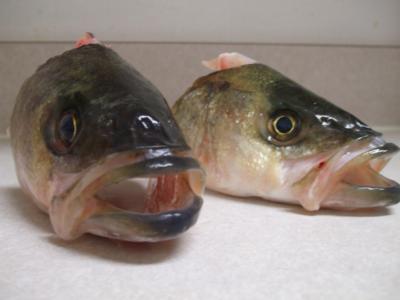
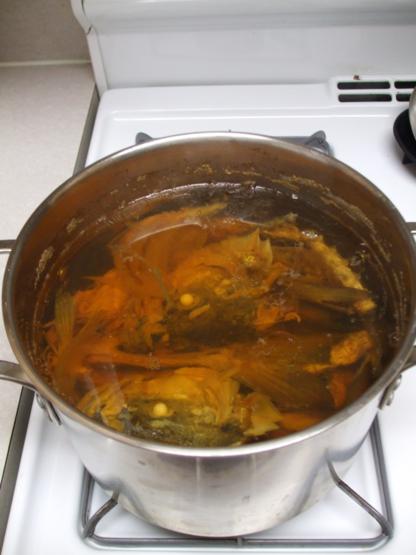
fish heads


So when I learned that fish stock was really good for you and that it was made from the parts of the fish being thrown away after the filets were cut, I had to try it at least once.  With all of the places that I could have turned to for a recipe for fish stock, I settled on two particular tried and trusted people.  One was our buddy Ann Marie from CheeseSlave.com the other was a well worn copy of Nourishing Traditions by Sally Fallon Morell.    


In Europe . . . the fish monger skins and filets the fish for you, giving you the filets of your evening meal and the bones for making the stock and final sauce.  Unfortunately, in America sole arrives at the fish market preboned.  But snapper, rock fish and other non-oily fish work equally well; and a good fish merchant will save the carcasses for you if you ask him. . . . Be sure to take the heads as well as the body—these are especially rich in iodine and fat-solulble vitamins” (Fallon & Enig, 1999)


Now I knew that Sally wrote extensively about soup stocks and fish stocks in particular, but I had not actually searched Ann Marie’s CheeseSlave website and I was pleasantly surprised to find this simple recipe.  Below is my attempt at trying to recreate her fish stock recipe:


Ingredients

Onion, yellow or white, organic if possible (1)
Whole fresh, non-oily fish with the bones and fish heads and trimmings — cod, sole, halibut, haddock, whiting, halibut, flounder or snapper (2 pounds)
Parsley stems — not the leaves (6-8)
Lemon juice (1 tsp)
Sea salt (1/4 teaspoon)
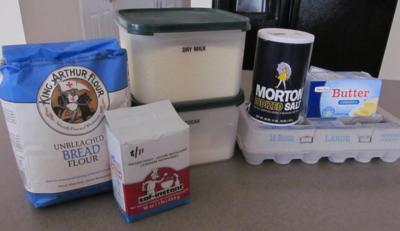
Dry white wine (1 cup)
Enough filtered water to cover the ingredients by an inch
Optional: 1/4 cup fresh mushroom stems


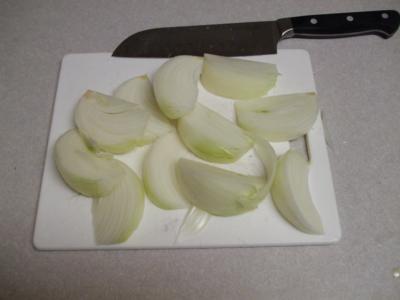
Cut up the onion into rough chunks and put them in the stock pot.  For even more flavor and body in your stock, I would recommend just cutting the onions skins and all.  These onions had some mold under the surface, so I skinned them. 


roughly chop onions


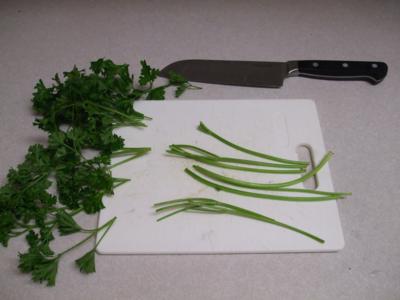
Divide the parsley stems and put them in the stock pot.  I saved my tops for cooking later in the week.


separate parsley from stem


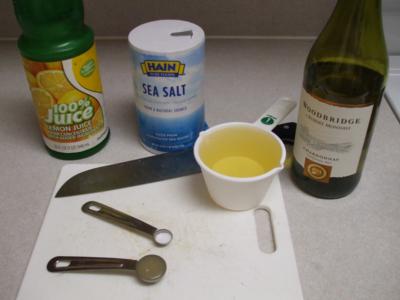
Measure the other ingredients and add them to the stock pot.


measure the ingredients


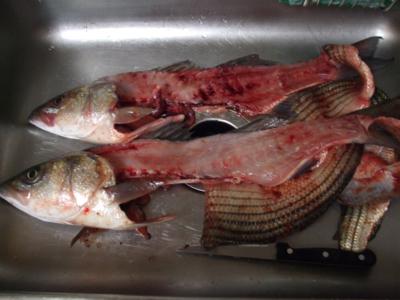
Wash the blood off of the carcass as much as possible, and add that to the stock pot.  I did not use the skins (although I hear that you can do so).


wash the blood off of the fish carcass


Be sure to remove the gills from the fish head, as this may bring a bitter flavor to your final product.  This guy makes me nervous while using the knife, but this is a good demonstration:


Remove Gills from Fish — powered by ehow


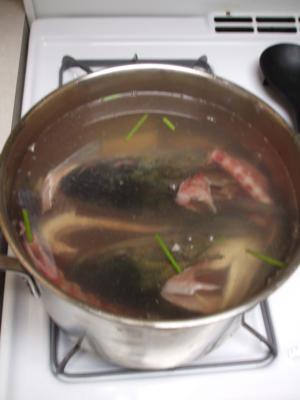
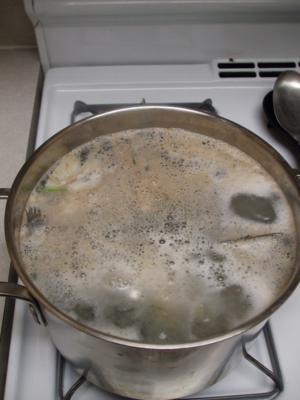
Cover everything with water, about an inch should do nicely.


place carcase in pot


Bring to a boil.  You will notice some scum on the surface—skim this off as much as you can (it need not be perfect).


skim off the scum


Reduce to a simmer for 4-24 hours depending on what you want it to look like.


final product


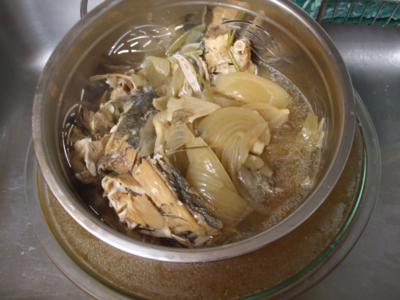
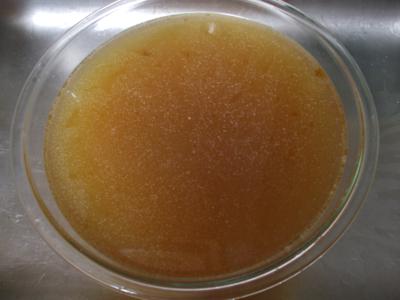
Strain the broth and the final product should look like this:


Strain


completed fish stock


Divide it up into small containers to freeze it or Ann Marie has a great tip at using a (specially purposed) ice cube tray to have smaller portions at the ready for soups and such. 


I know fish stock seems really gross to the American palate, but actually it is surprisingly tastey when you use it to make rice or soup.  Leave a comment, let me know what you think!


Wilson

Pro Deo et Patria 


Proviso:

Nothing in this blog constitutes medical advice.  You should consult your own physician before making any dietary changes.  Statements in this blog may or may not be congruent with current USDA or FDA guidance.


Works Cited:

Fallon, S., & Enig, M. G. (1999). Nourishing traditions, the cookbook that challenges politically correct nutrition and the diet dictocrats. (p. 119). New Trends Publishing.


Photo Credits:

All photos by Pantry Paratus


Pantry Paratus Radio, Episode 016: Interview with Erin from Black Chicken Host

Pantry Paratus Radio Banner


Meet Black Chicken Host . . . 


Homesteading, web hosting and some great advice on maximizing the homesteader’s number one commodity—time


Okay, so it is 11 PM on a Sunday and things are positively wonky your e-business, who can you call?  Say you want to use more natural cleaners or you are feeling that everyone else is getting this homesteading thing but you, where can you go?  We all depend so much on the internet for information, but who are the people taking care of all of the infrastructure out there in cyber space?  Meet our heroine Erin, she runs Black Chicken Host.  Besides being a great person who is very technically savvy, she is also a homesteader herself.  Come along and listen as Chaya gets the straight scoop about the journey that is homesteading and the secret technical leverage that you can apply to maximize the homesteader’s number one commodity–time. 


Homestead

.


Right Click Here to Download This Episode


Listen to internet radio with Preparedness Radio Network on Blog Talk Radio


We talk about: 


-Chaya’s love for the outdoors


-Erin’s Bio


-Balancing the time-sink known as the computer with the rest of life, homeschooling and running the homestead


-Doing little things like taking a phone call outside makes a big difference


-Chaya learned that she needed to be outside more from taking her PDC (while camping out in the back of the wagon)


-People love sunshine and natural light


-Reinforcing the fact that your kids know that they are loved despite the fact that you have to be on the computer


-Confessions about time and chocolate


-Love of the sciences (great kindred spirit!)


-Responsibility in ecology and sustainable practices


-How to make the computer a meaningful addition to the daily work load all the while skillfully advancing the message of homesteading—brilliant! 


-Chaya’s tip: never go cheap on technical support, you need to find someone like Black Chicken Host


-The nightmare of losing a website and the heroine we now know to be Erin


-What is a web hosting service?  Who else is on the masthead over at Homestead Host?


-Technology on the homestead, really?  Yes! 


-Inspiring a love for learning in children about practical application


-Automated chicken coop functions: lights, open and closing doors for access, webcams—wow!


-Solar leasing and the sticker shock for initial buy in for solar power conversion for a home


-Adding layers of self-sufficiency


-Every homesteader has a “project list” of things to get done


-Permaculture, Paul Wheaton and Permies.com


-Using old pallets for fencing


-Getting more perennial plants in the ground


-Planting more native plants, raised freeze beds


-Grass, hmmm cannot eat it, no one wants to spend lots of time mowing it, so finding more useful things to plant on the homestead


-Chaya’s reading stack in the winter


-Taking a PDC


-First rule of Permaculture is observe


-Knapweed, the allelopathic effects of the Niacin secretion in the soil


-Rent-a-goat vs. the dangers of keeping an animal that may be smarter than you! 


-Making the natural transition from ecologically minded urbanite to homesteader—be careful, when that self-sufficiency bug bites!  Sustainability, it is the gift you give to your future self


-Owning a small business and homesteading—how do you juggle all of that? 


-Getting the first person raw feed (warts and all) from someone who struggles with getting everything done while scaling the learning cliff


The Simplicity Primer by Patrice Lewis, 365 short ideas to scale back from the over romanticized to the reality of dealing with the hardships of the lifestyle so that you can reap the rewards of the homesteading lifestyle


-Making note of the success metrics for how you can know how you are doing in your homestead venture


-Chaya tells (confesses?) about her experience in planting wild flowers with children


Natural cleaners and the sustainable household: vinegar (with lemons), water, baking soda and some essential oils


-Natural deodorant formula: coconut oil, baking soda, corn/arrow root starch and essential oil(s).           


-Oregano oil, the natural cleaner and other good uses *does not constitute medical advice*


-Comparing homesteading in the city vs. being in the country in terms of having community 


-When your Permaculture homestead does not jive with the neighbor’s yard who uses harsh chemicals


-Making the house more energy efficient


-Finding joy in the routine—doing the best you can with what you have despite the tedious nature of pulling weeds or digging post holes


-If you are a vegetarian and you cannot do that 100% of the time, then negotiate on the best terms that you can; the same is true in the journey of self-sufficiency.


-Seeking your independence from CAFO’s or just-in-time logistics all the while we are doing the best you can and not being a slave for to “the list”


-Watching homesteading videos thinking that you may not be able to do all of it, so you realize your need for community


-The irony of living in an agricultural area, but still having to import organic produce so that you do not have eat the GMO chemical laden food that is


-Raw milk in Michigan is legal via herd share programs


-Once you discover raw milk, it is so hard to go back to pasteurized, homogenized milk (still waiting to see the death toll from raw milk . . . )


-Food sovereignty, not giving up your freedom while trying not to be political


Nourishing Traditions by Sally Fallon Morell


-Wrap up


Links:


Black Chicken Host


Homestead Geek (Erin’s blog)


-Blog post by Erin, The Meaningfulness in Work.  One of the most concise, honest and heartfelt blogs I have read in a long time by someone trying to balance personal and professional goals


Engineir, aka Mr. Homestead’s super useful website for all things hardcore DIY computer programing  Truthfully, most of it is over my head, but I am so glad that there are people this smart out there that are willing to help other people in need! 


-Jill from thePrairieHomestead.com


-Adrienne from WholeNewMom.com


-Laura from LaurasGlutenFreePantry.com


-Ellen from EllensQuiltCreations.com


-Sarah from BeeWenchFarms.com


-Millie from RealFoodForLessMoney.com


-Jessica from DeliciousObsessions.com


Chicken Coop automatic light circuit wiring diagrams


Video on Permies.com using pallets for fencing


Erin’s formula for natural deodorant


Weston A. Price Foundation


Proviso:


Nothing in this blog constitutes medical advice.  You should consult your own physician before making any dietary changes.  Statements in this blog may or may not be congruent with current USDA or FDA guidance.


Family Game Night: Pizza Crust (& Focaccia Bread) Recipe

Family Game Night

Pizza Crust (& Focaccia Bread) Recipe


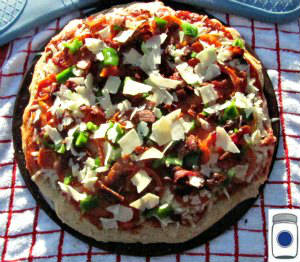
Before the toppings are baked on the pizza dough


I grew up eating deep dish pizza, a pizza crust so thick you really need silverware to eat it.   Wilson grew up with hand-tossed, brick oven pizza.  While we both see the merits of both, we find that at home we tend towards that thicker crust because it’s the easiest to replicate with home-milled flour and a regular ol’ oven.    It is true that using the whole wheat kernel changes texture and flavor—for the better if you ask anyone who has learned to bake with it.   Like all new skills, give yourself some grace and experiment a few times until you find your family’s favorite texture and flavor combination.  As we have learned in our family, pizza is personal. 


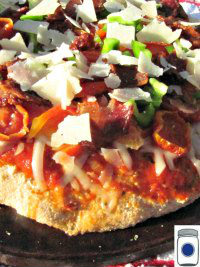
Fresh Parmesan and Reconstituted Tomatoes


I felt like I hit the jackpot when I altered a focaccia bread recipe to serve as our pizza crust; it’s delicious and adaptable.


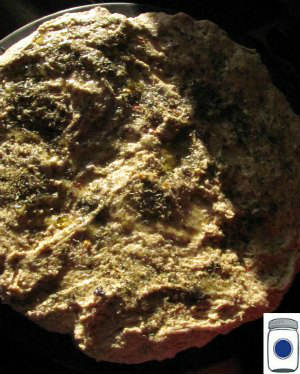
The dough before baked


We love fresh focaccia bread, as well.  It’s amazing with a bowl of homemade soup or with a pasta that just needs something else to go on the side!  If I make 2 full loaves (or crusts), one can go in the freezer. 


Chaya's Deep Dish Pizza


We all have our favorite toppings!  Some of mine are dehydrated tomatoes and fresh parmesan cheese!


Chaya’s Focaccia Bread & Deep Dish Pizza Crust Recipe


Start to Finish:   Focaccia Bread– 1 hour, 15 minutes

                               Pizza Crust–  1 hour, 30 minutes


4 cups warm water

4 tsp.  active dry or instant yeast

8 cups home-milled flour, an extra ½ cup for dusting

4 tsp. sea salt

3 tbs. olive oil

¼ cup Pizza Seasoning or Italian Seasoning (based on your preference)


1)       Mix yeast into the warm water and let proof for 10 minutes.

2)      Add flour and salt, barely mixing it until the dough is just sticky. 

3)      Cover and allow to rise for approximately 1 hour in a warm place.   Preheat oven to 350 degrees prior to starting the next step.

4)      After the dough has risen, separate into 2 equal halves. 

5)      Roll both out into the desired size and shape for pizza crust.

6)      Brush olive oil liberally onto the top of the dough, then perforate the crust everywhere with a fork. 

7)      If using dough for pizza, sprinkle seasonings lightly.  If using as focaccia bread, apply seasonings very liberally.

8)      Put both crusts into the preheated oven for 15-17 minutes (20-25 minutes if using as focaccia bread without additional toppings).

9)      If using as pizza, apply sauce and toppings as desired and bake for approximately 15 minutes longer. 


Not Much Left Over!


If you want to freeze pizza dough:

After the crust had the original 15 minutes in the oven, remove it and allow it to cool.  When it is completely cool (not a minute before), you can place the entire thing into an unscented (!!) kitchen-sized trash bag, and use a twist-tie on the end.  Label with the date and lay flat in your freezer.  When you want to have a quick dinner, allow it to thaw before adding toppings for the additional oven-time. 


–Enjoy!

Chaya


All pictures are property of Pantry Paratus.

Memoir of a Kid on a Modern Diet–& the Journey Back

The Memoirs of a Kid on a Modern Diet


…and the Journey Back to Health with Real Food

 I thought cookies came from tree elves. 


Tree Elves & their cookies

Breakfast was cereal and it was cold and soggy, and its truest function was to infuse chocolate into the pasteurized milk.  Oh, and the toy-in-the-box factor was often the deciding vote as to which chocolatey morning treat made it into the shopping cart. 

We ate ice cream out of mixing bowls. 


Overdose of Ice Cream

We had an open-cupboard policy in which I never had to ask for a snack or a treat.  My mother was a business woman, and to survive life she filled the freezer with the prepared meals from the guy who came every two weeks in a truck (the one with waterfowl on the side).  Modern reality TV shows are loosely based upon the fad diet plans my parents routinely endured.

Then came junior high.  Crazy mornings and time-constraints caused by big hair meant that I traded in soggy cereal for the all-new cereal bar (glued together with corn syrup).  The junior high experience meant that we now had choices in the school cafeteria.  I will tell you what I ate every day of my junior high experience:  A Coca-Cola® and Reese’s® Peanut Butter Cups.  No more, no less, that was my junior high school food experience. 

Please know that not for a moment do I want to cast blame on my family; my mom was an excellent cook but she was overextended.  My parents likely assumed I ate real food at lunch and I doubt I ever told them otherwise. 

We also grew up in an era of trust; there were certain things you just always believed:

* All Disney movies were appropriate for children, as was anything in cartoon form. 

Modern Family TV Time


*If you got in trouble at school you got in trouble at home because the teacher was always right.


Shiner


*If you paid your taxes you would never get into trouble legally, and if there is a law about something, there must be a very valid reason. 

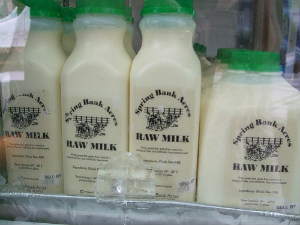
Raw Milk Illegal in Many States

*If the FDA allowed it to be packaged and called food, then it was really food.

Twinkies, Food or Fiction


Here is my main question:  How common was my experience with food as a child and adolescent?  Is this more “normal” (should I say common?) or the exception to the rule? 

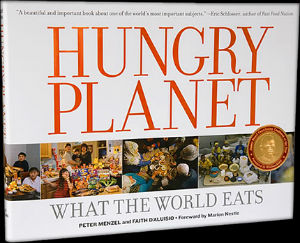
 What I experienced in a modern middle class family was malnourishment.  Actually it was worse, it was a slow poisoning.  What is your experience with this—do you think that my experiences in the late 80’s/early 90’s is still a common one?  If you have not ever checked out the book “Hungry Planet: What the World Eats” (10 Speed Press) from your local library, it will be a worthy use of your time.


Hungry Planet


  It is a photographic study of families around the world as they eat today, in the age of globalized fast food and agribusiness.  Each page is a picture of the average family in a given country, framed in by tables of what that family consumes in one week’s time.  The book reveals a stark contrast:  You see some of those 1 billion souls in our world who (because of drought or politics) are still starving for a lack of food to eat; and you see the majority of the world’s citizens now who are increasingly overweight and unhealthy as the weekly food allowances consist of prepackaged foods, sweets, and food prepared by others.  This is no longer a problem for just those middle class Americans like me—this is cropping up in Africa and South America and in the Middle East. 


I came to learn about health and nutrition because of sickness and despair.  I know many others, many who might be reading this, who have a similar story to mine.  A reader said this in an email to me:

“I was a city girl nourished on Wonder® Bread and Velveeta®, so most of what I know has been through my own research and study.” 


So many of us are discovering these old-fashioned real foods together, we are discovering gardens, kitchens, and real food together.  We are leaving fad diet plans, processed foods, and even school lunches behind.   Please share where you are on your journey with us.  We hope, as we are all on the same road, that we can help you get a few steps further. 


We look forward to hearing from you,

Chaya


Photos:

The Keebler® Box of Cookies has not been altered in any way and is trademarked and owned by Keebler.  Pantry Paratus in no way claims to own this photo. 

Chocolate Ice Cream: nofeuL (http://www.rgbstock.com/photo/nofeuL4/chocolate+icecream+indulgence2)

Television Time: meMGfZi/ (http://www.rgbstock.com/photo/meMGfZi/Family+Time)

Norman Rockwell’s “Shiner” & “Runaway” through the Norman Rockwell Museum 

The Twinkies® photo has not been altered in any way and is trademarked by Hostess®.  Pantry Paratus in no way claims to own this photo.  

Raw Milk: elisharene (Creative Commons)


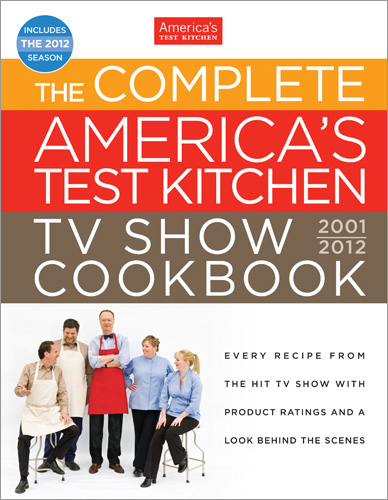
Wilson’s book review: America’s Test Kitchen Cookbook

America’s Test Kitchen Cookbook


. . . because everything does not come out perfectly in your kitchen either!


After a few years of marriage now, Chaya has convinced me not to experiment on recipes with our dinner guests.  So, if you do ever find yourself over for dinner at our house, rest assured we will serve a solid family dinner success—and no, I will not chronicle the mishaps.  Because not everything comes out correctly in anyone’s kitchen, the good people over at America’s Test Kitchen have come out with a great resource for cooking and the why something works or does not work. 


The cookbook is a candid look at a candid operation we know as Americas Test Kitchen TV.  I offer this quote from Christopher Kimball,


But, unlike much of what is on television today, this is not a performance.  The cameras give you an honest, if slightly more lively, view of how we work in our test kitchen.  The set that you see on the show is, in fact, a real working kitchen.  This is where we live Monday through Friday, developing recipes for Cook’s Illustrated magazine (Kimball, 2001).


America’s Test Kitchen


Chaya and I had America’s Test Kitchen Cookbook recommended  to us by our guest on our next podcast this Friday, Brie Aronson, farm cook for the legendary Polyface Farms and we had to check it out.  Turns out that even the pros do not get it right every time. That is very comforting, because we do not either. 


But we try and try again.  With a little help from science and a dose of experience, we can progress and know where and why our process broke down.  The ability to troubleshoot your own results is truly a high level of the learning process.  Best path to success with meatballs, mashed potatoes or marriage is to never stop being curious—what worked, what did not work, how can I improve that? 


It may be possible that you are not the world’s best mashed potato maker, but you want to be.  What makes for a good batch of lick-the-bowl-clean mashed potatoes?  Is it the bowl, the butter, the salt—what?  Now I know, because after dozens of batches of mashed potatoes the folks over at the America’s Test Kitchen recipe repository now have given away not only the secret sauce but the science behind the best mashed potatoes.  If you like food science as much as I do, then you will geek out on this video:


It is great when something works, but even better is knowing why it works so that you can fix something that goes wrong.  Did you happen to catch the discussion about which flours are best for different purposes at about the :36 minute mark?  Hint: If you want the best protein and most nutritious flour, then you are going to have to grind your own


For the best results without guess work, years of experience, a dose of science and the benefit of other people trying 9 blenders to see which one is the best for your money in order for your tomato bisque soup to come out like a winner, then I recommend the Americas Test Kitchen Cookbook


Science-heavy or not, there are parts of the book that are simply not for us such as Coca-Cola© Ham (p. 204-205).  But I found the blind butter taste test (and which brands had more butter fat) to be fascinating (p. 221-222).  Your mileage may vary . . .


Check your local library to see if they have a copy or pick up your own, I am pretty sure that you will be perfecting your own version of the America’s Test Kitchen recipes in no time.  From the best corkscrew, to mouth watering fried chicken to the proper method for packing brown sugar—my inner food science geek recommends the America’s Test Kitchen Cookbook


Wilson

Pro Deo et Patria


Works Cited:

Kimball, C. (2001). America’s Test Kitchen Cookbook. (p. ix). Brookline: Boston Common Press.


Photo Credits:

Book cover photo is from America’s Test Kitchen:  http://www.americastestkitchen.com/


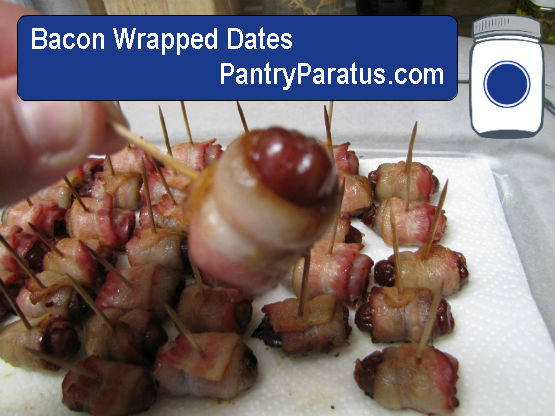
Bacon Wrapped Dates

Bacon Wrapped Dates


Bacon Wrapped Dates


Hard to believe they taste this good and are that easy to make!


Okay, so we have all done it before.  You show up at a late summer picnic, church potluck or party of some kind with the least popular side dish as evidenced by how much you had to cart home.  Let us be honest, there is only so much Jello-fruit salad you care to eat one week later.  These bacon wrapped dates are sure to be a crowd pleaser!


Dates wrapped in bacon, so simple yet so yummy!  Hat tip to our buddy Ann Marie over at Cheeseslave for the scoop on this new easy favorite:


bacon wrapped dates recipe


Ingredients:

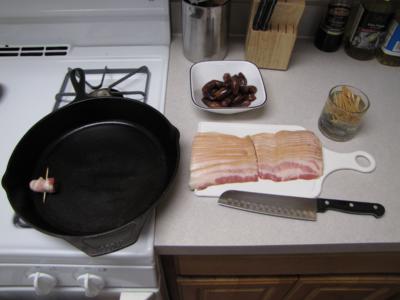
Your quantities are approximate, so depending on how thickly your bacon is sliced you will need approximately 3 dozen dates (check your local ethnic grocery store), 1 lb of bacon (nitrate free if you can find it), and about 3 dozen toothpicks.


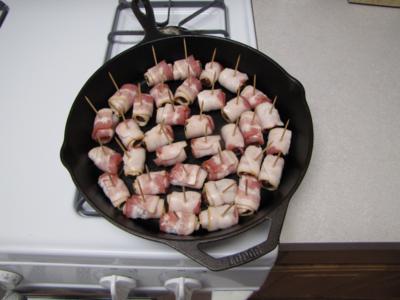
dates wrapped in bacon


1. Soak your toothpicks in water.

2. Preheat your oven to 350 degrees.

3. Start out with half slices of bacon.

4. I used already-pitted dates, but if you have to pit the dates yourself please be careful. 

5. Take an individual date and wrap it with a half a slice of raw bacon. I had the best luck with toothpicks to hold the form together.

6. Place the dates wrapped in bacon in a cast iron skillet or baking dish suitable for the job.

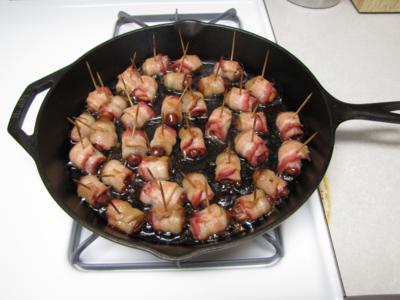
7. Bake for 15-20 minutes.   When the bacon is done to your satisfaction—you are done!

Quick Tip: the tighter the bacon wrapped dates are packed together, the longer you will have to bake them to get that perfect crispness.

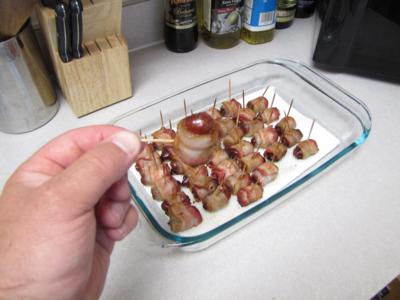
8. Remove from oven and place in a serving dish.


recipe for bacon wrapped dates


Give this easy recipe for bacon wrapped dates a try and leave a comment to let us know what you thought—you too may just develop a new favorite!  Or, take it up a notch with bacon wrapped dates with almonds! 


Wilson

Pro Deo et Patria


mmmmmm


Photo Credits:

All photos by Pantry Paratus

 This blog is linked to Real Food Wednesday with Kelly the Kitchen Kop!

Homeschool + Bread Baking = Delicious!

Bread Baking


Homeschool + Bread Baking = Delicious!

Educational bread baking?


Julia from Homeschool Mom Chronicles has been an inspiration to us at Pantry Paratus, we are proud to have her share some of her homeschooling experience here with us.  Despite all she manages to get done in a day, she still stopped by today to chat about home education, balancing schedules and of course bread.


Ingredients


One of the things that I like best about homeschooling is that “school” is never closed! Even the most mundane tasks, such as grocery shopping or bread baking, can be a learning experience for my children.


My children love homemade bread, so it’s only natural to teach them how to make it for themselves! But for homeschoolers, such training has the extra benefit of being eligible for school credit. Here is how I give school credit when my children learn to bake bread:


Math:  reinforcement and practical application of measurements

Language Arts:  reading and following directions; journaling and answering relevant questions in their notebooks

Practical Skills:  learning to bake; kitchen safety and cleanup


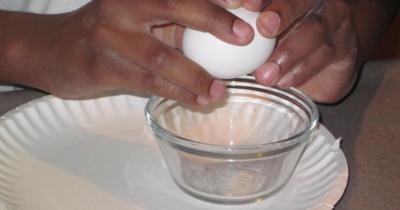
Cracking the Egg


I require all of my children to learn how to cook, regardless of gender. I want my daughter to bless her future husband and children with scrumptious (yet frugal) home-cooked meals. My sons will probably not be the primary cooks in their families once they marry, but they should still know how to prepare simple and delicious meals. My sons should be able to feed their families if their wives are ill or unavailable, or maybe just to bless their wives and children from time to time.


Because of his youth spent on his family’s dairy farm, my husband was always an early riser. When he wanted the rest of our family to get up early too, he would fry bacon! The delicious smell would waft upstairs and pry us from our pillows. Before long, the entire family would be in the kitchen trying unsuccessfully to snitch bacon from the platter while my husband prepared scrambled eggs and toast. (Somehow, our only daughter always managed to snag a piece or two of bacon from her daddy. Not fair! 😉


Adding Water


Anyway, although my husband didn’t cook a lot, the meals that he prepared for us in love were always tasty and much appreciated. My children and I will always cherish the memories of those meals that my husband brought to the dining table. And I would be thrilled if my sons’ children would have similar memories of their dads in the kitchen.


Bread baking is required in our homeschool


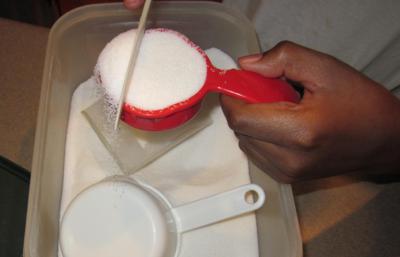
Sugar


All of my children will experience baking bread from scratch. I always start with having them use a bread baking machine so that the children are (pretty much) ensured of success. The next time, I have them prepare the yeast bread dough using my trusty Kitchen Aid mixer. Finally, I have them prepare homemade bread completely from scratch by kneading the bread dough by hand. At the very least, all of the children will come away with an appreciation of how much work goes into preparing a loaf of yeast bread (and hopefully they will have more appreciation for whoever prepares homemade bread for their families someday).


If my children attended public or private school, there wouldn’t be enough time left in their busy days for such training. I am grateful for the God-given right to “Train up a child in the way he should go, Even when he is old he will not depart from it.” — Proverbs 22:6 (NAS).


measuring


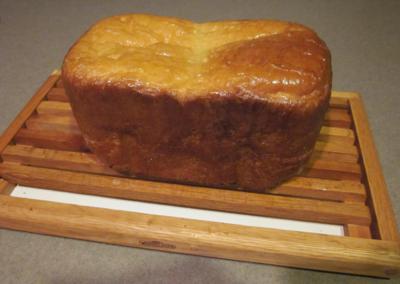
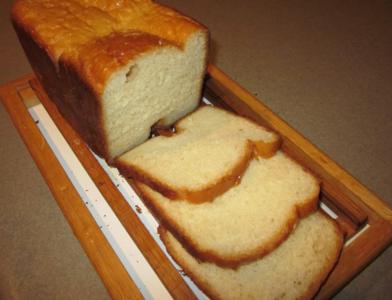
The bread you saw my son make in the above pictures is one of my family’s favorite bread baking machine recipes, Sally Lunn Bread. This high-rising loaf is slightly sweet, with a tender crumb. Whether or not your family homeschools, I’m sure that you’ll enjoy this delicious loaf of homemade goodness.


bread baking


Sally Lunn Bread (1 ½ pound loaf)

3 tablespoons butter or margarine (Butter tastes best, believe me!)

1 large egg

1 teaspoon salt

1/3 cup sugar

¼ cup nonfat dry milk

1 cup lukewarm water

3 cups bread flour (My favorite is King Arthur Flour)

1 ½ teaspoons instant yeast (I prefer SAF Instant Yeast)


Place all ingredients in the bread baking machine in the order recommended by the manufacturer. Program for White Bread and Light Crust setting (no timer), and press Start.


-OR-


Program the bread baking machine for the Dough setting. After the dough cycle is complete, remove the dough from the pan and place it on a lightly floured surface. Punch down the dough, then cover it with a clean kitchen towel and allow the dough to rest for 10 minutes.


Shape the dough into a 12-inch loaf, and place it into a lightly greased 12-inch Nonstick Bread Pan. Cover the pan with the kitchen towel, and place the pan in a draft-free area. Allow the dough to rise until doubled (about 30 minutes).


Place the pan on the counter while you preheat the oven to 375°F. Bake the bread for 25 – 30 minutes. Remove the bread from the pan and place the loaf on a wire rack to cool. (For a softer crust, brush the hot loaf with melted butter.)


(This recipe originally called for 1 cup of milk. I changed it to ¼ cup nonfat dry milk and 1 cup lukewarm water for convenience and to save money. – Julia)


Hopefully, this post will encourage you to incorporate bread baking into your homeschool curriculum!


Julia

HomeschoolMomChronicles.com


bread baking machine recipes

Nonperishable Food Report Card


nonperishable


Nonperishable Food Report Card


It may be on sale and it may be shelf stable, but do I want it on my table?


Full disclosure upfront here, these grades are subjective.  You can probably call this the “Wilson Squeamish Index,” but at least let me tell you why.  I wanted to look at some foods that fall into the “buy and forget” nonperishable category for food storage.  If you get a great sale on Rice-A-Roni®, should you stock up?   


It depends if you are a label reader or not.  I picked about twenty typical nonperishable foods to do a label scan and see if they are good to eat keep.  Some of the results just may surprise you!  You will see my annotated photos below showing the particular ingredients that weight the particular grade for that shelf stable food item.


In alphabetical order:


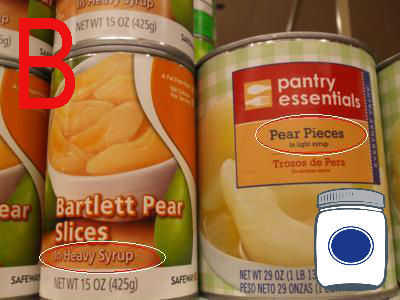
canned pears in syrup


1. Canned pears in syrup: B 


Now I am a big fan of pears, but the syrup part worries me.  What kind of syrup you ask?  Corn syrup–not good.  Otherwise these would be great! 


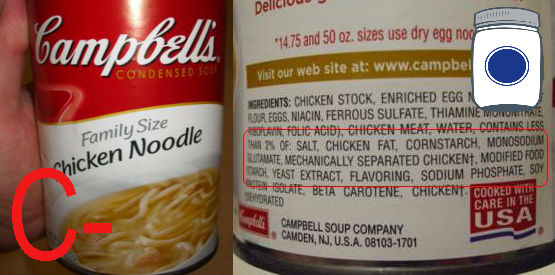
Canned Soup


2. Canned Soup: C-


Originally, this one shocked me.  Chaya and I subsided during our early marriage on canned soup, but here you see the whole bottom half of this shelf stable classic is not good.  Moreover, my grandmother’s chicken noodle soup was awesome sans MSG thank you very much. 


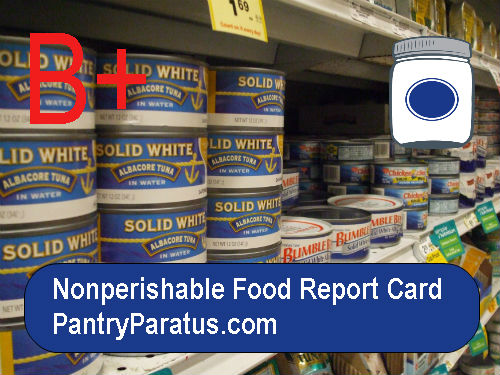
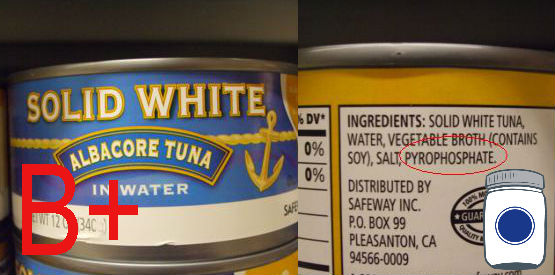
Canned Tuna


3. Canned Tuna: B+


Tuna is a great protein source.  Take out the Pyrophosphate (it keeps the flesh of the fish firm and moist) and the BPA lined can and this would a sold A for me. 


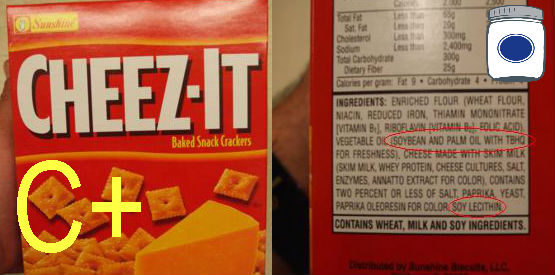
Cheez It


4. Cheez It®: C+


Surprising not as bad as you may think for a snack food.  Can you live off them?  No.  My concerns here are the Soy and Palm Oils, the TBHQ and the Soy Lecithin.  Note: on none of these foods am I even touching the enriched flour factor in the rating. 


chocolate


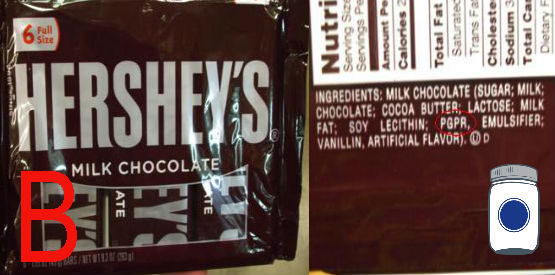
5. Chocolate: B


This may surprise some of you, but if you take out the PGPR, I would rate this a solid A.  PGPR was put into chocolate because it is cheaper alternative to cocoa butter–which is actually good for you.  Find chocolate without PGPR and that is a keeper.


cocoa powder


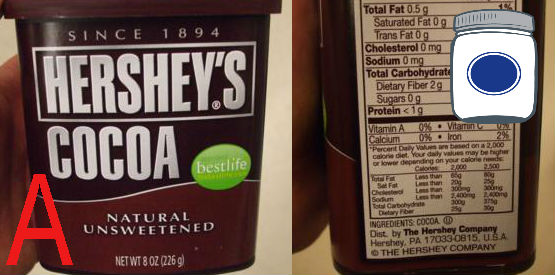
6. Cocoa Powder: A


Most one ingredient foods score very highly with me.  Who would think of entering an emergency situation without cocoa?  Take this out of the plastic package and put into a glass jar and you have a solid A+ by Wilson’s reckoning. 


honey


7. Honey: A-


Honey gets nature’s perfect single ingredient, shelf stable food award.  If you were to take this out of the plastic jar it would be an A.  Buy it from a local producer A+.  Harvest your own honey . . . move to the head of the class!  Oh, and if it crystallizes, do not panic.  You would be surprised how much of a discount you can get on crystallized honey!  Simply warm up the part you need and it will go back into the liquid solution state you know and love. 


Hungry Jack Instant Potatoes


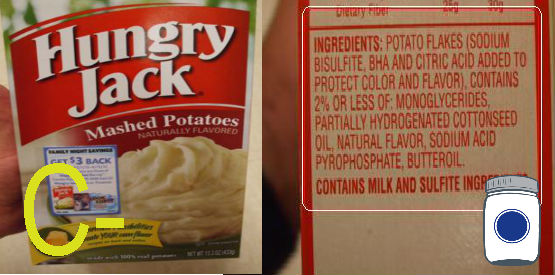
8. Instant Potatoes: C-


The only reason why this is even in the C range is because it contains potatoes.  I highlighted the whole label as one big “not on my shelf” concern. 


Cornbread Mix


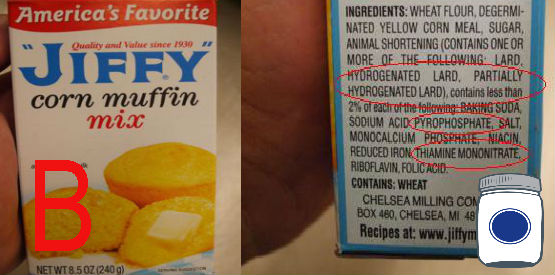
9. Cornbread Mix: B


I love cornbread!  And the best cornbread is made with lard.  However, if you see “hydrogenated” anything–pass on it. 


Macaroni and Cheese


10. Macaroni and Cheese: C


The label was “okay” until I got down to the bottom.  Things with Yellow 5, Yellow 6 or Red 40 never make it to the shopping cart for us.  A C may be generous here.  I am not a pasta hater, so if you really want good Mac ‘n’ Cheese that is nutrient dense try this recipe.


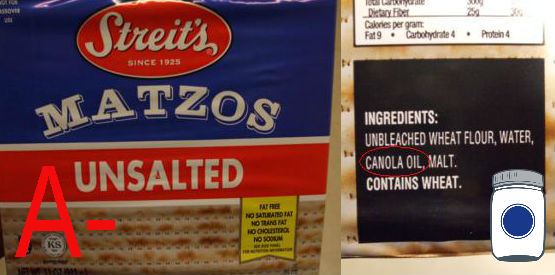
Matzoh Crackers


11. Matzoh Crackers: A-

Well you may not have them on your shelf, but we grew up eating them.  If they used olive oil instead of Canola, this would be an A for sure.  Plain matzoh crackers are tough to beat.


Oils


12. Oils: C-

Not all oil is created equal.  No, but vegetable oil (read: “[GMO] Soy”) and [GMO] corn oil are your not-good-for-you subjects of the Farm Bill.  Olive oil or Coconut oil will do just about anything that you need in the kitchen all the while supplying Omega 3’s. 


Peanuts


13. Peanuts: C-

Cornstarch, MSG, Torula yeast–really?  I love peanuts in the shell, but I will pass on these thanks!


Powdered Milk


14. Powdered Milk: B+

There are not any sources to put raw milk on a shelf, which is what makes it so nutritionally potent.  When you put it through high heat, you kill off the stuff that boosts your immune system.  Failing having a dairy animal “on tap,”  instant nonfat milk is not a terrible shelf stable food. 


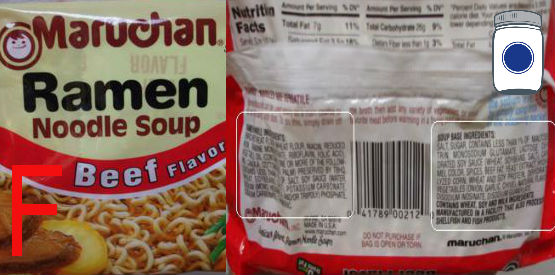
Ramen


15. Ramen Noodles: F

That is not a trick of the eye.  Both of those ingredient lists are highlighted because they are both terrible!  One is for the noodles and one is for the powder–not only do they have MSG, but space wise they are mostly air!  Solid F!


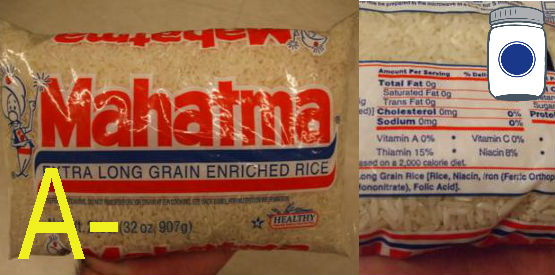
Rice


16. Rice : A-

It is hard to improve on rice.  Not all rice is grown equally or ethically–so do your homework.  However, for a filling side dish, it is tough to beat.  Plus, it is half of rice and beans, or if you prefer beans and rice.  Brown rice is better for you, but because it has more oils in it, the rice will go rancid more quicly. 


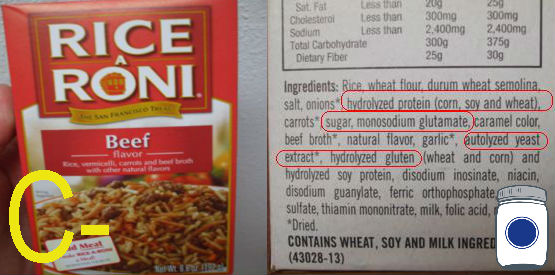
Rice A Roni


17. Rice-A-Roni®: C-

Take a great food like rice and add hydrolyzed anything, MSG, autolyzed yeast (MSG lite), blah, blah, blah and the score plummets. 


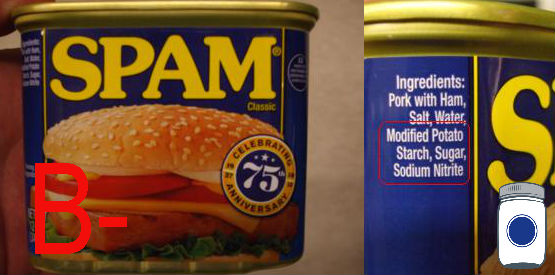
Spam


18. Spam®: B-

What, Spam® gets a B-?  Yes, it is actually not made from the parts of the pig that are rejected for dog food, rather it is all shoulder meat (citing the Spam® museum here).  It would rate higher if not for the “modified” potato starch and of course, what shelf stable meat would be possible without sodium nitrate?  Take those away, and Spam would be an item on my shelf. 


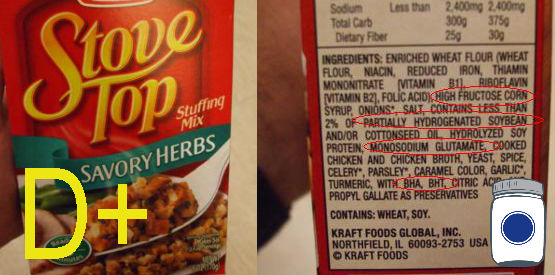
Stove Top


19. Stuffing in a box: D+

I am not grooving on Stove Top because of the High Fructose Corn Syrup, the “hydrogenated” word again, MSG (seems to be a theme here) and BHA and BHT for good measure.  *sigh*  Stuffing can be so good, so meaty, so uncomplicated–but it cannot be “tasty” shelf stable food–therefore it has to be loaded up with all of the other junk.   Try asking your Grandmother for her recipe, I bet she makes the good stuff!


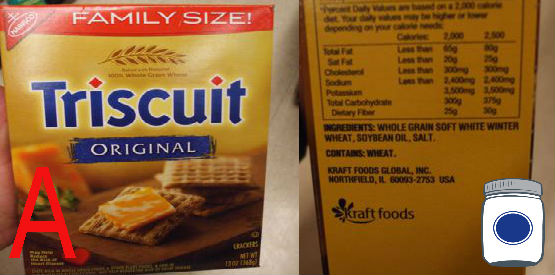
Triscuit


20. Triscuit: A

Surprisingly simple ingredient list.  Actually, Chaya makes a great version of these at our house.  Avoid the flavored ones, they typically have “flavor enhancers” (aka: MSG or its knock offs) in them. 


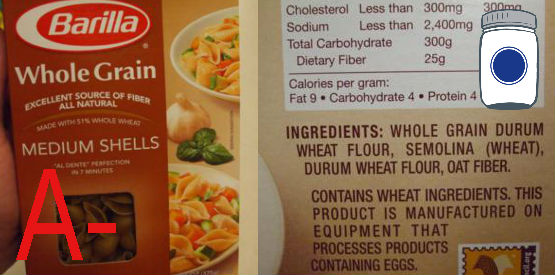
Wheat Pasta


21. Whole Grain Pasta: A-

Not the do-it-yourself kind with real whole wheat, but not terrible for processed food either.  Not all pasta is equal, but this is pretty good. 


Now the quintessential post-nuclear war nonperishable food award goes to the Twinkie®.  If you are into Twinkies®, I would highly recommend reading a great book by Steve Ettlinger, Twinkie, Deconstructed.  It will make you laugh because it is funny and it will probably make you sick to think that you ever ate one at all. 


I randomly picked out the above list in a recent trip to the grocery store.  Your mileage may vary on your nonperishable choices, but please read the label when making your purchase.  What good is it to live through the Mayan calendar ending, EMP, Zombie Apocolypse Trifecta only to suffer from poor nutrition?  Recently a friend of ours (who grew up Mennonite) relayed how she never knew anyone with cancer from her community–until the processed foods started to encroach in on them.  I am not advocating a diet of twigs and grass, but there is a large measure of health to be had by sticking to simple ingredients.  Sure, you are bound to get lots of advice on nonperishable this-or-that for emergencies, but hold the MSG and the stuff you cannot pronounce. 


Wilson

Pro Deo et Patria


Photo Credits:

All Photos by Pantry Paratus


Additional reading:

http://www.twinkiesproject.com/  Lots of funny experiments done with this snack cake. 


Going from the can to the bag, a nerd’s eye view of bulk beans

bulk beans


Going from the can to the bag, the beauty of bulk beans

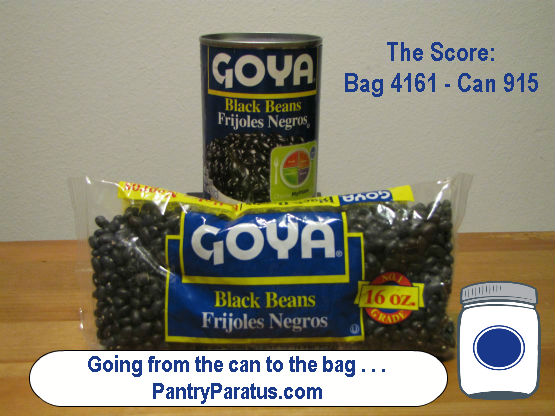
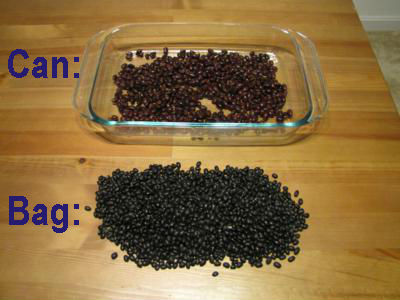
Score is: Bag 4161 – Can 915


Okay, so you are looking to put some food away or you just want to stock up to minimize trips for staple items—either way what does it cost to put food away?  The best advice (and I get this on good authority) is to buy in bulk.  Alright, but how does the cost savings stack up for say, bulk beans? 


Beans, you probably either love them or hate them.  Me, I love them, especially with cornbread in a cast iron skillet.  Beans bulk, beans canned, beans bagged—what is the real cost and how do you measure that?  These are much better questions if you are looking to buy a lot of them. 


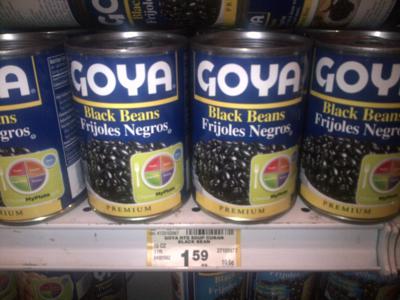
beans in a can


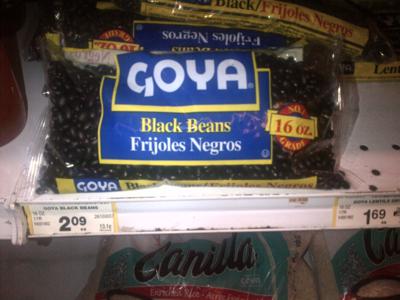
beans in a bag


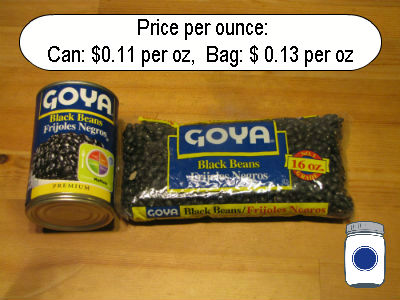
This is a side by side comparison of two containers of beans from our local grocery store.  They are both Goya® brand (to isolate as many variables as possible), the first one is a 15 oz can that cost $1.59 and the other is a 16 oz bag that cost $2.09.  Now doing a cost per unit of weight comparison you can see that the can already looks like a better value: Can: $0.106 per oz,  Bag: $ 0.130625 per oz.


 Cost per bean


Wait a minute . . . when I shake the can I can hear it slosh, where the bag clearly rattles.  Hmmmm, could I be paying for water?  Actually, yes you can—it is called a “value added” product.  Here is how it breaks down, Goya® knows that to take a hard bean and make it a soft palatable bean takes time and heat energy.  So, they figure that you are into soft beans and not hard beans when you are in a hurry.  So, the already cooked variety (in a can) comes with water weight.  Since to buy beans in bulk by the barrel is not practical, smaller consumer cans are what grocery stores typically carry. 


To get a true apples to apples (or beans to beans if you will) comparison you would have to count the number of beans.  Unless you have a lot of time on your hands, an accurate scale and algebra are your friends here.  I got the following count for the number of beans in each container: Bag 4161, Can 915.


Score is Bag 4161 - Can 915


Woooah, that is quite a difference.  Clearly the (16 oz by weight dry) bag is a better choice than the can—but what is the cost per bean?  Cost per bean in the bag: $0.0005, cost per bean in the can: $0.0017.  Okay, so this beans in bulk comparison is probably not going to break your piggy bank.  Taking this further, if you buy bulk beans in say a 5 or 25 pound bag you are realizing some true savings here when you apply the math for value added vs non-value added packaging. 


I hope that you found this helpful.    Bulk beans are a great bargain and you can put away some good protein for not a whole lot of cost involved.  Just take some extra time and prepare those bulk beans yourself before you are ready to use them and save that money for something else—like a pressure cooker. 


Wilson

Pro Deo et Patria


Guest Blog Post and Book Review for Just in Case

Just In Case

Guest blog by Mark Smith

 Just In Case


Book Review: Just In Case: How to be self-sufficient when the unexpected happens by Kathy Harrison


Released in 2008 this book opens with a very plausible scenario told from the perspective of two different families.  One family had little preparedness planning while the other lives a prepping lifestyle—by that we mean they increased the quantity and quality of their options. The differences in their reactions and outcomes are telling.  I found it to be a very interesting and realistic assessment of the fictional families.


Kathy Harrison uses a simple but very effective method of handling preparedness. She calls it the O.A.R. system which stands for Organize, Arrange and Rotate. It is described in detail and I found it to be a very user friendly method that I personally recommend to my clients. She goes on through the book’s 230 pages talking about what to do in case of disasters as well as how to go about setting up your home and family to deal with disasters before they happen just in case of . . . well, almost anything.  It is done in a matter of fact, been-there-done-that fashion.


Just In Case Coupon Code


The book contains a wide assortment of personal anecdotes that were both helpful and revealing. She does not talk down to the reader which I found refreshing in comparison other books on the market.  Also, within its pages were a number of useful recipes using both stored foods as well as cooking from scratch. She discusses how to home can your food and she does it in such a way that a novice canner would feel comfortable.


The book is well populated with clean illustrations.  This helps any reader through the process that she has detailed.  Another helpful feature in the book is the number of short checklists that can help focus the effort of those preparing for any disaster: tornado, snow storm, power outage, etc.


Given that the book came out four years ago, it really put Kathy ahead of many in those who have written on preparedness. In short, I highly recommend that you add Just In Case to your preparedness library.


Mark Smith

Southern Plains Consulting


Southern Plains Consulting


Quick note from Wilson: One of our favorite publishers is Storey Publishing and we have done book reviews on other titles before.  However, today we get to hear from our friend Mark Smith, who is a real live preparedness consultant for hire (you may remember him from Podcast Episode 002).  I met Mark Smith at the Dallas Self Reliance Expo this past winter.  This book comes with both Mark Smith’s and James Wesley, Rawles’ endorsement—good enough for me.  We sell this book because it fits into the primer category (you may not know where to start and do not presently nor ever intend to live in a bunker).  If you want to hear more from Mark Smith, check out his website or his own new ebook (only $4.99).


Cornbread in a Cast Iron Skillet

Cornbread


Cast Iron Cornbread


Our favoritie way to make Cornbread


Cast Iron, such a timeless kitchen implement.  Scrambled eggs & bacon, fried catfish, pancakes, there is just something about cast iron cornbread that makes it one of life’s simple pleasures with any hardy meal.  


Check out our new favorite recipe modified from Ree’s original post over at the Pioneer Woman.   Cornbread in a cast iron skillet can make an ordinary pot of beans, well, extraordinary.  Serve it with honey as a great breakfast option on the go or just serve it along chicken fried steak for a tough-to-beat crowd pleaser.


Here is Ree’s original recipe.  I modified ours by substituting real lard for shortening and home ground flour for all-purpose flour.  In fact, milling regular popcorn for the cornmeal will give you very moist bread!  Feel free to use raw milk (where legal) and my favorite pasture raised eggs in place of their store bought replicas. 


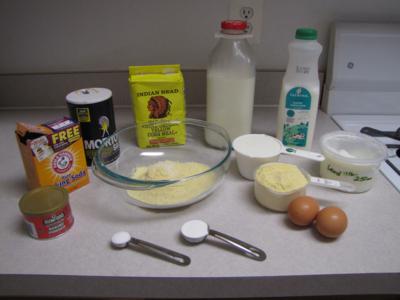
Cornbread Ingredients


Cast Iron Cornbread Recipe Ingredients:

  • 1/4 cup Plus 2 Tablespoons Lard
  • 1 cup Yellow Corn Meal
  • 1/2 cup All-purpose Flour
  • 1 teaspoon Salt
  • 1 cup Buttermilk
  • 1/2 cup Milk
  • 1 whole Egg
  • 1 Tablespoon Baking Powder
  • 1/2 teaspoon Baking Soda

Preparation Instructions

Preheat oven to 450 degrees. Heat lard in an cast iron skillet. Combine corn meal, flour, and salt in a mixing bowl. In a separate bowl, combine buttermilk, milk, and egg. Add baking powder and baking soda. Stir all ingredients together. Add ¼ cup melted lard, stirring constantly. Pour into hot cast iron pan, smoothing surface with spatula. Bake the cast iron cornbread for 20 to 25 minutes or until golden brown on top.


Here are the steps (more or less) in pictures:


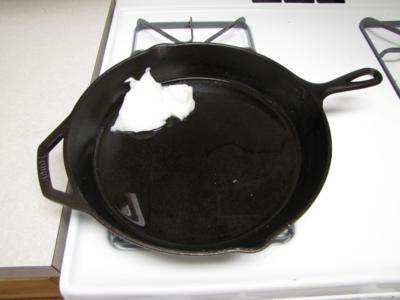
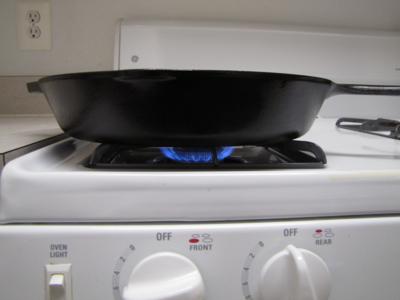
Heat the lard in a cast iron skillet.


Heat Lard in Cast Iron Skillet


Mix dry ingredients and then mix wet ingredients.  Then combine all ingredients together.


Heat Cast Iron Skillet


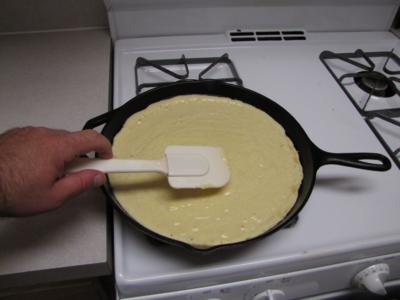
Cook the bottom of the cornbread over heat for about a minute, (you should see a few bubbles).


Cook bottom of the cornbread, smooth out the top


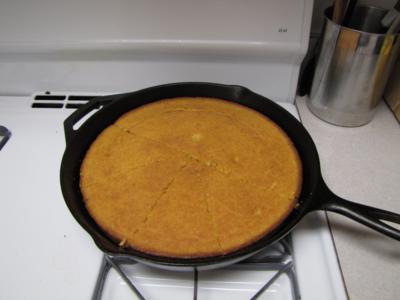
Bake at 450 degrees for 20-25 minutes.


Bake 450 degrees 20-25 min


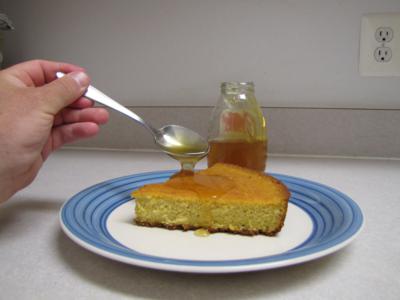
Serve with local honey!


Serve with Local Honey


The key to success of this cast iron cornbread recipe here in my opinion is the cast iron.  Give this recipe a try and let me know what you think down in the comments section.  I am sure that this cast iron cornbread will happily satisfy the hardest working homesteader appetite. 


Wilson

Pro Deo et Patria


Stacking brush (and stacking functions): reevaluating the lowly brush pile

Brush Pile


Brush Pile

Stacking functions for beneficial insectary habitat


If you live long enough in a woodland area, you are going to have to cut something which will inevitably yield a brush pile.  I am an amateur apiculturalist (bee keeper), so I take my local habitats pretty seriously.  We avoid using insecticide sprays or dusts, and we like to plant things that attract bees. 


I ended up having to trim some branches from a bush to clear a sidewalk pathway yielding brush to pile.  I decided I would create a brush pile habitat (the best that I could) on a southwest facing slope that gets great afternoon sun.  The spot I chose was just above an old stump so the water would naturally collect there forming a type of swale. As a bonus, the tree was in the process of forming these seed pods, so perhaps with all of the seed pods, one of them can take root and start a new bush. 


Although I am partial to honeybees (after all I am married to a bread baker), there is a whole world of solitary bees that are great pollinators.  Bees are generally a sign of health and vitality on a piece of land (i.e. “land flowing with milk and honey” Exodus 3:8 NIV).  Generally things that flower and bear fruit require a lot of symbiosis; so much of this is only possible with pollinators.  So if you like beauty and you like to eat, take care of the pollinators.


I had heard on a Paul Wheaton podcast about the value of brush piles for insectary habitat.  Actually, here is an excellent worksheet for evaluating beneficial insectary habitat on a piece of land.    Sure some of that brush could have been used to stoke the camp fire, but once it goes up in smoke, there is little benefit left.  What was once waste (i.e. brush) can actually become an input to develop further life and growth on your homestead.  I think that Crown Bees has some great information on developing bee habitat and the homesteader’s new best friend, the solitary bee.


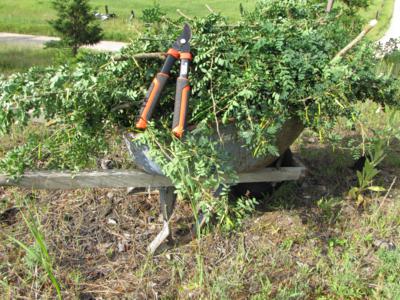
To do this I used a pair of loppers and the trusty rusty wheelbarrow with the solid front tire.


wheelbarrow


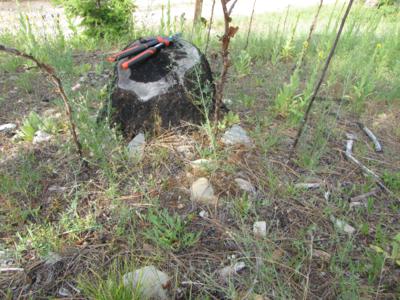
I found the spot by the stump on the slope I wanted to start my insectary.  I found a few sticks to insert into the ground (on contour) to hold the brush in place. 


sticks holding the brush in place


Next, I formed the brush pile habitat by layering the freshly cut brush with seed pods and some old lumpy dry sticks to add texture.  There really is not a whole lot that you can do wrong here on this step. 


stack brush with sticks 2


stack brush with sticks


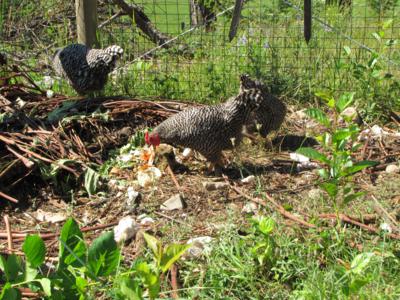
My end product looked like this (as seen from the side).   Notice that it is on the uphill side to help slow the water down and feed the seeds that will hopefully develop there into a new bush. 


brush pile habitat


Can a waste product develop further life on your homestead?  Yes, it can.  I hope that you see the benefits of the simple brush pile. I found this other great article on brush pile fostering, I hope it helps to inspire you to stack functions and create life on your homestead.


Wilson

Pro Deo et Patria


Photo Credits:

All Photos by Pantry Paratus

Another use for the Klamper tool: Building a Compost Bin

Build a Compost Bin

Another great use for the Klamper Tool


Nature is the ultimate conservationist.   You can help focus that reutilization with a simple compost bin.  So you want to build soil, but you are thrifty—how can you do it?  Well, I came across some used pallets and I got to looking at them to see if I could build a compost bin without spending additional money on fasteners. Here is how I did it using the Stronghold Haywire Klamper tool in just under four minutes (sort of):


How to build a compost bin: Start off with some pallets , I scored mine for free at the local hardware store.  The wire that I used comes on a roll (probably sold at your local hardware store) by the ¼, ½ or full mile—so there is no need to be super precise in your measurements.  I had a pair of lineman’s pliers on hand, but you can use any sharp cutter, and lastly we use the Klamper tool because it gets it done!


After you have the tools together to build a compost bin, take four pallets the same width and stand up two of them on end while locking the corners in tightly together.  Use a bungee cord or have someone help you hold them together to make your first tie with the Klamper. 


Now, finish tying that corner together and add the third pallets to the other side.  You should end up with a small corral at this point.  Take the fourth one and cut it to be shorter so that you can access the bin or just tie it onto the front if you do not mind jumping in there to shovel it out. 


make a compost bin


You can start with a more elegant solution like this kitchen compost bin to collect scraps, but getting them to compost efficiently outdoors can be more involved.  Still have questions on composting?  Check out our book review of Composting for Dummies and then read our interview with the author Cathy Cromell


If you have never tried a Klamper tool, you can use the coupon code “BUILD” and get one for $19.99 (normally $24.95) through August 31st, 2012.


A compost bin is a great way to redirect those ordinarily wasted nutrients.  For composting, you basically need Carbon, Nitrogen, Oxygen and time.  It is a great way to recycle that waste into great top soil!  In a compost bin, on the ground, in the ground, aerobic or anerobicjust compost!  Go ahead, try making your own compost bin and tell us how you did in the comments section below. 


Wilson

Pro Deo et Patria


Photo Credits:

All photos by Pantry Paratus