Last Minute House Guests? 6 Tips & Tricks

Produce, Prepare, & Preserve Your Harvest

I love having people over.  I detest the undue stress I place on myself when I have fair warning that guests are coming.  I actually thrive with the unexpected variety, because no excuses shall be made: yes people, this is how we live…well, sort of.  I do pull some last minute trickery, and I’m going to let you in on my secrets.  But then I thought that perhaps I am missing a few great tricks, too!  I put the question about last minute house guests to our facebook fans on the Pantry Paratus page…and wow–they’ve got some great advice I’m going to try next time.

Continue reading Last Minute House Guests? 6 Tips & Tricks

DIY Tile & Grout Cleaner

DIY Tile & Grout Cleaner

Our guest post today is from Edna, who is a maintenance expert.  Be sure to read more about her at the end of this article; but in the meantime, let’s sparkle!  You know that my advice would always be to try the safest, most natural remedy first.  Edna gives us a few to choose from so that we can work up to the right solution. 


The trouble with grout is that it shows every speck of dirt, making your bathroom really unappealing. The same goes for your tiles. It’s really difficult to get stains off your bathroom surfaces, considering that they provide the perfect conditions for growth of bacteria and mold. Well, don’t panic. Here are a few homemade grout and tile cleaner recipes that may work wonders to keep your tiles free of dirt and stains. Check it out.

Continue reading DIY Tile & Grout Cleaner

Fermenting: Large vs. Small Batches

pickled carrots

You can pickle nearly anything following the same basic steps in this article. Really. My family doesn’t really care for pickled carrots, but I absolutely adore pickled garlic, onion blooms, and radishes. And of course, there is always sauerkraut too! If you are interested in pickling eggs, please read this article.

pickled-carrots pickled-garlic

When I ferment anything, I no longer use the large “crock” method. Perhaps that is because I have never owned a real fermenting crock but have tried other hacks such as food grade buckets. I much prefer fermenting in very small batches and so I stick with mason jars.  This is purely experiential opinion, but you’re welcome to it:

Continue reading Fermenting: Large vs. Small Batches

Making Pickles with Fermentation

Making Pickles with Fermentation

Pickles are personal.  Since pickled (or fermented) veggies are so easy to make at home, I can get creative and make them just as I like them!  In fact, if you want to get the great probiotic benefits of a true fermented vegetable and avoid unnecessary food coloring and preservatives, you have no choice but to make them at home.  Cutting out Yellow #5 and #6 is what finally led me to make my own cucumber dills, and if I occasionally eat a store-bought one at a picnic, I’m taken aback at how slimy and flavorless they seem to me now.

Making Pickles


Continue reading Making Pickles with Fermentation

Healthy Food for a Healthy Dog

Healthy Food for a Healthy Dog

Guest Post by Allie Coleman

Allie gives us great tips, and reminds us that the needs of your pooch might change over time.  Please welcome Allie to Pantry Paratus by leaving a comment with your thoughts.  Also, be sure to check out some great dog food recipes at the end!


Healthy Food for a Healthy Dog

Making sure your dog gets regular meals is part of keeping him healthy, but how do you choose the best food for him? With so many options on store shelves, knowing which kind to get can be confusing. The following tips can make it easier for you to determine the healthiest food to purchase.

Take Age and Health into Consideration

Your dog’s age and overall health are the first thing to consider. If your dog is a puppy or senior, make sure you get dog foods that are designed for these age groups. These foods contain the nutrients that a growing puppy or an older dog need. If your dog has any dietary restrictions or health problems, talk to your vet about which ingredients your dog should avoid.

Read Labels Carefully

Look for dog foods that claim to provide complete nutrition and a balanced diet, but don’t take that at face value. A dog food that does provide this should have a statement on it that says the food meets the nutritional standards of the Association of American Feed Control Officials (AAFCO). This statement means that the food contains at least the minimum nutrient amounts required for a diet that’s balanced and complete.

As for the ingredients, look for dog foods that contain higher amounts of protein. The label should list the protein amount, and you can also tell by looking at the ingredients list. The first few ingredients should be sources of protein, such as chicken or venison. While meat byproducts might not sound appetizing, they can provide your dog with good nutrition.

What to Avoid

Avoid foods with high amounts of grains, which serve as fillers rather than nutritious ingredients. Also, stay away from foods with BHA, ethoxyquin or BHT, which could be harmful to your dog.

The author: Allie Coleman is the founder of the doggy bloggy startup: BlogYourDog.com


  Read More:  How to Properly Store Pet Food

Dog Food Recipes

 Around the homestead, we know the value of utilizing every ounce of nutrition out of a butchered animal–even the ounces that we ourselves do not eat.  Stretching a dollar, placing a high value on nutrition and performance…whatever your reasons may be, here are some excellent homemade dog food recipes that nourish your pooch!

A Return to Simplicity

Angi from A Return to Simplicity explains the importance of real food, and how the switch to a more nutrient-dense style of feeding also resulted in cost savings, simply by sourcing wholesome ingredients from their own homestead and butchering.

Prepper's Guide to Homemade Dog Food

Erica from Mom Prepares guides towards what we need to know in preparing homemade dog food. She also expresses the sentiment we do here at Pantry Paratus–that to be truly prepared, you will need to know the “DIY” of the thing…and yes, that applies to pet nutrition too!  If you were unable to purchase dog food, what healthy alternatives will you have? It’s a great time to practice these skills.

Bacon Dog Treats

Rebecca from Letters from Sunnybrook gives us her recipe, but I must confess–bacon doesn’t last long on the plate at our house so I’m not certain it’ll get as far as into this recipe.  Her use of bacon fat, though, is something I will have to incorporate in the future!  Wilson used to make homemade dog treats for our boxers, but his recipe stank horribly–I do believe that this one will smell like a country breakfast on a summer day!

Whether purchasing or making pet food, your pet is depending on you for proper nutrition.  We know you love your pets as much as they love you; so let’s all make deliberate choices for our four legged friends.


–Chaya

3 Comments

Kris

posted on Sunday, February 15, 2015 6:14:28 PM America/Denver

I am happy to be seeing more articles and blogs on making your own dog food and treats. I have started doing this. One day I went to Walmart and started looking at the dog and cat foods. I stood there exasperated and another lady in the aisle started laughing. She said that she had been going through the bags and cans for over 20 minutes and couldn’t find anything on the ingredient lists that didn’t start out with corn!

Kris

posted on Sunday, February 15, 2015 6:19:42 PM America/Denver

Very good article! I’m glad more people are coming to their senses regarding pet food. I have started making my own healthy treats for our dogs and they really enjoy them!

Edward

posted on Wednesday, February 18, 2015 11:47:23 PM America/Denver

When it comes to health of my dog, I am very much concerned about his diet, his daily schedule which includes eating, This article has helped me learn a lot more about the precautions that I need to take care of while choosing the right food and what to consider according to the dog’s age. I read a lot over the internet and I came across your article where I encountered some great dog health tips. I am thankful to you for sharing this article because it helped me to learn something new which I was not aware of. Keep posting such articles.

Preserving Summer’s End (Part 2)

Preserving Summer’s End (Part 2)

Making the best of the sunshine last through the winter

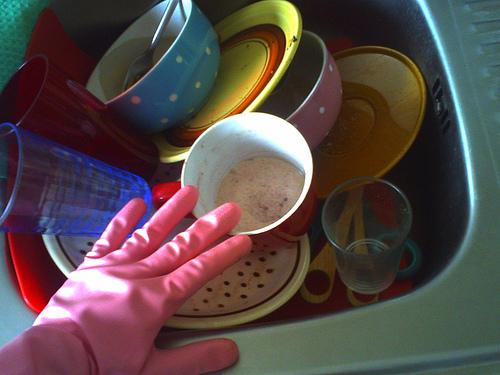
I like fruits and vegetables all year round.   Since I am not living in the Southland but am in Montana,  I need to find a way to preserve the best of summer for the rest of the year.  I showed you how I dehydrated the bulk of what I bought at the farmer’s market in the first blog in this series; now I want to wrap up the dehydration and cover some fermentation.

Produce from Farmers' Market

Truth be told, I like dehydrating the best.  In fact, Chaya was just teaching about it at the Zone 4 Live! event in Pray, MT!  Dehydrating is my favorite because it is so hard to mess it up.  I love a nifty kitchen gadget, but the simplest one that I own is the Excalibur Dehydrator.  It is the work horse for DIY food preservation.
Chaya adds: “Wilson is right, it is hard to mess up, and once you own the dehydrator there is no recurring costs to it.  It preserves more of the nutritional value than any other preservation method and the food has a shockingly long shelf life.  You can’t beat it!”
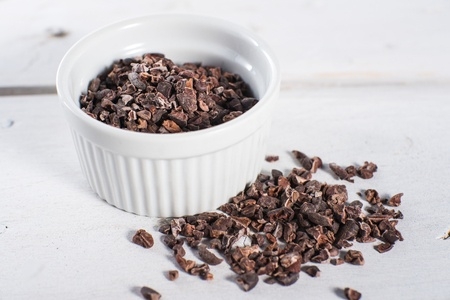
 

Parsley & Basil

Dehydrated Parsley

I am going to combine these two herbs into one section because to process them is identical and I made an error in taking the photos.  Here it goes . . .

Cutting Parsley

First thing I do is to cut the parsley.  This is not all that scientific, and you need not worry yourself with how even the cuts are.  Once the parsley comes out of the dehydrator you can crush it up to be as small as you like.  For now, I am just going to chop and drop it right onto the mesh dehydrator tray.

Weighting Down Herbs

Weigh down herbs by adding a mesh lining on top and placing

something like chopsticks on top.

Now, I have never seen this written in a book anywhere, but I believe that I can save you some frustration here.  I take one extra mesh dehydrator tray and put it on top of the cut herbs.  When either parsley or basil are hydrated, they will not blow away in the moving air from the dehydrator fan.  However, after the moisture is removed, they will migrate to the front of your dehydrator and if you are lucky you can sweep up the best parts in the bottom of the dehydrator. Chaya recommends using paraflexx sheets underneath; although not necessary, sometimes the small dehydrated bits fall through the mesh; it’ll keep your dehydrator cleaner and make it simpler to jar the dehydrated herbs. If you try this method (I added the chop sticks for extra ballast) you can keep almost all of your herbs and not experience an attrition like I described.

Finished Dehydrated Basil

When you are getting the finished product into the jar, you will inevitably get some on the table or counter which is not a big deal, just sweep them up and add those to the jar.  Other than that, you can see that this is $1.50 in parsley—try getting that on the spice aisle in the grocery store!  This is really the way to get fresh herbs into your diet through the winter at a fraction of the cost.

Sweeping up Parsley


Montana Kimchi

Adding Onions to Kimchi

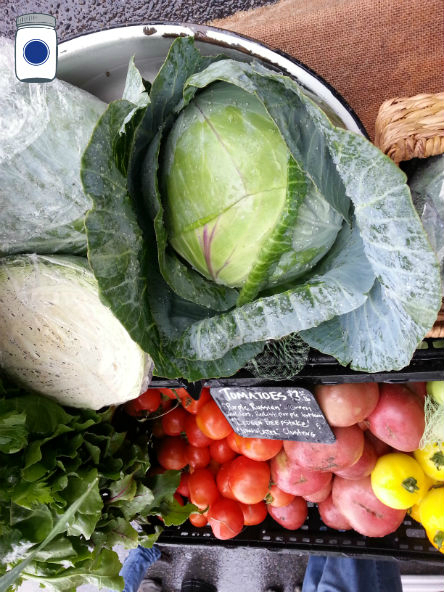
So, I would love to tell you that this is a secret family recipe that was passed down to me, but that would not be true.  Actually, this came from some adverse times when Chaya and I were very poor.  We would ask the produce people at the local grocery store to put aside the “trim” from that day in a box and we would pay some nominal fee for it.  What is trim?  That is what they pick from the produce displayed in the grocery store and throw away because it is not visually appealing; what was not edible for us was a treat for the chickens, ducks, and goose.  So, if you do not mind bruises or a few brownish spots, then you had a real bargain.  From these boxes of produce we started making “Trim-chi” which was upcycled to “Montana Kimchi” later on and has remained with us as a favorite.

Use Exterior Leafy Green

While we are not starting with oozing onions anymore, we are still working off the premise of not wasting anything (actually, my Italian Nonnie would be very proud if she were still alive to read this).  Here I am starting off with the exterior green tough layers from the cabbage.  Since I bought this at the farmer’s market, and I know (because I could ask her) that they did not spray it with pesticides, therefore the outside leaves are edible*, so I cut them up and toss them in the mixing tub.

Cut Cabbage into small wedges

When it comes to cutting cabbage for fermentation, the best tool hands down is a food slicer.  However, I wanted to show the manual method here and one particularly useful trick is to cut the dense cabbage in small wedges.  While my OCD tendencies would make me want to slice it uniformly into thin bands (thus, my affinity for the food slicer) all the way across the head of the cabbage, this works out to be cheaper than therapy and more efficient for food preservation.

Cabbage for Kimchi

Do you recall from Part 1 where I had you set aside the stringy root bits and carrot tops?  Here is where we use them.

Carrot Tops in Kimchi

As the saying goes, “It’s all good for Gumbo.”  Well, I do not actually venture into putting squid into my Montana Kimchi, but just about anything is good to add and carrot roots and tops are no exception here.

Chard in Kimchi


I did the same with the chard leaves and stalks, the green chive tops of the onions.

Adding Chard to Kimchi

Just about anything is good to add try apples, garlic or hot peppers; I have even heard of people using potato peels.  Fermentation is equal opportunity goodness. 

Where dehydration is pretty generous and hard to mess up and baking bread is more of an exact science, fermentation falls somewhere in the middle for level of difficulty.  There are a few things that you want to know upfront: you will mess it up at least once, always provide for oxygen (avoid anaerobic conditions!), let the bacteria do the work and have patience.

Non-iodized salt is important

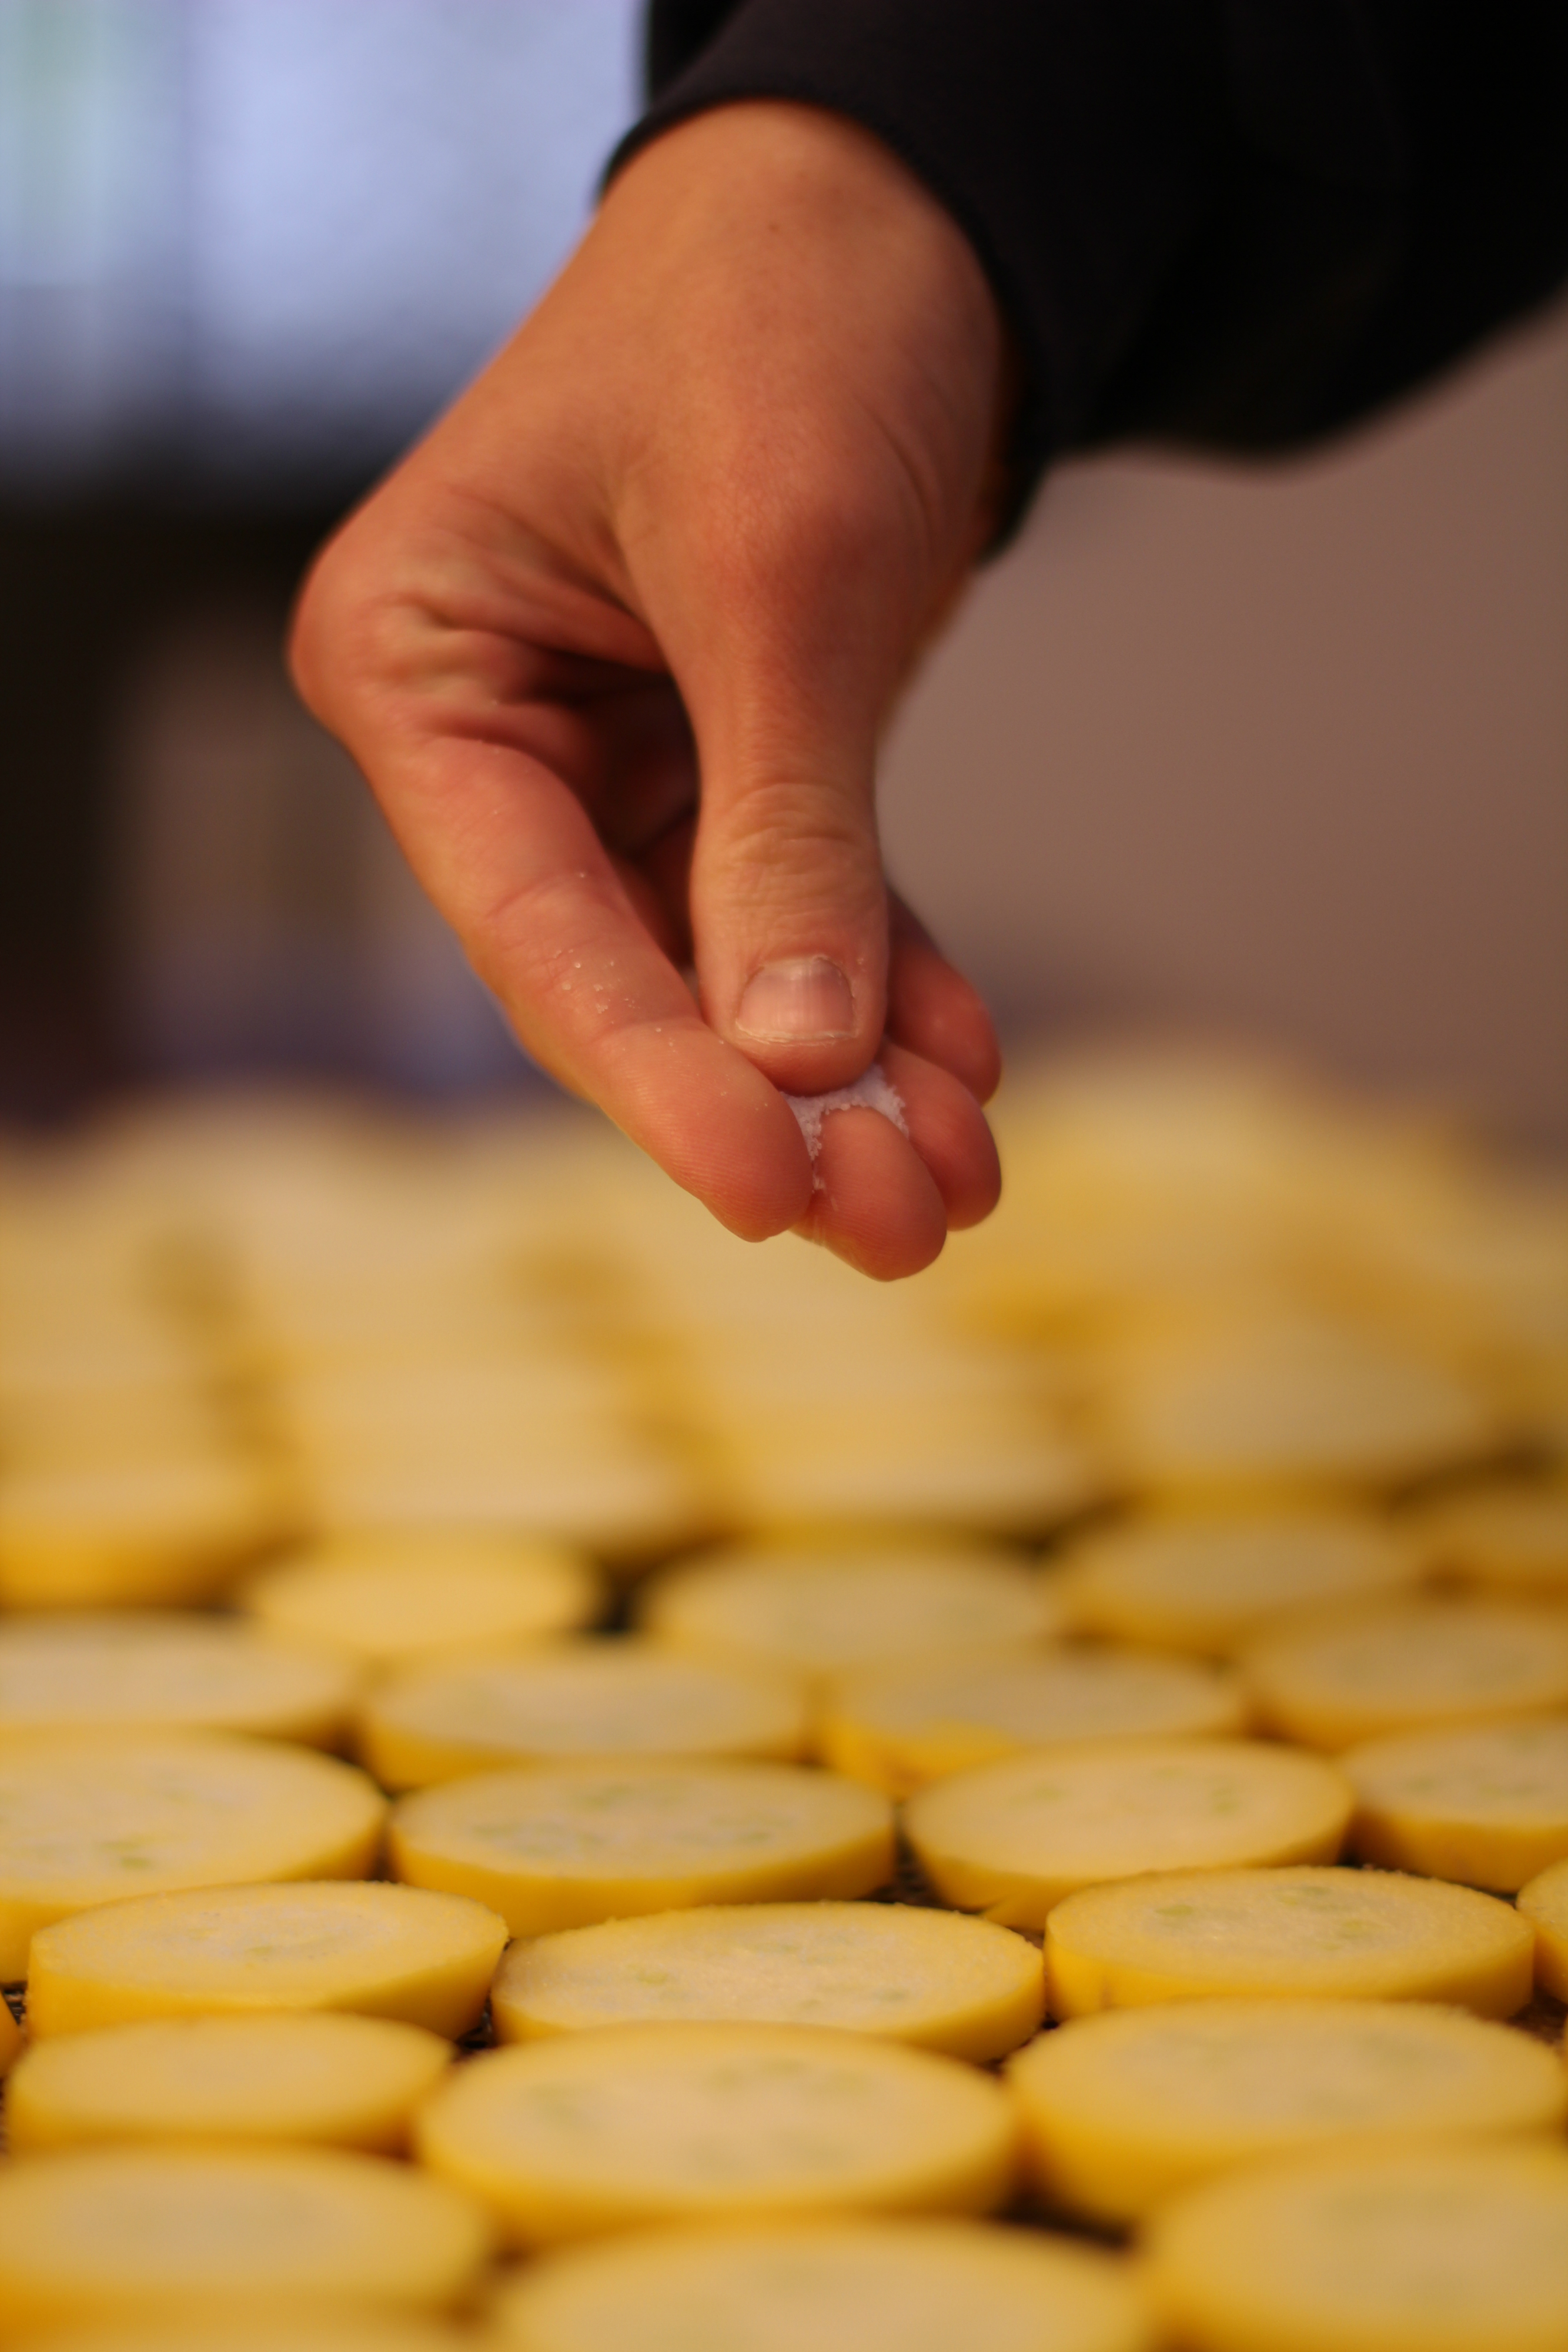
In this particular batch, I am counting on the lactobacillus on the cabbage and chard to start the process, but to help it out and to keep the other bacteria at bay I need to lower the pH.  To do that I am adding non-iodized salt (canning salt, sea salt from Pantry Paratus, or kosher salt will work) and kneading/mixing thoroughly by hand.  The salt has two functions: lowers the pH to create an acidic environment that the lactobacillus can work in, and it draws moisture out of the vegetable matter to create a liquid solution.

Splash of Wine-Vinegar

You will be surprised at how compact the vegetable matter becomes after the salt starts to work.  As the water follows the solute (salt), you will also notice a lot of liquid at the bottom of the bowl or tub in which you are kneading this—this is a good sign.  For this batch, I am adding just a splash of a home-fermented wine vinegar with mother mixture to lower the pH and get the fermentation party happening quicker.

Pack Kimchi into jars

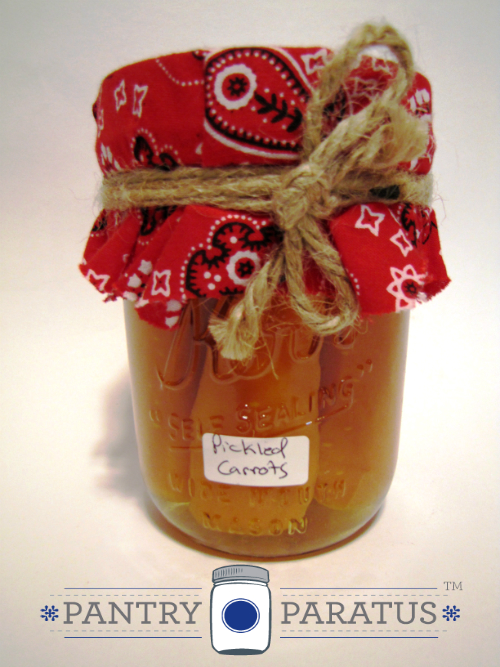
Lastly, I packed the Montana Kimchi into half gallon jars using a wooden spoon handle to compact it. You may be wondering, “How much salt do I add?”  The answer is, “to taste,” but to be more precise, you will see the water draw out and it should cover what is being fermented.

Cover with Fluid

If you feel that you need to add a splash of water to cover it, then you may need to re mix and add more salt.  The better solution is to just add the salty water that you have just extracted by kneading the mixture.

Dehydrator Yield

Here is the whole project completed.  It took about two hours for the Montana Kimchi and the rest of the food was processed as I had room in the dehydrator over the next few days–and this is the sum total of the $18 in produce I purchased at the Farmers’ Market on a rainy day.  All in all, I love to see this on my shelves as a reminder of peace of mind that comes from forethought.

You may be wondering, what the dish is for under the half gallon jars?  As the salt continues to work, you will see the liquid start to seep out of the top of the jar, this is normal.  For this reason, and to let the carbon dioxide out, we just loosely put the lids on and the bands are only on there half a turn.


Pro Deo et Patria,

Wilson


P.S. As a public service announcement and reminder, nothing goes to waste.  If you cannot use it, your soil can so compost it.

*The lady at the farmer’s market stand actually said to me regarding the cabbage, “If you see any green friends crawl out, just pick them off.”  I replied, “If the bugs do not want to eat it, why would I?”  Moral of the story: shop locally!


Proviso:

Nothing in this blog constitutes medical or legal advice.  You should consult your own physician before making any dietary changes.  Statements in this blog may or may not be congruent with current USDA or FDA guidance.

Preserving Summer’s End (Part 1)

salting zucchini for the dehydrator

Preserving Summer’s End (Part 1)

How to Dehydrate: Apples, Zucchini, Onions, Carrots

If you are like me, you loathe paying $4 for mealy tomatoes in January.  There are two things that really put me over the edge about that: one is that tomatoes are cheaper in the summer, much cheaper! And secondly,  a January tomato from the store does not even taste like a tomato.  So, I have done all that I can over the years to leverage food preservation to our advantage because I really like tomatoes, but not at $4 lb!

$18 at the Farmers Market

In the last blog, I gave a shout out to all the people faithfully manning the booths at the farmer’s market, we really do appreciate it.  In the above picture, here is my haul for $18—not bad.  Now to preserve it all.  As a reminder, nothing goes to waste.  If you cannot use it, your soil can so compost it.


Apples

Dehydrated Apples

The first thing that I processed was the apples by running them through the dehydrator.  In retrospect, I wish that I would have done the herbs first because they go so quick, but are so aromatic that they can impart flavor to other things in the dehydrator like the apples and should be dehydrated alone.  But back to the apples: here is how to do it:


Apple Peeler

We use this apple peeler from Pantry Paratus, but you can check out our other great apple tools in our Fruits & Nuts section.


You will find that nutritious apples with dense juicy flesh dehydrate best when they are sliced to uniform thin slices.  The best way to do this is the apple peeler.  We leave the skin on as fiber is always good to have, but if you like them peeled by all means the apple peeler and slicer will make you wonder why you ever did this with a paring knife.  It’s also great fun with kids.


How to dehydrate apples

Next, I take the “apple spring” and run a knife down one side to cut the coils and make the rings from the coil-sliced apple.  To control the amylase sugar browning on the apples, I dip them in lemon juice (about a ¼ cup to 2 cups of water).  Chaya juiced & froze an entire box of lemons earlier in the season; I used that but I also used the stuff from the grocery store too.

Dip in lemon juice

I happen to have this handy thrift store glass cup (picture above)  which is exactly the size of the apples so that I can economize my lemon juice and make it go further.


Apple Rings

Before

Dehydrated Apple Rings

After


I like to do my apples low and slow.  That is put them in the dehydrator on low heat for a longer period of time.  To me, the apple rings are dehydrated and ready to put away when they have a noticeable click and bounce when you drop them on the table.  I like mine to snap when you break them, but other people like theirs chewy so pull them out of the dehydrator when you like their texture.


Zucchini

Dehydrated Zucchini


I know, I know.  I am probably the only person who cannot grow zucchini well, but these beauties are actually going to make one of my favorite snacks—zucchini chips!  Careful though, you do not want to eat too many of them, they are higher in fiber than you think!

zucchini

First thing is first, slice them up into discs.  Since zucchini dehydrates so well, you do not need to worry (as much as with other foods) about uniformity, but just get them onto the tray.

lighltly salt the zucchini

Next for zucchini chips, I like to lightly salt them.  You will be surprise how little salt you need here.  If you are putting zucchini away for long term storage, skip the salt as it will not be optimal for storage.  If you feel adventurous, sprinkle some garlic powder on them as well for a real treat.  Still not enough?  Find your favorite fresh herbs and make a pesto, dip the zucchini discs in the pesto, then dehydrate them.  I will bet that you cannot eat just one!

Dehydrated Zucchini on tray

Zucchini (especially with the light salt) dehydrates very quickly, so you can usually turn these around in a day or less.


Onions

Dehydrated Onions

These onions from the farmer’s market were so tasty, we were eating them like an apple.  Usually, this indicates low sulfur in the soil, but I am not complaining here.  Actually, I found a new side salad dish: fresh lentil sprouts, some finely chopped fresh farmer’s market onions, light sea salt, parsley and some nutritional yeast to taste.  Wow!

Cut Onions

Slice the onions and lay them out on the tray.  I was not all that particular here, so the object is to just get them onto the tray.  Since they shrink so much, you can overlap them if need be.  This may mean that you have to break them apart at the end, but the increase in throughput makes up for it.


Dehydrated Onions


Chaya adds: It’s hard to explain, but the flavor seems to get even better.  If you are from the Midwest, you remember those chemical-laden onion-things that people put on green bean casserole, right? Well, these are better, way better.  Very nearly a candy.

 Carrots

Dehydrated Carrots

The last thing that I wanted to show you today is the carrots.  These were itty bitties that the kind lady at the farm stand gave to Bugaloo, my daughter,  a token for how brave she was to even come out with her rain coat and boots.

Shred Carrots

The first thing that I do is to pick off the stems (which are actually related to parsley and are edible) as well as the stringy root bits and I set them aside.  Stop by for part 2, and I will show you what to do with those.  Since these carrots were so small, they were hard to shred.  You can dehydrated carrots sliced, too, but Chaya prefers them shredded because they rehydrated much more thoroughly and quickly.


Shredded Carrots

Shredded carrots can be placed directly on the tray.  Actually, I just shred them right over the mesh dehydrator mat—done!  If you are going to cut the carrots into coins, I recommend blanching the cut slices first, then dehydrating them as this will prevent case hardening.

Dehydrated Carrots

Come back next time for Preserving Summer’s End Part 2.  I will show you how to dehydrate herbs (read: $avings!) as well as my Montana Kimchi.  See you then!

Pro Deo et Patria,

Wilson


Knives


P.S. Do you know what the difference is between these two knives?  Why is this difference important for dehydrating?  Leave a comment with your answer.


Proviso:

Nothing in this blog constitutes medical or legal advice.  You should consult your own physician before making any dietary changes.  Statements in this blog may or may not be congruent with current USDA or FDA guidance.

Food Foraging: Get Started with These 7 Tips

Food Foraging: 

Get Started with These 7 Tips


The treasure hunt for fresh, local food sources can literally be as “local” as your own yard.  Dandelion jelly, puffball mushrooms, clover for your tea, and so the list continues.  Delicious foods that pack a nutritious punch may be common “weeds” or might be found in a neighbor’s field or a local park.  A treasure hunt indeed–there is a thrill to finding and identifying early springtime wild asparagus or an onion blossom (ooh, yummy “fritters”).  Your mind races with all of the plans you have for the delicacy that only reveals itself for a brief season.  This is food that requires living in the moment, and can serve as your trophy from a day out in the bright sunshine. 


Tip 1

There are some things you must know before you get started.  First and foremost, you must know the land, know the owner and something about it.  Has it been sprayed with any chemicals?  One of my favorite foraged herbs (Mullein) is deliberately sprayed by our county because it is considered a noxious weed–this means that I can only forage it from my land or from that of a friend who verifies it safe. 


Butterfly on Oxeye


Tip 2

Secondly, only pick a few things you want to forage.  Get a great guide like this one and learn only a few items well.  Once you decide what you want to try to forage, look up the food in alternate books and guides; sometimes the difference in artwork can help you clarify what it is that you are searching.  Plan on no more than three foods to start this season, and every year you will add to your repertoire.  This keeps foraging safe for you; you are not guessing or getting confused.  You can also use good books to learn the fakes and look-alikes.  Some edible plants have poisonous counterfeits.  Know them both by heart.


Backyard Foraging


Tip 3

Thirdly, get talking!  Someone in your area loves to forage, no matter how unlikely it seems for your neighborhood.  I have found many kindred spirits at my Farmer’s Market and through the local food co-op, so these are great (and natural) places to strike up the conversation.   They’ll give you suggestions as to where to look, the effect recent weather has had on the crop, and anything else you should know.  One piece of advice given to me when first moving to Montana was by two older women that I would guess to be in their late seventies: “Always wear bells on your clothes; it helps scare the bears away.”  Your newfound foraging friends may offer to take you along to show you a trick or two!  If they do not offer, do not hesitate to ask; this might help you make positive plant identification and will ease any concerns you have about it.  If you live in a community with a cultural center for an immigrant population, this might be a starting place.  I once took Russian language lessons from a Russian cultural center that taught everything from ballroom dancing to chess, to—mushroom hunting!


Huckleberry Picking with a Friend


Tip 4

My fourth tip might be controversial to some, but follow me out.   If you are starting, skip the mushrooms altogether.  There are about 10,000 known species of mushrooms out there–dizzying, isn’t it?  Out of those, only approximately 1,000 species are edible (edible, not necessarily delicious).  Mushroom hunting is a wonderful skill and a very rewarding one, but not for the beginner.  There is a Russian saying: “There are Brave mushroom hunters and Old mushroom hunters, but not Brave, Old mushroom hunters.”  Try something easier first, then spend this next winter attending your local mushroom hunting club to gear up for Spring when you have the expertise and companionship of Old mushroom hunters.  


Morel Mushrooms in hand

photo credit: Chiot’s Run via photopin cc


Did tip #4 make you mad?  For those who understand that a world of opportunity lay at your feet with mushroom hunting,  understand that the fear of poisoning is what keeps most people from ever attempting food foraging!  By eliminating mushrooms altogether for the newbie, we have opened up a world of delicacies from the forest floor and eliminated the initial fears that would inhibit them from these delicious discoveries. We need to be careful with all foraged foods, but mushrooming is the one area I say should be reserved for hands-on instruction with a veteran.


Tip 5

Make a day of it!  Plan on hiking.  Invite a friend.  Take good maps, a change of clothes in the car, lunch and snacks, tell others where to find you.  Carry a bucket or bag for the food you collect.  Let me recommend the Roo apron; it will keep your clothes clean, your cell phone handy for emergencies, and eliminates the need for a bucket when you traipse through the woods.


Make a day of it

 photo credit: yvestown via photopin cc


Tip 6

Wait until you get home to taste test.  This is another safety tip.  It might be exactly what you think it is, but if you personally have an allergic reaction, the side of a hill is not where to discover it.  Just wait until you get home, cross examine the food item with your other books and resources, and then nibble.  Wait a half hour.  By then, you will know that you positively identified a nourishing food on your hike. 


Fiddleheads & Lemon Slices

photo credit: libraryman via photopin cc


Tip 7

Finally, experiment in the kitchen.  Your books will recommend the best way to eat a food item, and you can learn some great recipes through resources like this book.  Play, eat, and enjoy!


Preserving Wild Foods


Staying Safe, Sun-kissed, and Satisfied,

Chaya


Proviso:  Nothing in this blog constitutes medical or legal advice.  You should consult your own physician before making any dietary changes.  Statements in this blog may or may not be congruent with current USDA or FDA guidance.


Using Cacao Part 3: Homemade Cocoa Powder

cacao nibs

How To Make Homemade Cocoa Powder

Using Cacao Part 3

 How to make homemade cocoa powder


I suffer from high expectations, and since I use chocolate to self-medicate the consequences of that, I decided that I should begin applying my high expectations to the chocolate itself.  First, is it ethically produced chocolate?  Is it fresh?  And then, if I’m getting those two things how on earth can I have it affordable?  The answer lay within the nearest bag of organic, fair trade cacao nibs.  By purchasing bulk through Pantry Paratus, I am getting a great price.  By grinding my own nibs into powder, I am getting the freshest product possible.


Taste Test

 I wanted to know if I would really prefer it to the others on the market.

I did a cocoa powder taste test. 


Hersheys, Ghirardelli, and Organic Fair Trade Cacao Nibs


It was hardly a scientific approach.  The Hershey’s Powder and the Ghirardelli were in my pantry already. Both were within the expiration dates by a wide margin but I highly doubt I purchased them simultaneously so they are likely differing ages; they were stored properly and in the same conditions. 

RESULTS:

Hershey's Cocoa Powder

    Tired.  Bland.  Slightly clumpy but a nice powder texture.

That was the Hershey’s.   No real complaints but definitely my least favorite.  It requires more to get the same chocolatey flavor.


Ghirardelli's Cocoa Powder

  Good flavor, nice powder. But expensive.


Yup, that would be the Ghirardelli’s. Having done a taste-test between it and Hershey’s, I would say that Ghirardelli’s is the better powder by far due to texture and a more potent chocolate flavor. I deliberately did not alter these photos to improve lighting; look at the difference in color between Hershey’s & Ghirardelli’s.


Grinding Cacao Nibs

    Best value (hands down), freshest flavor, and known origin.

  Extra steps and cleaning.


Without a doubt, I really do prefer the home-ground cacao nibs flavor-for-flavor.  Other powders remove much of the cacao fat so that it is shelf-stable, but it is where the deep, bitter flavor resides.  You are retaining that with cacao nibs, so fewer are needed to get a rich flavor.  With Ghirardelli selling for over $18 a lb, I think I’ll take the DIY method with the cacao nibs.  I use my coffee grinder so it isn’t really more work, but it is an extra step and the grinder does make one more thing in the dirty-dish pile.  Knowing the human trafficking involved in the chocolate industry, though, it feels extremely selfish to voice the “ugh, a dirty dish to feed my gluttonous indulgence for chocolate” complaint outloud.  <yup, erased and re-wrote the last paragraph twice—don’t want to sound like a horrible person OR like a self-righteous one.  It’s the chocolate talking. >


Cacao Nibs


How To Grind Cacao Nibs

The high level of fat in the nibs means that you should never use an electric grain mill.  Use either a solid and trustworthy food processor, a hand-crank grain mill with the stainless steel burrs, or a coffee grinder.  You will make your appliance earn its spot on the counter with this job, though, so be sure it is a tough one.  You will have to grind it several times.  It may never come out with the fine powder to which you are accustomed (shelf-stable powder also have a lot of the cacao fat removed), but the right appliance and multiple grindings can do it.  As you grind, you may need to pause and remove the gummy cacao fat (“liquor”) on the bottom of the grinder several times.  Store your powder in an air-tight container in the freezer for maximum shelf-life.  Remember that there is a high percentage of fat in that powder and it will go rancid.  Ideally, only grind what you plan to use within the week.


I’m done buying the store-bought stuff when fresh, full-flavored cocoa powder can be made so quickly, ethically, and affordably.  If you would like to pick up a 1 pound bag of cacao nibs for a great price, get them here with Pantry Paratus.


Humbly signing off to go wash dishes,

Chaya


Did you miss the other articles in the Using Cacao Series?

Part 1: Is Cocoa Powder and Cacao Powder the Same Thing?

  Part 2: Chocolate By Any Other Name (Chocolate Defined)


All Photos are property of Pantry Paratus.  Feel free to share or pin them in conjunction with this blog, but  please keep proper attribution.  Thanks in advance.

Vegetable Powders: Making Them, Using Them, & Long-Term Food Storage

Vegetable Powder

 Vegetable Powders

Making Them, Using Them, and Long-Term Food Storage


Vegetable Powder


The Moms were eating lunch while the kids—claiming they were full—exited to play tag.  The subject  discussed was by no means gloriously thrilling.  Spinach.  We were talking about spinach.

“I got it on sale, overbought it, and not even the husband will touch it.  I am doomed to salads three meals a day for a week.” 

Nods of sympathy. 

I asked if she had a dehydrator; no, but it is on the wishlist she said.  I nearly prefer spinach in its dehydrated form because it makes for great pasta (or my meatballs with bechamel sauce) and is a wonderful nutritional boost to anything while the family is completely oblivious.  Sure, some might say it’s a passive-aggressive way to achieve optimal health; I prefer the term clever.   I do not think most nutrition should be sneaked; kids should understand what constitutes a healthy diet and be encouraged to eat fresh, raw fruits and vegetables.  However, complex flavors unaware to them will ultimately expand their palate so that the next time you introduce that icky green, it won’t seem so foreign—or icky.  I have personally experienced this.

 And it started with vegetable powder.

My kids were not keen on spinach, but I found that powdered spinach could work as a thickener and, if in small amounts, boost the nutrition without changing the flavor (color but not flavor).  Over time, I got lazy and then used it as flakes; I think they know it’s in there.  Like I pretend not to notice stuff the kiddos do on my weary days, I think they pretend not to notice the increased spinach flakes.  Maybe I’m wearing them down.


Dehydrated Spinach


And just like my children increase the actions to which I turn a blind eye, their silence has only emboldened me.  Why stop at spinach?  Tomatoes, carrots, the possibilities are endless!  I personally powder celery, onion, garlic, tomato, carrot, and spinach.  A few weeks ago I got 5 pounds of asparagus from the local co-op.  I checked in my “Preserve It Naturally” book (which comes with an Excalibur from Pantry Paratus), and guess what????   I can powder asparagus for use in soups!  I really had no plan when I ordered 5 pounds of asparagus.  It just sounded good.  Other great soup and sauce additions are green beans, broccoli, cucumber, peas, and peppers.


Dehydrating Asparagus


 I was a primary caregiver for a child that was underweight and came from a difficult circumstance.  She just would not eat.  In desperation I turned to a  cookbook that, although had  some poor nutritional suggestions in it like vegetable oil, was written on the notion of making vegetable purees that could go virtually undetected in nearly anything.  I made spinach brownies and chickpea chocolate chip cookies, stuff like that.  The difficulty was that the pureed vegetables had to be either refrigerated for immediate use or frozen.  This, for me, was not practical.  In fact, we wrote a whole article about the hidden costs of the deep freeze (which do not even include things like losing food to freezer burn or power outages). 

Enter the Excalibur Dehydrator.  Seriously in love.  But if you really wanna hear me gush, go check out this article.  

Beyond the nutritional boost from powders, here are a few other reasons I love them:

Pantry Paratus To use as a thickener to soups, stews, and casseroles

Pantry Paratus To add a depth of flavor in unsuspecting ways (carrot powder is great in meatloaf, for instance, and a little is great in your oatmeal cookies)

Pantry Paratus Vegetable powder is seriously boots long-term food storage because its density means less quality-compromise from air exposure, and is far less bulky.

Pantry Paratus Wonderful for thickening (and nutri-boosting) your smoothies

Pantry Paratus I can jump on great vegetable deals without panic that I have more than I can use

 To make Vegetable Powders: Check the food-by-food list in the Preserve It Naturally book available at Pantry Paratus, to determine the best method for that specific food.  If the food requires blanching, see the basic method here.  Here’s a basic breakdown, so you know what you are getting into:

Spinach and other leaves (herbs, raspberry leaves, kale, etc) get a rinse and then go straight into the dehydrator.  To powder leafy greens you can pulse them in a food processor,  break them up with your hands, or use a mortar and pestle.

Garlic and onion get sliced or chopped, and then you simply arrange them onto trays.  Once dehydrated, pulse in a food processor or use a mortar and pestle for small, immediate-use quantities.

Overwhelmed by Carrots

Other vegetables such as carrots and asparagus should be cooked (boiled or steamed). Once cooked, you can puree them and spread onto a paraflexx sheet.  This is by far the simplest method, although you can blanch, slice, and dehydrate.  However, I find that dehydrated sliced vegetables are more difficult to pulse into a fine powder. 

Dehydrating Vegetables as Leather


Once these vegetable leathers have dehydrated to a dry crispness, you can use them in cooking as sheets or flakes, or powder them using a food processor or mortar and pestle.

Putting Dehydrated Vegetables in Food Processor

Tomatoes and zucchini can be done to your preference; cooked or raw, peeled or unpeeled, sliced then in food processor, or as vegetable leather.  My preference for these is to puree, make leather, and then keep some as sheets and powder the rest.

Some Basic Guidelines:

1)      Dehydrate the food item according to specifications given in Preserve It Naturally until it passes the “clink test.”  Many foods should snap when you break them, and you can check them by dropping onto a table.  If they make a clinking sound, you have sufficiently removed the moisture. 

2)      Some foods will powder easily with mortar and pestle, but a food processor will be required for most foods and for larger quantities. 

3)      Store the powdered vegetable in vacuum sealed bags for long term food storage, and mylar bags will help eliminate the light and other variables.

4)      For immediate use, place the powder in a pint-sized jar with an oxygen absorber and keep it away from heat, steam, and light.


Put this on your calendar for this week.  Then come back here and share your ideas with us!

Produce, Prepare, and Preserve,

Chaya

Proviso: Nothing in this blog constitutes medical or legal advice. You should consult your own physician before making any dietary changes. Statements in this blog may or may not be congruent with current USDA or FDA guidance.

It’s All Gravy: Reduction Sauce, Roux, Béchamel, Veloute, Mornay

It's all gravy

Reduction Sauce, Roux, Bechamel, Veloute, Mornay

  The word gravy usually refers to the sauce that ramps up the meal in flavor, but few are exacting with its use.  In fact, Italian Americans sometimes use the word to describe pasta sauce.   I actually looked up the definition of the word “gravy” and found that it really only refers to a sauce made out of a meat’s juices. 

 So what is it that my mom makes from butter and flour and milk (with bacon fat if she has it)?  That would be roux (pronounced roo).  This is actually a family joke for us.  Wilson & I were only dating when he leaned over my mother’s shoulder in excitement—“I love roux!” he exclaimed.  Now, Wilson comes from a multicultural family (French is his mother’s first language).  I come from a multicultural family too, if you understand that Southern Ohio and Southern Missouri are completely different cultures.  Although the pronunciation of things like “creek” (translation: crik) and “fire” (translation: fawr) vary widely from my family’s diverse cultural backgrounds, there is only one word for that creamy sauce made from bacon fat:  gravy. 

 I most commonly make what is called a “reduction sauce” to get the yummy bits out of the pan.  I just pour in some wine, which deglazes the pan beautifully.  That means it pulls all of the flavors off of the cast iron and liquefies them.  I might add something like onions or mushrooms and then turn the heat down to let it simmer and thicken, scraping the bottom to get the cooked-on tasties.


Gravy


People complain about how difficult it is to make gravy but it has more to do with texture than academics; no one can give an exact recipe because of the variables of fat or starch used.  Use the left over meaty bits in the pan, and add some lard or butter if needed, and deglaze.  Turn the heat to medium-low, and slowly add milk while continuously stirring.  Mix in some flour (a tablespoon at a time) to thicken but never stop stirring, not for a moment.  You can let this simmer as long as you must to get your desired consistency.  Some people swear by cornstarch instead of flour, but we do not personally use that; if you are gluten-free, arrowroot or tapioca do the job nicely (rice flour burns too quickly, avoid that).  You’ll add salt and pepper to taste, and that is really all there is to it.  It’s a matter of 4 additional minutes in the kitchen, tops.  It is a great way of scraping the last flavor out of the cast iron skillet.  Taste as you go, go slowly, and do not be afraid to experiment.

 Similar in purpose, but more versatile and delicious—Béchamel (pronounced bay-shu-mell)—actually serves as its own ingredient within other recipes to bring moisture and depth.  It is a French white sauce that is used through most of European cuisine; many Italian, German, and British recipes consider it a necessary staple for things like seafood crepes or meatballs.  Although you will see many variations of this “gravy” most will include the secret ingredient that separates it out from other pan sauces…nutmeg.


Bechamel Sauce Recipe


Recipe for Bechamel Sauce

  • ½ stick of butter (4 Tablespoons) or ghee
  • 3-4 Tbs home-milled flour
  • ¼ cup broth (or substitute with milk)
  • 1 cup milk  (or substitute with broth)
  • Salt & pepper to taste
  • Pinch of nutmeg

 1) In a saucepan, warm milk on low while you are melting your butter in a separate skillet.

2) Start by melting butter in a medium-low skillet (butter burns quickly).  Using ghee instead (my secret, shhh, don’t tell) will enrich the flavor and help prevent burning.

3)Stir 3-4 TBS flour into the melted butter until it’s a thick paste.

4)Then immediately pour ½ cup broth (vegetable or animal, either is good) while stirring. 

5) Add about a cup of warmed milk, salt & pepper and –TahDah—a pinch of nutmeg.  You can turn this to low, cover, and walk away for 5 minutes at a time until it is your desired thickness (usually about 10 minutes).

 Feel free to add your favorite herbs or spices (like fresh rosemary or basil), dry mustard, or other spices.  The variations of Bechamel are endless.

 Veloute: Veloute is basically a dairy-free Bechamel.  Make the standard Bechamel, but substitute more broth for the milk.

Mornay Sauce: Make Bechamel, but add about ½ cup grated cheese (such as fresh parmesan or swiss) at the end, stirring well.  This is a wonderful way to make lasagna, casseroles, or a white sauce for pasta.  Use this as a substitute for spaghetti sauce if you have to, just be sure to add plenty of garlic!

 If you do not like gravy, neither do I.  But call it Bechamel, serve it in a crepe or a meatball, and use your best French accent over dinner.  It will make all the difference. 


À bientôtor as we say in Southern Ohio, see’ya,

Chaya


A note: If you are a connoisseur of delicate international cuisine, I am downright offensive in my oversimplications.  I know.  It’s because I am not afraid to break the rules.


Check out our next blog, which is how to make meatballs with dehydrated spinach and Bechamel Sauce!


 Proviso:

 Nothing in this blog constitutes medical or legal advice.  You should consult your own physician before making any dietary changes.  Statements in this blog may or may not be congruent with current USDA or FDA guidance.


5 Baby Steps to Cooking Healthy Food

The weirdest gift I ever received was one of the most influential in my life. 

A vacuum sealer. 

 Wilson and I did not have kids yet, but he was still in the military and deployed.  Thus, I lived alone.  And my sister bought me a vacuum sealer. 

 “What am I supposed to do with it?” I asked.

 “You are supposed to start cooking,” she said.

 “It doesn’t cook things, it seals them.”  I retorted.

 “Duh, Toad.  <don’t ask–it’s what she calls me>… You are supposed to start cooking real food.  Healthy food.  Enough for more than one person.  You eat some, you freeze some.  Over time, you can kiss the frozen section of the grocery store goodbye—but not literally.  The produce guy gets mad when he has to clean your lipstick off the glass. Ask me how I know.”

 Slowly, over time, I started really eating.  And slowly, over time, I started to get better.  I had been sick, very sick.  That was a big part of my Frozen Section Excuse actually, too sick to do much of anything.  Too sick to care.

Frozen Section

 Step 1

I started by cooking one real meal a week.  Not spaghetti night, not a hotdog, a real and delicious balanced meal.  I worked full time and so I made this my Saturday evening routine.  Although I grew up in a home with delicious, homecooked meals, I also grew up  left to my own junk food devices too, so I had a lot to learn.  I did cook for hubby, but living alone?

Cooking for one is a lonely thing; many-a-meal I ate standing over the kitchen sink, refusing to sit at a table by myself.  Lest you think that a nourished lifestyle comes easy to this girl, let me tell you about rock-bottom.  I distinctly remember eating cold peas out of the can.  Over the Sink.  For Dinner.

 If you currently live on things that come in packages or cans or are from the frozen section; if you just open it and heat, then try this: Set aside one night a week to cook a real, balanced, healthy meal.  Use a cloth napkin, a real plate, and even sit down to eat it. 

 Grandmother's Spoon

You will feel more human.

  Do not cut the recipe in half to serve one; double it!  Use vacuum sealing bags to make your own “t.v. dinners” for other days.  Label the package with its contents and date, and you can drop the whole thing into a saucepan of boiling water, or (if this is where you are in life) even microwave it.  If you do live alone, you should put 3 of each meal away into the freezer.  Give this a month (a variety of 4 real meals) and you now have some choices when you open that freezer.    You now have food to take for lunch at work, too, so that you can cut back on eating out.

 Step 2

Soups & Stews.  This will kickstart Step 1.  The reason I suggest starting with soups and stews is because they really are forgiving.  If you are not a great cook and tend to spill the cayenne, don’t worry—just add more broth and make a bigger pot of soup.  If it is bland or the flavor is off, experiment until you like it.  Do not worry about fancy. There is something wholly comforting about the unassuming nature of soup.  This is also the best way to experiment with foods that might be new to your system.  When I realized I needed to cut white flours out of my diet I started experimenting with grains that were completely new to me—quinoa, barley, teff, and spelt.  A handful of anything will fill a soup nicely, and your tummy.  If you are really just that bad at cooking, I mean, so bad your dog paws at his nose when offered, consider investing in some great spice mixes (like Chili Seasoning, Mexican Seasoning, or Italian Seasoning).

Soup Night: Your Food Storage pops with flavor in this recipe

 (Don’t even like soup? You haven’t tried any of these recipes, then….seriously):

   To freeze your extra soup: put a serving size into a bowl and place it into the freezer, uncovered.  In a few hours, pull it out of the freezer.  Turn the bowl upside down under the faucet.  With your hand on it to catch your soup-cube, run warm water over the bowl.  It will pop out and is ready for the vacuum sealer!  Then, to warm it up, you can either warm it in a saucepan or the bag itself.  You are now combining the convenience of the frozen section of the grocery store with proper nutrition and homecooked meals!

 Step 3

Find something you enjoy in the kitchen.  Or find a happy distraction.  Let me say this another way.  I hated cooking meals because it felt like a lonely task with too much cleanup.  But I thoroughly enjoyed listening to Prairie Home Companion every Saturday night; I would get lost in the tales of Lake Woebegone, and you know what—this woman was getting stronger just by getting into the kitchen and making real food.  Cleanup was enjoyable when I was laughing at the stories and singing along to the goofy songs.  So although meal prep and cleanup are still—to this day—not my fave, I have found a way to redeem that time with something educational, distracting, or just plain fun.  


Kitchen Radio

 This was also the period in life when I discovered that I love baking!  Getting into the kitchen to bake, for me, is completely different than a meal.  During those lonely single days, I started baking breads and treats using real food ingredients.  This helped my health tremendously because I cut out all white flours from the store.  I saw my blood sugar stabilize and my energy come back. 

 Seeing results serves as its own motivator, too.  No matter how much I hate washing dishes, I love being healthy.

Step 4

Always carry something to eat.  The pressure to “grab a bite” was strong in my life.  The blood sugar problem was a legitimate excuse often, too. And yes, I was that crazy lady that oscillated between hitting the side of the vending machine and whispering sweet nothings to it in great desperation.   But once I started baking, I had things like oatmeal bars and homemade cookies that I could seal in snack portions.  I would drop a snack into my bag before leaving the house, always glad that I did. 


Homemade Fruit LeatherAn easy, take-along snack!

 Step 5

Replenish ingredients with healthy alternatives.  Some people quit white sugar cold turkey.  I did not.  But I did begin to replace the empty bags with ingredients I could feel better about.  For instance, the sucanat replaced the brown sugar.  The wheat and grain mill replaced store bought flours.  The cacao nibs replaced the palm oil & preservative-laden stuff I had been eating. 

 One at a time.

  It took time for me.  Then I noticed a peculiar thing.  Even though I saw many of these items as costing more than their junk food counterparts, I found they lasted a bit longer.  It was because a real brownie made with real ingredients really satisfies.  I no longer crept into the kitchen at 11pm to finish them off!  I also found that buying in bulk meant I was saving a considerable amount of money than the typical last-minute run to the grocery store.

 Bulk Organic Sucanat

A Head Start

You read this blog.  You have a plan.  Give yourself some grace.  Do not compare yourself to some food blogger (who probably still dips into the occasional jar of Nutella in front of her computer screen when no one will find out <cough>).  Just take a step.  A single step.  And then tomorrow, take another.  You will look back on this moment as the start of something good, the start of a healthier and more nourished you. 


One step at a time,

Chaya


Photo Credits:


Frozen Section: Fire At Will [Photography] via photopin cc

Grandmother’s Spoon: Tassike.ee – Marju Randmer via photopin cc

kitchen radio: Justin Snow via photopin cc


Proviso:

Nothing in this blog constitutes medical or legal advice.  You should consult your own physician before making any dietary changes.  Statements in this blog may or may not be congruent with current USDA or FDA guidance.