Mockmill Electric Grain Mill Review [Mockmill vs Wondermill Comparison]

Choosing an Electric Grain Mill

We all know what toasters do.  We’ve been eating toast since our mommas cut it diagonally to make butterfly shapes on our plates. 

Grain mills are new to many people.  How do you choose the right electric grain mill when you aren’t even sure what you’re doing with bread baking yet?

Well, I’ve been baking and teaching for a long time, and I have a few opinions!

Why Get An Electric Grain Mill

Challah Bread with Frontier Sesame Seeds
My Challah Bread

I have said it in a million classes, that every preparedness-minded person buying a hand-crank grain mill needs an electric one too. 

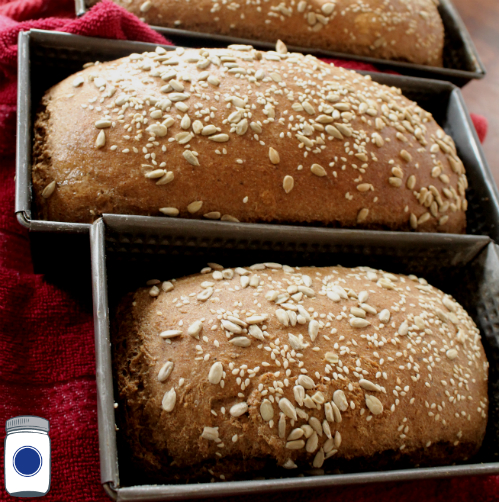
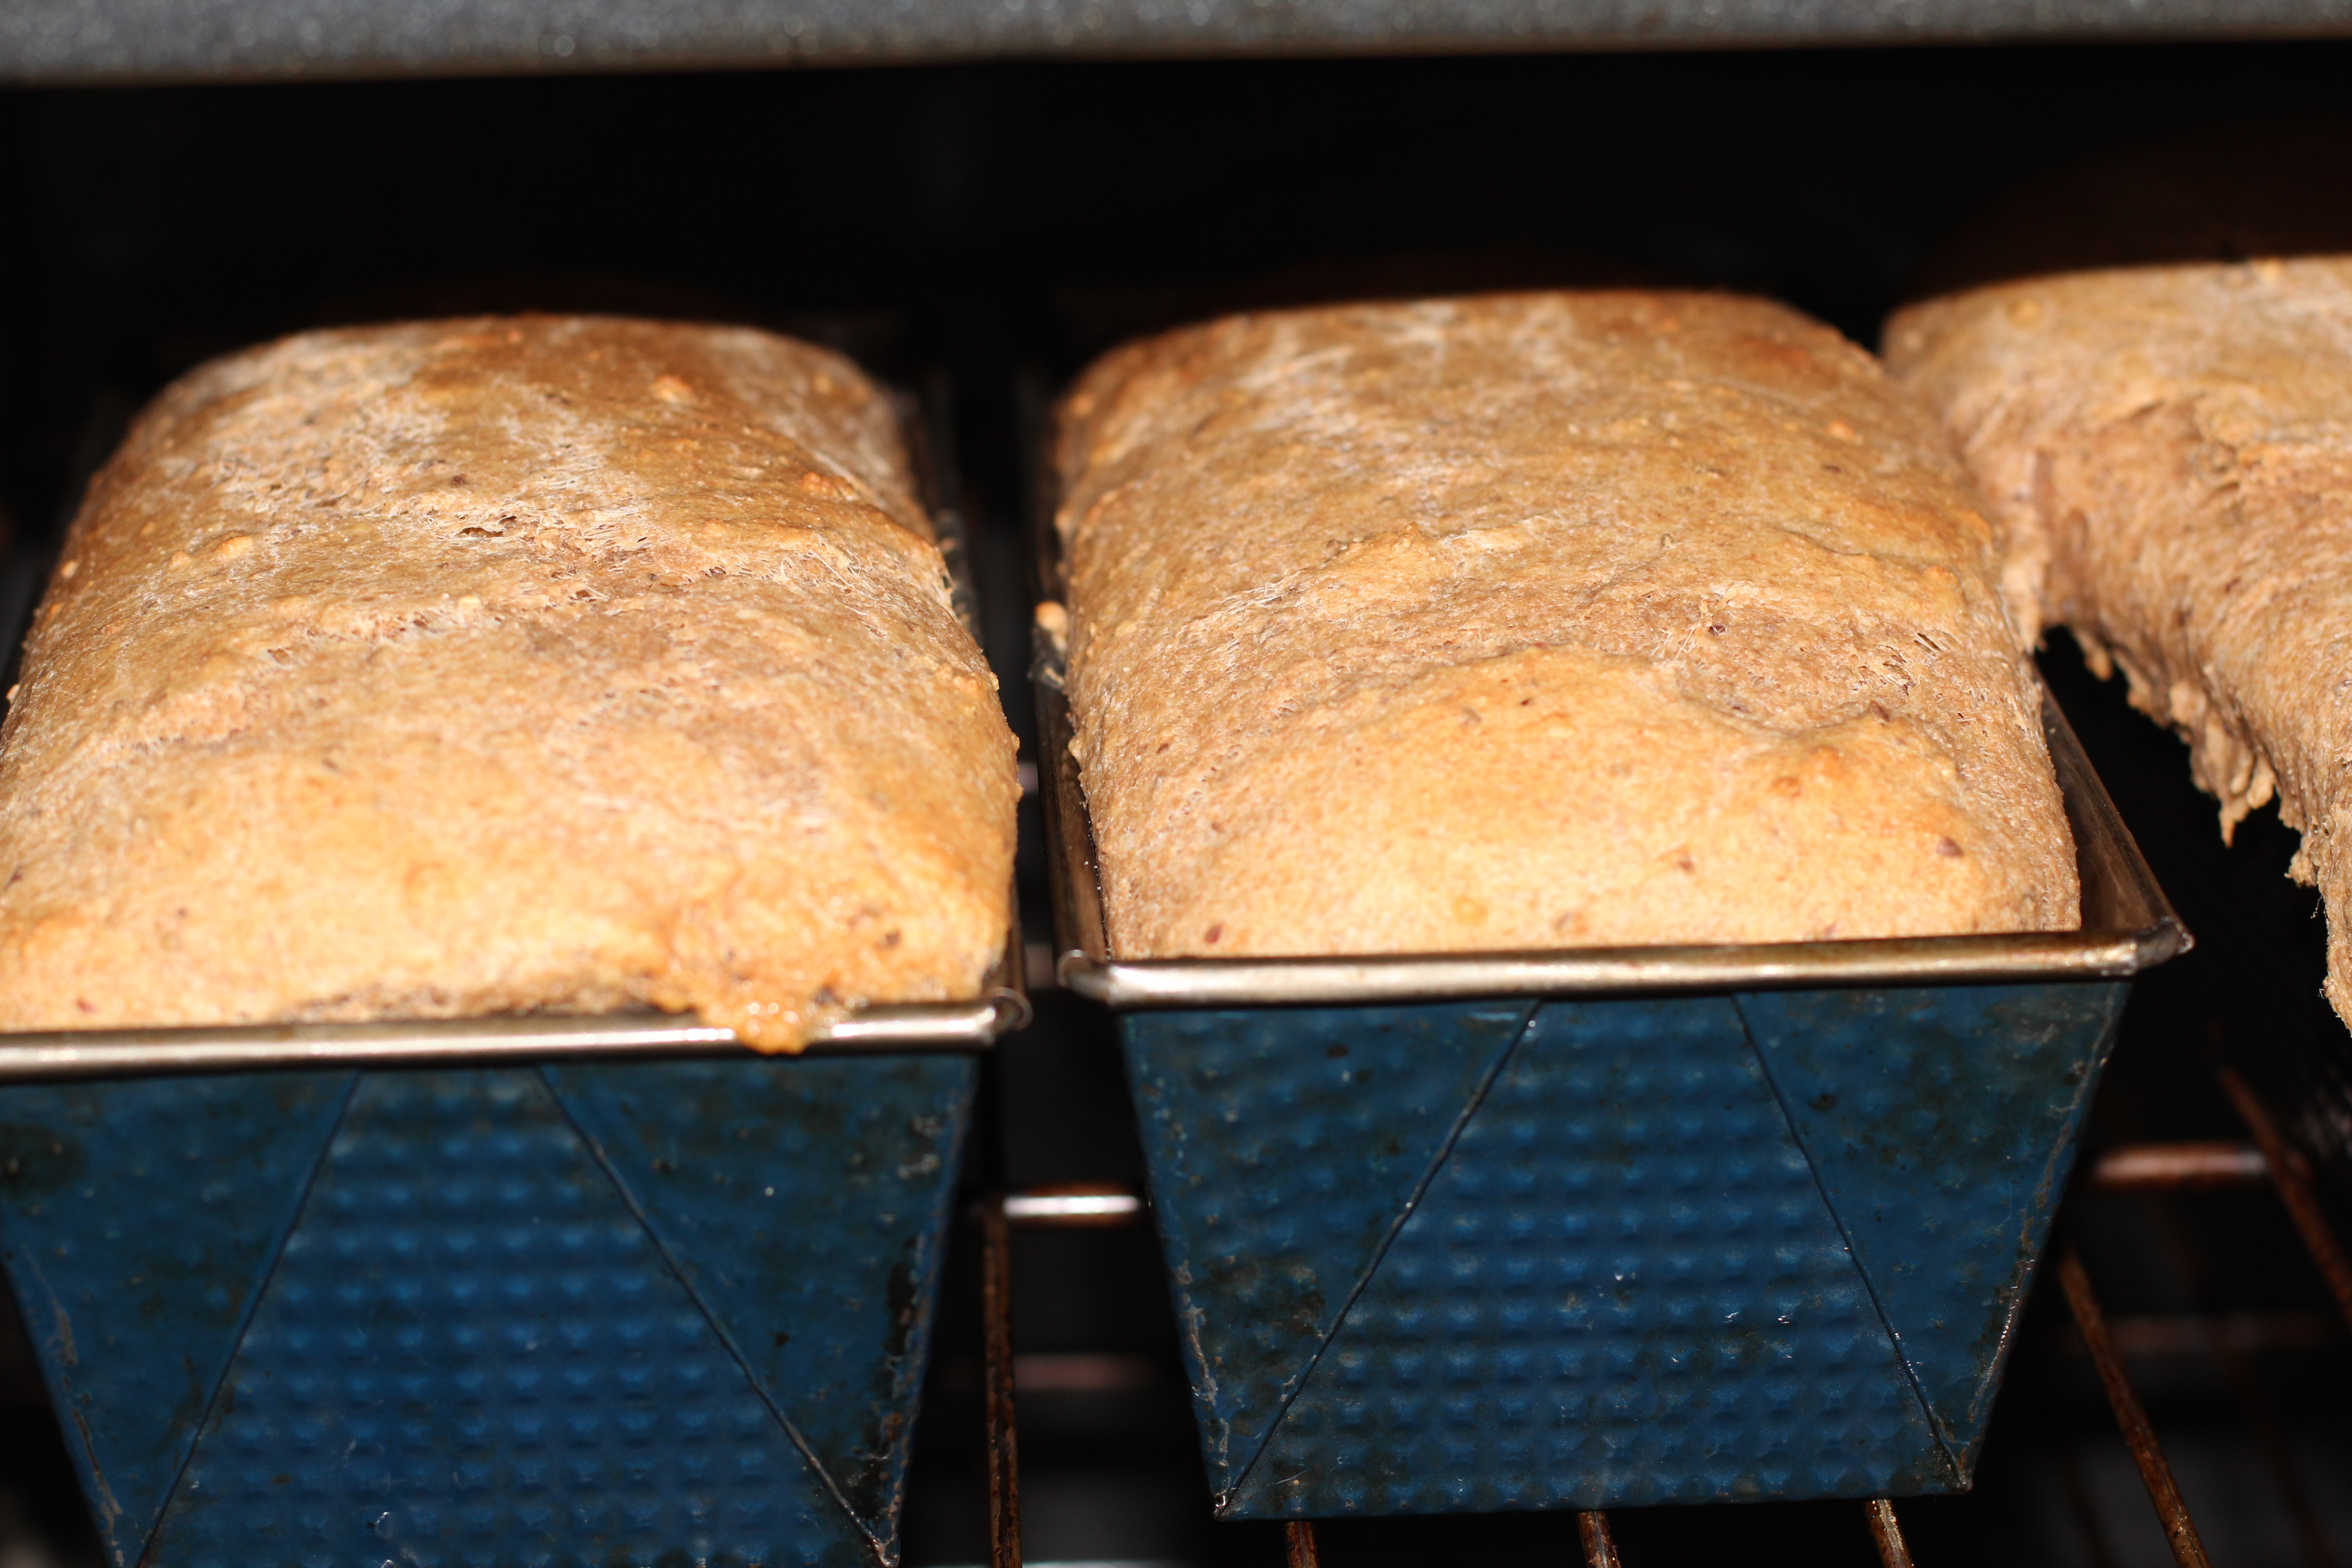
Start baking bread now, when you will benefit from the years of nutrition it provides, and when you do not have the concern of learning how in an emergency situation where your resources are limited.  It’s just not reasonable to think you will learn how to bake bread then, with no stove or running water, or name-your-emergency that would lead you to pull out the hand-crank mill.

The high levels of protein, folate (folic acid), fiber, iron, thiamin, niacin, magnesium, vitamin B6, phosphorus, and zinc found within unmilled wheat are far superior to milled wheat. 

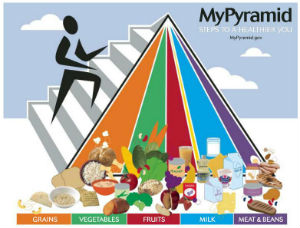
Why? Because the kernel is stripped and separated into three parts; only the endosperm is being sold to you as “wheat.”

I’ve written extensively about what the FDA requires for something to be called “whole wheat,” and it is not what you are getting when you choose to mill your grain at home.  I hear health stories from people constantly, about how many difficulties have cleared up since switching to homemade bread made with freshly ground wheat.  Our family has a few stories of our own.  And when we cheat—when I drop off from bread baking, we all feel it!

Electric Grain Mill Options

There are a lot of electric grain mills on the market, and this is not an exhaustive list.  I have been a serious bread baker since 2008; I’ve taught a lot of classes on bread baking and I’ve been in people’s homes where I’ve been able to try a few different models.

Choosing an Electric Grain Mill

Here’s my personal opinion on a few:

Le Equip is LOUD.

Like airport-runway-loud.  This was my first mill.  I bought it because it was cheap and I thought my husband would kill me if I made a serious investment into bread-baking, not really knowing if I’d stick with it.

It was LOUD! The babies would cry.  The dog would howl.  And my husband finally made me mill my grain outside.  In North Carolina rain and in Montana winter.   Sometime years later, I had to get hearing aids for hearing loss for unknown reasons (I always wondered….)   I have heard the same complaint about Blendtec (and it’s the same design as the old Le Equip).

Kitchen Aid Grain Mill Attachment

It’s such a wonderful concept, is it not?  At one point, it was a fantastic option if you already owned the Kitchen Aid Mixer.  But if you don’t, it isn’t cost-effective.  And if you own a newer one, you’ll probably join the list of people who complain that you cannot mill much at a time.

Nutrimill. 

These are great grain mills, I’ve only ever “borrowed” one.  Still a little loud and difficult to find a place for it in a small kitchen, it’s the same size as the Wondermill.  I have compared it to my favorite mill, the Wondermill, but I still recommend the…
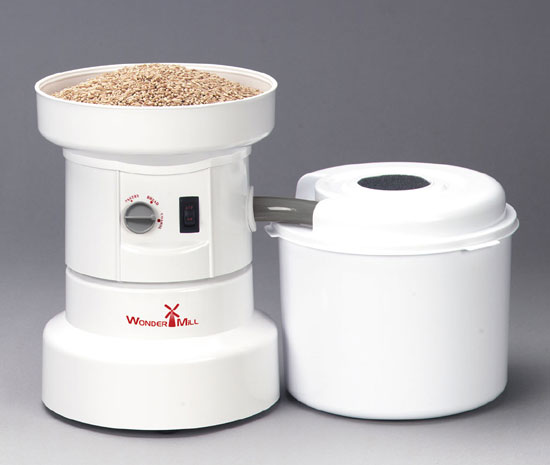
Wondermill

Wondermill. 

Awesomeness.  It claimed for years to be the quietest mill on the market, and it was obvious for a long time that it was.  It has an easy-to-clean design, and the canister can also be used for storage.  What always set it apart for me from the Nutrimill, though, was the customer service.  I work with a lot of companies and Wondermill is the best of them all.  In fact, we sell the Wondermill, and for years it was the only mill I would ever consider selling, just because of its perfect combination of product and customer service.

But this brings me to what I thought I’d never say…

I have a new favorite mill.

My Experience with Mockmill

Mockmill 100

When Mockmill called and asked if I’d like to review their mill, I felt disloyal to Wondermill initially, having been an authorized dealer for Wondermill since 2011. 

But to be fair to our customers, it seemed right to try the newer products on the market, too.  So let me be forthright about what I stand to gain from this review: I make more money selling Wondermill (as an authorized dealer) than if you buy a Mockmill from any links provided in this email, although Pantry Paratus is now an affiliate. 

I think Pantry Paratus will consider becoming an authorized dealer in the future, though!

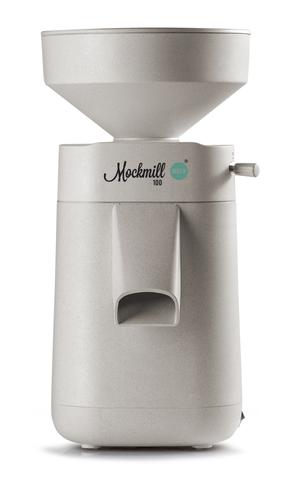
Streamlined Mill with Small Countertop Footprint

Unless you are using a grain mill attachment (and Mockmill has one, by the way), I know of no other grain mill with such a small countertop footprint.  Grain mills require either plenty of counter space or plenty of cupboard space, but they all require plenty.  I’ve got a small kitchen countertop, and the Mockmill has a new home on it, always available for a quick cup of flour here or there as I need it, always fresh.

Mockmill under counter

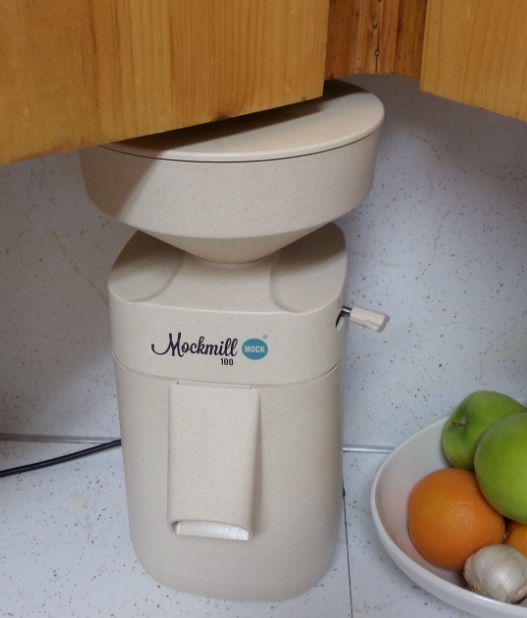
I’ve mentioned before that because of the high level of oils found within home-milled flour, you need to either use the flour immediately or freeze it.  Because other mills are so big and cumbersome, most people mill for the whole week (or two), and then clean their mill and store it.  With the Mockmill, I can have fresh flour every single time, because it takes less room than my blender would, far less than my toaster.

I also have low cupboards, and it’s a perfect fit under them!

Now, if I’m going to get really picky, I will say that I wanted my Lucky Baking Bowl to fit underneath.  Sigh.  But other bowls did, and I don’t have to clean out the Mockmill like I do with other electric grain mills.  So it’s a trade-off.

Design Simplicity and Grinding Stones

ceramic stones in Mockmill

I was impressed with the simplicity of the design, and I saw the stones themselves.  By the way, the Wondermill using micronizing technology whereas the Mockmill uses stones just like the Wonder Junior Deluxe Hand Crank Mill.  If you like the idea of stones, you’d prefer Mockmill. Neither mill overheats the grain.

Mockmill states that their ceramic stones are “near-diamond” in their hardness and that they’ll last forever.  I’m not worried.  Even if they didn’t for some reason, they are very easy to get to in the machine and remove.  The stones clean themselves as they are used and are hard enough to last.

Intimidated by Instructions to Open Up Housing

Mockmill with casing open

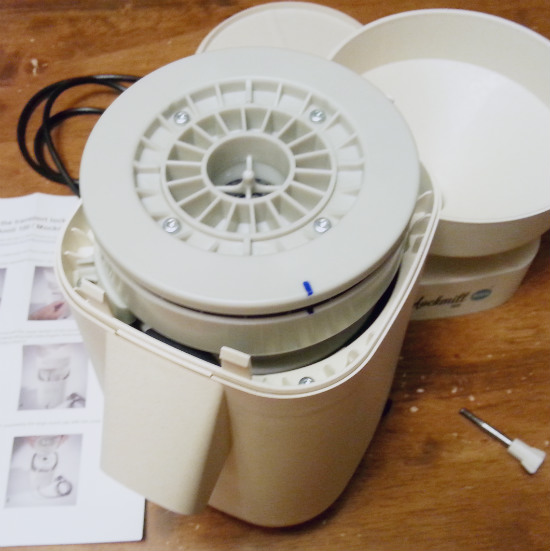
It came with instructions requiring I open up the mill, because for shipping there were two braces inserted to keep the stones from shifting.  Well huh…I won’t lie that this really intimidated me.  You would never open up the housing on the Nutrimill or Wondermill.  You can get them serviced, but you wouldn’t get into them yourself.  So I followed the instructions, removed those two braces, and assembled as they’d instructed.  I put grain in and turned it on.  It didn’t mill.  When I opened it back up, I realized I simply didn’t screw on a piece as tightly as instructed.  Then it worked like a charm and I am now confident in how to open and service my own machine if I ever needed to do so.  I actually came to like that.

Lower Grain Amounts

I bake with about 14 cups of flour at a time.  The Mockmill can handle it.  But it is more of a countertop model and I cannot find where they’ve studied the volume it can produce at one time.  I know that Wondermill is proven to produce 100 pounds of flour per hour, and they’ve done some crazy endurance testing with it.  Both mills are rated for home use, but if you plan on using your mill for a cottage industry of selling bread at the farmer’s market, you should go Wondermill.  If, instead, you’re looking to have a weekly baking day or a way to whip up some brownies, you might prefer the small countertop footprint of the Mockmill that lets you keep the mill at hand.

With that said, I have the Mockmill 100.  The Mockmill 200 has a greater grinding capacity. Check it out.

The Mockmill is Quiet

I really want to say that the Mockmill is quieter than the Wondermill, but that’s coming from a deaf girl.  Hubby mentioned it too, though, so that’s something!

The Mockmill has a 6-Year Warranty

‘Nuff said.  But then again, the Wondermill has a lifetime warranty.  Both machines are easily fixable, but I cannot really see how or why anyone would need to fix either machine.  In eight years of selling Wondermill, I’ve never had a call to get a machine fixed.  And I’m super-impressed with the Mockmill’s sturdy frame and build.  I think you’re good, either way.

My conclusion is this: I’m happy with either the Wondermill, or potentially the Nutrimill, and definitely happy with the Mockmill.  Of the three, the Mockmill is hands-down my favorite.  It’s practical: takes little room, is easy to clean, and is quiet.

Just to help you out, I’ve created a comparison sheet between my 2 favorite mills.  In the end, we might prioritize our needs differently.  If you have any questions about what is right for you, don’t hesitate to email us at customer <at> pantryparatus.com!

And if you are considering the Wondermill, you can get it here,  from Pantry Paratus.  If you are considering the Mockmill, you can get one here using our link and it helps us earn a couple bucks.

Wondermill vs Mockmill

A Note About Our Mockmill Coupon Code:

Update: 2023-09 – Unfortunately we can’t offer a MockMill coupon code any longer. =(

We used to refer people to Mockmill with a coupon code, we unfortunately don’t have access to that anymore, but if you purchase after clicking our link it helps use keep the lights on: simply click this link instead.

Wheat Bread & Gluten-Free Bread Recipes You Must Try

Wheat Bread & Gluten Free Recipes

Pantry Paratus knows bread; it is probably what we do best!  In fact, if you sign up for our newsletter, you get a half-hour bread baking tutorial video in your inbox (in about 24 hours).  If you are new to baking or to baking with home-milled flour, that video is a great place to start!  Below, we share some of our favorite Pantry Paratus recipes, but below that you will find some other excellent wheat bread and gluten-free bread recipes.

Continue reading Wheat Bread & Gluten-Free Bread Recipes You Must Try

Homemade Calzones

 Calzones

An Easy Recipe for work-ahead convenience


It is handheld comfort food.  It’s a frozen convenience meal that everyone actually asks you to serve.  Plan an 1 ½-2 hour session to make these ahead, and you can have as many as 4-5 separate dinners in the freezer!  That’s a great return on investment for your time, and it’s peace of mind—because having something stashed away for that later-than-expected dinner means you are less likely to eat something you will regret. 


 Easy Recipe for Calzones


You will need a Large Dumpling, Empanada Press.  This thing is great for sweet & savory recipes.  Who wants one more gadget?  How about a better question, can you live without one?

 
 Years ago an older Russian woman was convinced she would teach me how to make a piroshki (not too unlike the shape and size of a calzone, really).  I frustrated her, she yelled in a language I did not understand, and my hands were smacked several times.  In full disclosure, Wilson chuckled to himself because he had to put up with her every day since she was his teacher and he could understand all of her admonishments.  I cried.  I, a grown woman, cried over my piroshkies and was rather traumatized by the whole three-hour event.  In fact, I was so traumatized by it that as I was crying, I fumbled with my keys and managed to lock my house & car keys IN my car & had to call the locksmith.   True story.  So for me, the answer is YES!  Just get the press, already!  Really, anything stuffed inside of a bread pocket is delicious, kid-friendly, travel-friendly, freezer-friendly, & convenient. 

Large Dumpling Press 

Your end result will be more visually appealing with the large dumpling (or empanada) press.  The bigger problem for me when I’ve made them without the press is that if I tore my dough or did not seal the edges well, the contents would spill out.  That makes pan cleanup a real chore, and ruined the prospect of eating them on-the-go (which is the best part of these—they are just as good cold, so take them camping or pack them for lunch).


I make two separate batches at a time.  If I double this recipe, I will get 20 calzones for the freezer & a pizza crust for tonight’s dinner. 

Use your favorite pizza toppings as the stuffing!


 Calzone Recipe


4 cups warm water

4 tsp.  instant yeast

8 1/2 cups home-milled flour, an extra cup for dusting

4 tsp. sea salt

Pizza sauce  (a double recipe takes 1 whole jar)

Mozarella cheese

Toppings of choice

4 tbs. olive oil

¼ cup Pizza Seasoning or Italian Seasoning , optional (I use this on the pizza, not the calzones—personal preference)


1)       Mix yeast into the warm water and let proof for 10 minutes.

2)      Add flour and salt, barely mixing it until the dough is just sticky. 


3)      Cover and allow to rise for approximately 1 hour in a warm place.   


 4)      After the dough has risen, separate into 8 equal halves, these should be balls that fit nicely into the palm of your hand. 


5)     Roll each ball into a flat circle and add flour liberally to keep from tearing the dough.  Make the circle wide enough that it will stretch to the teeth of the dumpling press.


6) After you place the dough circle onto the dumpling press, add approximately 3 tablespoons of topping (do not overflow it, it might rip a hole into your calzone).


7) To close the calzone, fold both sides up simulatenously, balancing the center part of the dumpling press flat onto the table.  This prevents it being pushed out the back of the maker.  If you find this is happening, carefully push the calzone back through the opening to prevent ripping. 


8) If there is too much dough on the edge, rip it off.


9)      Brush olive oil liberally onto the top of the dough. 


10) Bake at 350 degrees for 20 minutes on a greased and floured sheet.


 Easy Recipe--Calzones


Enjoy,

Chaya


All pictures are property of Pantry Paratus.  Please feel free to pin or share them, but keep the original attribution.  Thank you.


www.Hypersmash.com


Chocolate Truffle Recipe: 4 nourishing ingredients for this no-bake treat

Chocolate Truffle Recipe: 4 nourishing ingredients by Pantry Paratus

Chocolate Truffle Recipe

Only 4 nourishing ingredients for this no-bake delicacy


A Nourishing Truffle Recipe

I have never been so keenly aware to the superfluous –and harmful–ingredients used in some of my favorite indulgences.  Now that we have identified food allergies within our family, we cannot “cheat” on our whole foods (real, nourishing, traditional food) diet.  Oh, and did I ever cheat.

Chocolate Truffles

I created this recipe to reinvent one of my favorite indulgences–the classic truffle.  This truffle has the look, the melting sensation in your mouth, the spark of a perfectly balanced topping, and the deep rich chocolate aftertaste that instinctively required you to close your eyes and savor.   

 Here is the catch: this nourishing truffle recipe should make a full dozen.  You cannot eat every other one for me to keep my promise on that. See my remnants: 

 Chocolate Truffles


 Nourishing Chocolate Truffle Recipe

 1.  Soak the nuts for approximately ½ hour (overnight is really best for your health, but not necessary for the recipe).

2. Put the nuts and honey into your food processor until a smooth paste.  Add Frontier Organic Hot Cocoa powder and salt; combine until a thick, sticky paste.

 3. Place the batter into the freezer for 20-30 minutes  (just put the whole food processor bowl in there). 

 4. Once they have been stiffened in the freezer, roll out the balls onto a flat surface covered in the toppings of  your choice.  I use more cocoa, homemade dehydrated orange peel, and sesame seeds

 5. Place truffles onto baking paper in a pan, and store in refrigerator.

 Truffled,

Chaya

Looking for something more gourmet?  Check out this downloadable!


Looking for the ingredients?

Explore Baking at Pantry Para

Please feel free to pin or share any of the pictures, but please keep proper attribution.  They are property of Pantry Paratus.


Baking Powder, the Expanded History Part 2

baking-powder, non-GMO and aluminum free

Baking Powder, Part 2

What is Baking Powder? How do we get it and what does it really do?


Biscotti

Click here to read Part 1

 Leaven comes from the Latin word Levare to raise (M-W, 2012) and all that makes great sense, but how did Eben Horsford help?  Horsford was a chemist and he knew that carbonates release carbon dioxide when they come in contact with an acid, any acid: sour milk, vinegar or even hydrochloric acid (which is not recommended).  Horsford was out to find a yeast replacement that was more stable acid that could be shipped with the baking soda (sodium bicarbonate). 

 After years of experimenting with hundreds of acid sources in Cambridge and Germany, Horsford found that by saturating animal bones from nearby slaughterhouses in sulfuric acid, he could manufacture a crude form of monocalcium phosphate that could be dried into a powder and mixed with sodium bicarbonate to create a dry chemical leavening that fizzed when wet (Ettlinger, 2007). 

baking-powder, non-GMO and aluminum free

 “After 1854, his main preoccupation was to discover a substitute for yeast in baking bread. At the same time, Horsford entered into a business partnership with George Wilson, a former textile manufacturer, to establish the Rumford Chemical Works” (American Chemical Society, 2007).  Eventually, Monocalcium Phosphate was the acid of choice and is still used to this day, although manufactured differently—just check out the Frontier’s ingredient list on this baking powder.

 The story of the Rumford® is interesting:

 The 1885 discovery of a sodium acid phosphate that gave off gas in response to heat, not water, led to its inclusion in the mix for a “secondary action”—the action that gave us the term “double acting.”  Now, when Horsford mixed it with sodium bicarbonate, he had the first phosphate-based, stable, reliable, affordable baking powder, which he packaged as Rumford®, in honor of the great count, whose beribboned, ponytailed cameo still graces the label on cans today. . . . Rumford [sic] has the oldest consumer product label found in grocery stores, dating back to the 1860’s (Ettlinger, 2007). 

 Wow, that is quite a history for something you probably never gave much thought to as it was added to your buttermilk biscuits.


What is the difference between baking soda and baking powder?  “Baking powder is baking soda with the acids already mixed in.  That’s why baking soda is generally used in recipes that include acidic ingredients, whereas baking powder is used in recipes that contain no acidic ingredients”  (Joachim & Schloss, 2008).  Baking soda is baking powder minus the acids—but it turns out that the acids make all of the difference.  Depending on the type of acid mixed in, the chemical leavener can be “tuned” to produce the second rising effect a certain temperature.  Likewise, recipes that call for baking soda are likely doing so to counteract an acidic ingredient in the mixture (see chart below).


Baking Powder or Baking Soda

How do we get this great stuff of baker’s convenience?  Rocks.  Yep, it is mined from the earth.  Starting off deep under Green River, Wyoming, Sodium Bicarbonate starts off as being extracted as a raw mineral called “trona” and it will produce sodium carbonate (later one more carbon atom is added to make bicarbonate).  As for the Monocalcium part one needs lime, a lot of it in the food grade form—it also is mined.  Lastly comes the Phosphate of Monocalcium Phosphate and it too is mined out West by mining companies such as Monsanto around Soda Springs, Idaho.  The refining process is something of a wonder, and although you can find low concentrations of Phosphoric acid in a Coca-Cola® or high concentrations in naval jelly (rust stripper), phosphorus acid in its pure form will catch on fire if it contacts with oxygen—extreme care must be taken to transport it.  Frontier’s Brand (which we sell in bulk) adds non-GMO cornstarch to prevent caking and you have something that we eat that (chemically) lies between glass and tracer bullets.


Glass and Bullets


Steve Ettlinger in his fascinating book, Twinkie, Deconstructed takes you to all the places where those items are mined from the earth and then onto the southside of Chicago to a company like Innophos where they are all reacted and assembled to produce baking powder.  What is interesting is that the applications for any one of those chemicals may be anything from Roundup®, to anti-acid tablets, to meth, to concrete, to paint or even paper—but the application that we are investigating is the stuff that makes a low-protein flour rise so well into birthday cake. 

 The next time you pull out that mason jar of baking powder from the cupboard,  think of the history behind such an unassuming ingredient.  While you are at it,  make a Baking Certificate from Clabber Girl® (parent company to Rumford®) for any little helper in the kitchen there to do any on-the-spot taste testing. 

 Wilson

Pro Deo et Patria


 [jigoshop_category slug=”baking-ingredients” per_page=”6″ columns=”3″ pagination=”yes”]


Works Cited:

  • “leaven.” Merriam-Webster.com. 2012. http://www.merriam-webster.com (17 Dec 2012).
  • Ettlinger, S. (2007). Twinkie, deconstructed, my journey to discover how the ingredients found in processed foods are grown, mined (yes, mined), and manipulated into what a. (First printing,March 2007 ed., Vol. 1, p. 137). London: Hudson st Pr.
  • American Chemical Society. (2007). Eben horsford. Retrieved from http://acswebcontent.acs.org/landmarks/bakingpowder/horsford.html
  • Ettlinger, S. (2007). Twinkie, deconstructed, my journey to discover how the ingredients found in processed foods are grown, mined (yes, mined), and manipulated into what a. (First printing,March 2007 ed., Vol. 1, p. 138-9). London: Hudson st Pr.
  • Joachim, D., & Schloss, A. (2008). The science of good food. (p. 122). Toronto: Robert Rose.

 Photo Credits:

  • Biscotti by Nathalie Dulex: http://www.rgbstock.com/photo/msDa65C/Biscotti
  • Rumford® Baking Powder from Clabber Girl®: http://www.clabbergirl.com/consumer/products/rumford/
  • Baking Soda Chart by Pantry Paratus
  • Glass blocks from John De Boer: http://www.rgbstock.com/photo/mfebimS/Glass+blocks
  • Bullets from Kriss Szkurlatowski: http://www.rgbstock.com/photo/mhXWLlO/Incendiary+bullets+for+rifle+1

 Additional Resources:

  • MSDS sheet for naval jelly: http://www.henkelcamsds.com/pdf/553472_235119_Loctite_Naval_Jelly_Rust_Dissolver.pdf
  • FMC’s baking soda info: http://www.fmcchemicals.com/Products/SodiumBicarbonate.aspx
  • Monsanto’s Phosphorus info: http://www.monsanto.com/soda-springs/Pages/more-about-phosphorus.aspx
  • Innophos info: http://www.innophos.com/

  Proviso:

Nothing in this blog constitutes medical advice.  You should consult your own physician before making any dietary changes.  Statements in this blog may or may not be congruent with current USDA or FDA guidance.


The Perfect Cookie. Yes, with Home Milled Flour.

The Perfect Cookie

Troubleshooting Flat Cookies, & a Foolproof Whole Foods Recipe

(All while using home milled flour)


Home milled flour has a learning curve.  I am often asked about cookies, even from expert bread bakers.  We often think of “whipping up a batch of cookies” as something so simple, something we have done our entire lives.  Why would someone who can produce a perfect loaf of artisan sourdough question how to make cookies?  Because when you venture into the world of milling your own flour—or into whole foods– you find that the rules change.  What you could do on “autopilot” now must be deliberately re-thought:  Crisco®, nope, not using that artery-clogging stuff.  White sugar?  Ooof, not with our diabetic family history!  Home milled flour? It is so much heavier than the dead bleached stuff from the grocery store.Cookies with Whole Ingredients

Many people say that the cookies flatten.  If that is what you have, here are a few suggestions:

 1)       Use a regular cookie sheet, not a baking stone.  If you insist on the stone, place it in the oven to pre-heat along with the oven, then pull it out to put the cookies on it.  The stones just take too long to come to heat and the cookie will flatten in the meantime.  Keep in mind that the bottoms of cookies will burn easily on the stone for the opposite problem, too: those stones keep cooking long after they are removed from the oven.  So be sure to remove the cookies immediately from the stone and you might need to adjust baking times.

 Homemade chocolate chip cookies with home milled flour

2)      Check your oil-to-flour ratio.  Does your cookie dough feel thick or more wet than normal?  Too much oil/butter/lard will flatten your cookie every time. 

 The Perfect Cookie with Home-Milled Flour3)      Use lard!  Lard and tallow are my secret ingredient for a fluffy, perfectly-browned cookie.  These were how cookies were invented, remember.  The Fake Stuff (shortening) came later and we have a whole generation (maybe 2?) that haven’t an idea on how to cook the real way.   When I first swore off the fake stuff, I tried oil and butter and every combination, with inconsistent results.  If you must use something other than lard or tallow (vegetarian?) I would suggest coconut oil.  I will not guarantee perfectly consistent

Delicious chocolate chip cookies from home milled flour

results with the recipe below, though.  Play with it and let us know what you find. 

 FLOUR:  I prefer to mill oat groats for cookies.  I find that the cookie is lighter in color and texture than with wheat, although spelt flour and soft white wheat work well too, and sometimes I mix oat, spelt, or soft white.   Oat flour will make this cookie indistinguishable from the cookies you remember from childhood.


 The Perfect Whole Foods Cookie

 Put your favorite nut or chip in these.  I often do chocolate chips because it is what my family prefers.  These pictures have both chocolate chips and Macadamia nuts.  Consider this a “basic” cookie recipe and do what you want with it!


Preheat oven 375°                                             Makes over 3 dozen medium-sized cookies

  •  ½ cup beef tallow (or lard)
  • ½ cup grass fed butter
  • ½ cup honey
  • 2 eggs
  • 1 tsp vanilla
  • 1 cup Sucanat
  • ½ tsp baking soda
  • 2 ½ cups Oat flour (or spelt, or up to half soft white wheat)
  • 2 cups chocolate chips (optional)
  • 1 ½ cup nuts of your choice (optional)


  1.     Using mixer, blend butter, tallow, honey, vanilla, and eggs in a medium bowl.  Set aside.
  2.     In another bowl, mix the dry ingredients: Sucanat, baking soda, flour.  Combine bowls.
  3.     Fold in chips and nuts.
  4.     Drop the dough onto a lightly buttered cookie sheet, and bake for 8-9 minutes (or until slightly brown around edges).  Remove from sheet to cool. 

 Enjoy!

Chaya


The Perfect Cookie with Home-Milled Flour
Thick, fluffy cookies made with home milled flour

Homemade Ravioli

ravioli in Chaya's kitchen

Homemade Ravioli

Techniques & Tools

Ready for Guests: Ravioli


Homemade Ravioli is the world’s best make ahead meal…the flavor compares to nothing you can buy in the store, and unexpected dinner guests can have a gourmet meal in 10 minutes flat (with the help of the freezer, of course).  I have made ravioli multiple times but I did them the “old fashioned way” that meant I was cutting and stuffing the squares by hand.  Delicious though they may be, the presentation was lacking.  They always looked rough (especially since my kiddos like to help).    I’m really excited about the simplest tool that transformed my end result!  Some people prefer to do it the hand-shaping way with a ravioli wheel, so we have one in stock if that’s your preference; but today I’m going to show you my favorite cheat for homemade ravioli–the ravioli press.

 Start with a basic pasta recipe.  If you do not normally put eggs in your pasta, I do recommend them now, because you will be manipulating the dough and the egg serves to hold the dough together very well.   I also recommend using your pasta machine to roll the pasta out into sheets; it’s way too difficult to get them thin enough by hand (and takes longer, too).

 For your filling, consider anything that suits your fancy…such as cheeses, sausage, spinach, pesto, pumpkin, the list goes on.   The pictures below were taken with the following recipe:

½ cup ricotta cheese, 3 cheese Italian, Cheddar Cheese, and sausage.   Mix in 2 eggs and salt & pepper to taste.    


So here is how to get ravioli to look like this:

 Ravioli


(1) Place one strip of dough over the frame of the ravioli maker.

Step 1: Place Dough over Ravioli Frame


(2) Press the dough into the frame with the indented tray.

Step 2: Press dough into frame with indented tray


(3)Fill the pouches with the filling as desired (don’t overstuff!), and place a second strip of the pasta dough over it.  Press the strips together with your fingers. 

Step 3: Add filling

Tip:  A few drops of water or egg white run in between the strips will help create a good seal.


(4) Seal by running a rolling pin over the top of the dough-covered frame, gently at first and then increase pressure until the zig-zag edges of the frame are visible through the pasta.

Step 4: Use a rolling pin


(5) Remove ravioli from the frame by tapping them onto the counter.

Step 5: Tap out of the frame


(6)Trim out squares using a ravioli wheel or knife.  Remove excess dough and re-roll.  Repeat the procedure until the dough and filling are used. 

Step 6: Trim Ravioli


(7) Place ravioli on a heavily floured cookie sheet and let dry for 1 hour.  Turn over and let dry for another hour.  Put ravioli in the freezer and thaw before cooking…

OR…go ahead and cook the ravioli for 8 minutes or until tender.  Remember that the cooking time will vary depending upon your dough’s thickness. 


Tip:  If making a pumpkin ravioli filling, serve with a sage butter sauce!  Yum!


Enjoy,

Chaya


Looking for the right tools?

Atlas Pasta Machine

        Stainless Steel Rolling Pin

Pasta Maker (Machine)          Marble Rolling Pin


Ravioli WheelRavioli Maker with Press

Ravioli Wheel                Ravioli Maker with Press


Pictures courtesy of Norpro, with the exception of the flour-dusted table–that’s my delicious mess.


Baking a Doorstop: How to know if the yeast works

Yeast in Bread


Yeast in Bread—Baking a Doorstop


The Role of Yeast in Bread Making


Yeast is a living organism.  Most of the items we put in our refrigerator or freezer are already dead and we are just trying to slow down the decaying process.  Yeast is alive (or at least it should be), and so we are going to look at the important the role of yeast in bread.   


If you have ever produced a hard brick bearing the name “homemade bread” you know the heartache of wasted time, energy, and ingredients.  There could be other reasons for bread that could break glass but the most common is impotent yeast.  To have favorable results for bread baking, the yeast used in bread must be viable—so how can you tell if the yeast is good?   


Three Steps to Proofing Your Yeast


SAF Yeast


1. Proper Storage


Your first step is to check the expiration date.  If this is not easily visible, find the date of manufacture.  Unopened packages of yeast are good for two full years from the date of manufacture.  Store the unopened package in a cool, dark, and dry place.  The best way to purchase your yeast is in a vacuum-sealed bag, the kind that looks similar to a brick of coffee.  This is because air, sunlight, and moisture are the mortal enemies of yeast. So once you’ve opened your brick of yeast, you will need to place the remaining yeast in an airtight, resealable container.  Then freeze or refrigerate. You will get a few months more out of it if you choose to freeze it.  You can then remove it and use it immediately from your freezer, although I recommend allowing it to warm to room temperature first.  Remember, yeast will not be active without first being warm. 


2. Yeast Must Be Warm


Next, I urge you to “proof” your yeast, though many modern bloggers and recipes will say that it’s an unnecessary or outdated step.  Proofing is too easy to justify skipping this step, and it is not worth the 10 minutes it saved if something happens to be wrong with your yeast—thus yielding a brick.  If you are a sale shopper or buy yeast from the grocery store shelf, you could be taking a chance.  People do not bake like they used to and the yeast on that shelf has been there longer than you might imagine.  Expiration dates are not the whole story, and the function of the yeast in bread will be diminished if the yeast is not viable. 


Here is my time tested, fail safe method for testing yeast: pour the warm water that is called for in your recipe into your baking bowl.  Make sure that your water is very warm, but not too hot.  I test mine on my wrist (like a baby’s bottle) but if you are not sure what temperature to go for, pull out the thermometer the first few times.  It ought to be between 110-115˚F.  If the water is too hot it will kill off the yeast and if it is too cold the yeast will not activate.


3. Feeding Your Yeast


Lastly, pour in the amount of yeast called for in your recipe.  Yeast feeds on sugars, so feed your yeast to proof it.  I follow the yeast with my oil and honey.  I do the oil first because I won’t waste honey in my measuring cup—the oil will ensure all of the honey pours out nicely.  Let this sit for at least 10 minutes (although longer is fine).  You will see foam action and bubbling with active yeast.  If you do not see that bubbling action, stop now and try different yeast.  Don’t waste all of those ingredients on something that will only produce a doorstop. 


Otherwise, continue on with the other steps in your recipe as written.  These three steps will confirm the viability of your yeast.  The role of yeast in bread making is an important one, without it we will only yield door stops. 


Here is an alternative method: A friend tells me that even though she bakes with honey for her sweetener, she adds just a tablespoon of sugar to the water and yeast to help stimulate it but does not do it my way because the oil may inhibit the yeast.  My bread does get a good rise and I am happy with my method however, I experimented with it her way and did see a major difference during the proofing process!  The end result is largely similar, so overall I did not see that much of an impact.  You might want to try the experiment. 


If phytic acid is a concern for you, add a few cups of your flour (not so much to make dough yet) and let your mixture proof for awhile longer—this soaking period will reduce the phytic acid in your bread. 


There is so much to learn in successfully baking a loaf of bread, I hope that you have learned more about what the yeast in bread does for your end result.  Truth is that there are thousands of recipes for bread (I have my own favorite), but learning why yeast in bread is so important makes the beginner’s path to nice bread shorter.  Leave a comment, tell us about your bread baking learning curve!


Chaya


If you are new to bread baking altogether, you can get an exclusive offer to receive a free how-to video from us on bread baking by signing up for our email list (you will find that at the bottom of our homepage).  Rest assured, we do not load up your inbox with spam. 


Is home ground flour “Processed Food?”

Cookies


At a end-of-semester Christmas party in college, the kind where everyone brings in something to share, one girl in that class brought in cookies.  She looked almost apologetic when she announced, “I know that not everyone is going to like these cookies.  They are made from a non-fat recipe.”  I consider myself an adventurous person (not like Adam Richman level of adventurous), so with the belief that I had never once meet a cookie that I did not like, I took one and ate it.


That was the day that I met a cookie that I did not like.  Some things belong in cookies, like fat for instance.  And other foods in nature belong with all of their accessories as well—like the wheat berry.


Chaya the beautiful


Baking is both science and art.  Believe me, Chaya is an artist in the kitchen with bread baking—and no two batches are the exact same.  Now compare homemade bread (with flour that you ground in your kitchen) to store bought bread.  Trust me, I could never go back to store bought bread; it lacks soul.


Whenever possible use whole grain products, ideally stone-ground.  Whole grain flours are nutritionally superior, plus they have more flavor.  “White” wheat flour has the “good stuff” taken out—the bran, wheat germ and “shorts” are removed; then to get the “bleached flour” the flour is treated with such things as oxides of chlorine, acetone peroxide, potassium bromate, nitrogen, nitrosyl chloride, chorine dioxide, benzoyl peroxide, azodicarbonamide, plaster of Paris, or ascorbic acid to whiten and “mature” the flour, rendering a “more tender final product in baking” (Mitchell, 1991).


Okay, let us dive right in here.  Can you call home ground flour, “processed food?”  I am going to say, “No and Yes.”


White Bread


“No,” in that home ground flour is nearly orthogonal to the stuff you find in the bread aisle at the grocery store.  That “bread” is not bread that you could produce in your house because you probably do not have Phosphorus in your kitchen cupboard.  Phosphorus makes incendiary products and tracer ammunition possible, but is not an ingredient in our go-to bread recipe at our house.  It may be a stretch to call that “bread” bread at all because real flour (the kind you grind at home) goes rancid at about the same rate as milk if you leave it on the counter.  This is a problem for bread companies to bake it, transport it and have it meet up with consumers in the grocery store at the height of its freshness.  So the more calcium sulfate you add to your bread, the more “processed” it becomes on the real food continuum.  However, you can also add calcium sulfate as a soil amendment or use it to comprise plaster or sheetrock—the possibilities are endless.


“For example, sometimes a recipe ends up needing to be modified with a little extra calcium sulfate or flavoring to balance acidity.  Whatever it might take in Wayne [New Jersey], it would be a big challenge to the Twinkie bakery” (Ettlinger, 2007).


Real Bread


“Yes,” in that it alters the wheat from the form you find it in nature.  I do not digest raw hops really well, but I love beer.  Raw meat is not my thing, but I do enjoy a grilled steak.  In the same way, flour baked into bread is a “process” that our house employs to derive nutrition from a wheat berry that would be plain roughage if swallowed whole.


A home use grain mill, like the Wondermill for example, is giving you a product that is 100% usable.  Since most of our bread that we bake is derived from wheat flour, we are able to use 100% of the flour from 100% of the wheat berries put into the mill.  The wheat berry comes in three main parts: the bran, the germ and the endosperm.


Anatomy of a wheat berry


The bran is the wrapper that encases the wheat berry and keeps it sealed.  The germ is the engine that starts the wheat plant when it germinates.  The endosperm is the starch, or to the germ it is the fuel that powers the wheat plant until it can absorb the nutrients from the soil and metabolize the suns energy.  Just like the fat in likeable cookies, the bran and the germ are part of the wheat package.  Since you pay for the whole wheat berry, why not eat all of it?


It turns out that commercial flour strips the bran and the germ out because these are the parts that will go rancid.  Rancid flour does not sell.  However the bran and the germ can be sold as cattle feed.  So the bread you buy in the store is not nearly as complete in nutrition as what is in the manger.


Most of today’s mass-produced foods are seriously depleted of nutrients and are highly chemicalized with additives. Processed foods today are not just more sophisticated and more convenient versions of the foods eaten by our ancestors. A wide spectrum of essential nutrients has been removed in the manufacturing process. The basic molecular structure of what remains is also degraded and nutritionally inferior.  Until recently, grains were ground between large stones to make flour. Everything in the original grain remained in the finished product, including the germ, the fiber, the starch, and a wide spectrum of vitamins and minerals. The final product contained all the naturally occurring vitamins, minerals and micronutrients (Cranton, 2011).

So if it is not nutrition that we are buying, what exactly are we paying for?  Answer: Convenience.


“We do not need unhealthy foods to be more convenient or less expensive” (Pino, 2011).


Oh, but they indeed are both more convenient and less expensive—hence the appeal.  You may remember the old food pyramid:


old USDA food pyramid


Now here is the new one:


new USDA food pyramid


Guess what the USDA is asking you to eat more of?  What appears first in each pyramid—you guessed it grains.  Where do most people get them?  Already ground, stripped, baked and value-added-ready-to-eat on the shelf.


I can remember that when good homemade baked bread was a regularity in our house, we all felt much better after dumping the mass-produced bread in the store.  Getting off the cheap starch is the one truly effective resolution that can change your life for the much better this week!  Blood sugar spikes, inflammation of every kind all are effects of being on cheap starch.  There is nothing wrong with fructose when it comes from fruit (eaten in moderation).  When you amplify a good thing like fructose with another good thing like corn you can get a bad thing like high fructose corn syrup.


So how can you tell which source of grains are best?  The answer is complex.  Not that the answer is difficult to understand, the answer is complex carbohydrates should make up any carbohydrates taken in at all.


Simple and complex carbs are the two main forms of carbs. Carbohydrates provide the body with its main source of energy. . . . Simple carbs are single- or double-linked sugar molecules, and complex carbohydrates are three or more linked sugar molecules, according to MedlinePlus. Simple carb foods usually come from fruits, table sugars and dairy products. Complex carbs commonly come from starchy vegetables and whole grain breads and cereals. The energy from simple carbs is used faster by the body while complex carbs last longer because they are made up of more sugar molecules than simple carbs (Gulezian, 14 ).

Carbohydrates that give us energy also are what fuels the plant to grow initially.  The body is an incredibly well designed machine, that needs high octane quality fuel—do not put the cheap stuff in your body.

Interested in more about bread?  Check out some of our other bread blogs:

Blog – Homemade Bread Recipe–Pantry Paratus Style

Blog – Whole Wheat vs. Hole Wheat

Blog – What I Put Into My Bread–The “Why”

Blog – Altitude Baking & Bread Recipe

Blog – Basics of Breadbaking–An Interview with Chaya’s Mentor


Wilson

Pro Deo & Patria


Photo Credits:

Grain by ml1gU02

Cookies by n49fTlI

first Bread by mgid8Bm

second Bread by nfAVg1Y

anatomy of a wheat kernel

old USDA food pyramid

new USDA food pyramid


Citations:


Mitchell, P. (1991). Grist mill quick loaf breads. (p. 3). Chatham: Sims-Mitchell House.


Ettlinger, S. (2007). Twinkie, deconstructed, my journey to discover how the ingredients found in processed foods are grown, mined (yes, mined), and manipulated into what America eats. (p. 84). London: Hudson st Pr.


Cranton, E. M. (2011, March 15). Modern bread, the broken staff of life [Web log message]. Retrieved from http://www.drcranton.com/nutrition/bread.htm


Pino, D. (2011, August 31). Why sliced bread was never a great invention. Retrieved from http://summertomato.com/truth-and-marketing-why-sliced-bread-was-never-a-great-invention/


Gulezian, T. (14 , July 2011). [Web log message]. Retrieved from http://www.livestrong.com/article/293310-high-complex-carbohydrate-diet/

Altitude Baking & Bread Recipe

I thought I’d show off; I’d learned how to bake at sea level, but I was staying with friends in Colorado, at roughly 7,000 ft.  Disaster.  I had to learn quickly about altitude baking.  After I’d moved to Montana things evened out for me at just less than 3,000 ft.  I did not find much difference between sea level and Montana as far as the outcome of baking, even though a few minor adjustments were still necessary along the way.

Chaya holding high altitude loaf

          That’s Pike’s Peak in the background.

We are visiting our friends now, and I baked two loaves of rather concave bread yesterday.  I have to laugh at myself, at how much I’d forgotten—the formulas for re-writing the recipe, the texture of the dough while kneading.  Every two minutes I was showing the dough to my friend: “Am I done kneading yet?” I would ask.  So much of baking for me is in the hands.

If you find yourself above 3,000 ft altitude, my bread recipe might not work entirely well for you.  You may have to try a few substitutions until you create your own perfect recipe.  For a more complete understanding of high altitude baking, let me suggest this high altitude baking site to answer your bread baking questions.

The science of altitude changes things.  The boiling point is lower (it drops about a point for every additional 500 ft incline).  The air is drier and moisture evaporates much more quickly.  It’s extremely difficult to have a muffin top or a dome on a loaf of bread.  Although baking is as much art as science, ignoring these changes will not work to your favor.  One of the more notable differences is the need for extra moisture.  This makes the dough stickier and wetter.

wet dough

  My recommendation is to start with a high altitude recipe instead of attempting to modify a sea level recipe, if you are higher than 3,000 ft.  Here are a few tips for you if you are higher than 3,000 ft and really want to try modifying your own recipe:

            *Decrease rise time to once, and only approximately 30 minutes!
           *Decrease fats, increase moisture--since the moisture decreases faster, the remaining imbalanced ratio
                 of fat  will  weaken the bread.
           *Increase the baking temperature by 10-15 degrees to keep the leavening gases from collapsing your 
                 beautiful loaf of bread.
           *Extra Moisture!

My friend graciously gave me her recipe, which she adapted over time  from a local breadbaker.

Her one comment was, “I wish my bread held together better”.  A typical troubleshooting tip I give is to add an extra egg.  I did that yesterday and the bread was much more “cakey” than I had anticipated, but it does make great toast.  Thought I’d pass that along to you—I think next time I would adjust the cooking temperature.  If anyone plays with this recipe, please comment and let me know what you have tried!

High Altitude Bread

Preheat oven to 375˚

Makes 2 loaves

2.5 cups warm water
1 ½ Tbsp yeast
¼ cup oil
¼ honey
1 egg
½ tsp lecithin
½ Tbsp lemon juice
½ Tbsp salt
5 cups hard wheat flour
  1. Proof your yeast in hot water and a tablespoon of sweetener for approximately 10 minutes.
  2. Combine other ingredients.
  3. This batter will feel much moister, will require more stirring initially to thicken the batter.
  4. Oil your hands before turning out onto the counter.  Avoid adding more flour, and knead bread for 15-20 minutes.
  5. Immediately put dough into bread pans and let rise.  I used the Excalibur dehydrator for the temperature-control factor.
  6. Bake for 30 minutes.

bread rising in dehydrator

Pumpkin Cream Cheese Oat Bars (or Oat Muffins)

Pumpkin Cream Cheese Oat Bars (or Oat Muffins)


Pumpkin Cream Cheese . . . let’s get to baking!


Pumpkin Cream Cheese Oat Bars, I literally invented this one as I went, not even basing it upon or adapting from another recipe.  It was a fantastic surprise!


          Pumpkin Cream Cheese


I started out baking these in my go-to cake pan, and then I ended up with a muffin tin full as well.  It was very good both ways, so I suppose you can just do what suits your fancy.  Pumpkin and cream cheese were both on sale, so I started with what I had on hand.  I think that the topping makes these as delicious as they are—please do not skimp here!


Pumpkin Cream Cheese Oat Muffins


Also, I used half of a box of cream cheese and the flavor was light.  I could envision these being even more decadent though, so if you try it with more cream cheese, would you please leave a comment below and let us know how it turns out?  One other note, I used hard red flour and they were great—but next time I will try soft white, as it is the best choice for a quick bread.  In either case the cream cheese pumpkin combo yield a moist but firm overall product that my kids love with milk as a snack.


Do not be intimidated by the seemingly long list of ingredients—the topping and batter ingredients overlap and these are mostly basics you already have on hand.  You could simplify with “pumpkin pie spice”—if you do, let me know what you think of it!


I have cut the recipe in half, so this should give you either a dozen muffins or a cake pan’s worth.

Topping:

2/3 cup old fashioned oats

¼ cup brown sugar

1 tsp cinnamon

2-3 tsp butter, melted


 Pumpkin Cream Cheese Oat Bars


Batter:

1 ½ cups fresh-milled flour

1 cup old fashioned oats

1 tsp baking powder

½ tsp baking soda

1 tsp cinnamon

1 tsp ground nutmeg

1 tsp ground cloves

1 cup sour cream

3 cups pumpkin puree

4 oz (half box) of cream cheese, softened

½ cup brown sugar

¼ cup olive oil

1 egg


 Directions:

  1. Preheat oven to 350 degrees.
  2. Stir topping ingredients and set aside.
  3. Combine dry ingredients (flour, oats, baking powder, baking soda, spices).
  4. In a separate bowl, add sour cream, pumpkin, cream cheese, brown sugar, oil, and egg.  Beat for approximately 2 minutes to ensure blending of the cream cheese and to get air into the egg.
  5. Pour one bowl into the other, stirring lightly.
  6. Pour into cake pan or muffin tins. 


If a cake pan, it will take 30-40 minutes.  If muffins, 30 minutes. 


This pumpkin cream cheese recipe is delicious and easy.  I usually try to make one other baked good item on my bread baking day to get my family through the week with snacks and quick healthy breakfast choices—so this works well either as pumpkin cream cheese bars or muffins!


Cream cheese and pumpkin


Give this pumpkin cream cheese recipe a try and let me know how you like it.  This may be my new favorite take-along finger food for get-togethers! 


Chaya


Photo Credits:

All photos by Pantry Paratus

What I Put Into My Bread–The “Why”

bread with seeds

Bread Ingredients


The Role of Each Ingredient in the Final Product


I would like to explain what each of the ingredients does and how it interacts in my bread recipe.  Once you understand this, it is easy to modify a recipe and make it your own.  Perhaps you avoid eggs, or want a product with less gluten, etc.  If you understand the interplay of these ingredients, you can make substitutions, and create your own variant.

 I prefer to start with natural ingredients as much as possible.  I will mill my own flour before I get started to ensure that I have the highest nutrient density in my family’s bread.  Where possible, I highly recommend pastured eggs.  The Omega 3 is clear to see in the bright yellow yolks—bugs and sunshine make the best eggs!  Lastly, if you can use filtered water you will get better performance with your recipe ingredients (and you will not miss the Chlorine). 


pitcher of water

Water—Beyond joining the bread ingredients, water temperature is very important for activating yeast.  You want your water to be approximately 110-155˚F.  Again, filtered water is going to give the best results. 

 Altitude is another consideration on how much water you need to add to your recipe.  Higher altitudes are dryer climates (lower boiling point for water) and will require a higher ratio of water to the dry ingredients.  My recipe worked for me at both sea level in North Carolina and at 3,000 ft here in Montana . . . however I have to use a slightly higher water-to-flour ratio here at 3,000 ft.  When I tried to bake bread at 7,000 ft in Colorado Springs, my low altitude recipe failedClick here for a tested high altitude bread recipe.

  olive oil

Oil—Next to flour, the quality of the oil has the most direct effect on the quality your bread, both in flavor and in nutrition.  I almost exclusively use olive oil, because when you examine the finished product, you will know the recipe by ingredients used to make it.  It is this fat content that makes a tender and moist baked good.  The fat interacts with the strands of gluten to shorten (why we call them “shorteners”) the length of the gluten strands.  This allows the gases more freedom of movement so that your baked goods are more “airy”.  Egg yolks also help serve this purpose.


honey

Honey—I always add the oil first so that the honey will slide out of the same measuring cup without mess or waste.  Traditional cookbook recipes just use plain white sugar, which is good for plain white bread.  But why, when you can take your bread from “boring” to “rich”?  Honey within itself is the original antibiotic—it is extremely healthy for your immune system, it is easily digestible.  Yes, it is one of the more expensive items on the ingredients list—but if you did a blind taste test between two loaves of bread, you would know which one had the honey.  I have baked with a variety of sweeteners over the years, to include agave nectar, stevia, and molasses.  I find that the honey has the least finicky response in the recipe and is the most versatile.


flax seeds

Flax Seed—this is a completely optional  in my list of recipe ingredients, but one I choose for the Omega 3 fatty acids.  I know that it is difficult (depending upon your geography) to fill your diet with excellent seafood.  If you do not grind the flax seed, you are basically only getting the fiber and the rest of the nutrition passes through undigested.  It is an excellent source of both soluble and insoluble fiber. If you grind it in a coffee grinder (you can typically pick one up cheaply for about $10.00 at a box store or pharmacy store) that you have reserved only for your herbs and seeds, you will get many precious phytochemicals in your bread.  Flax, like other seed grains, has a lot of antioxidants, including lignans. 

We like to use bread for sandwiches, but I commonly hear the complaint that homemade bread can crumble too much for this use.  Here’s a great trick:  grind your flax seed and add a tablespoon of water to it and let it sit in a bowl for a minute before adding it to your dough.  It will work as a binder–just like egg–and will help hold your bread together even while giving you the great nutritional benefit of flax.

 soy lecithin


Lecithin—This one ingredient single-handedly transformed my early breads to something edible.  I did not know WHY back then.  Since then I have learned that it is considered a health supplement for its ability to break down fats, to improve memory, and for its promotion of healthy gall bladder functioning.  It lowers cholesterol and has been linked to improving women’s reproductive health.  In cooking, it is used as an emulsifier to prevent sticking (such as what you find in a cooking spray and chocolate). It provides a tenderness and (perhaps the most important thing of all), it extends the shelf life of the bread!  I get several more days at room temperature out of my bread with lecithin, than the bread I have made omitting this ingredient.  “Lecithin” is a generic term that can mean any emulsifier and it can be made from many sources.  Although I typically avoid soy due to the GMO factor these days, I have used soy lecithin in my bread in the past.  You can live without this ingredient, but its shelf life extension, texture improvement, and health benefits make this one you need to weigh personally. 

Now that I’ve mentioned all the benefits and how I never baked without it in the early years, I must fess up and tell you I do not use it now.  I can “read” my bread dough better with years of experience and don’t need the lecithin to help hold it together for me any more.  I do have some on my shelf but I rarely reach for it now.

salt


Salt—I have forgotten it more than once.  Your bread is flavorless without it, entirely.  I have also overdosed on it, and that makes the bread inedible at best.   Salt also tempers the effect of the yeast; you usually realize you have forgotten the salt when your bread will not stop rising!  Stick with sea salt if you can; it greatly enhances the flavor and nutrition of your bread.  It makes it something richer.

 Palouse Flour


Flour—The single most important of all the ingredients, which is why I only use home-milled flours because of the marked health benefits.  Store bought flours, even the gourmet ones, have had to strip some of the nutrients out in order to give it shelf life.  Flours in the frozen section maintain most of the nutrition but freezer life will take its toll on that as well.  Milling your own flour is easy, affordable, and the most nutrient dense way to bake bread.  You can substitute bean and other flours (chickpea, for example) for some of the wheat, but do not go over 25% (you will likely need to add gluten) of the entire flour content or it will not rise properly. 

 Not all wheat is the same.  “Hard” wheat has higher gluten and is best for yeast breads.  “Soft” has lower gluten and better for lighter baking products like cake that use other rising methods, such as egg yolk, baking powder, and baking soda which also appear in quick breads.

 Hard Red—this has the dark, wheaty flavor.  I started with Hard White and began adding this in slowly.  This can be an acquired taste, now I love it!  Hard Red wheat responds very well to yeast recipe breads. 

Hard White—Less wheaty flavor.  Very tasty, excellent to use in yeast products.

Soft White—This is the best for quick breads, cookies, baking items with lighter structures.  I sometimes mix some in with bread flours for yeast bread, but never more than 10-25% of the total flour. 

Durum—This is your pasta wheat!  Very tasty and you will see a difference, but in a pinch, use soft white instead. 

Spelt—This is delicious and versatile wheat substitute.  You can use it in both breads and quick breads.  Some people who have sensitivity to wheat breads do well with this flour.


eggs


Eggs—This is the binder in your bread.  I have tried to live without them and I have tasted several loaves from other bakers without it and I come to the same conclusion every time—use eggs (even better, get your own chickens)!  The bread crumbles more easily without it—so if you want sandwich bread you cannot skip this step.  You might want to play with how many you use.  Eggs also provide another source of healthy fat for your bread, which helps lighten the overall texture. 

 There are likely thousands or even tens or thousands of bread recipes across the world, but each one will differ based on the ingredients.  The food science is the same though, so choosing recipe ingredients that are fresh, quality and wholesome will yield a superior product.  If you come across a recipe that you want to modify, you can as long as you which bread ingredients do what and why.  If you come across any ingredients that I did not mention here, please leave a comment below and let me know what you like to see in your bread recipe.


Chaya


Photo Credits:

Pitcher of water  http:/www.freedigitalphotos.net/images/view_photog.php?photogid=1857%22%3EImage:%20zirconicusso%20/%20FreeDigitalPhotos.net%3C/a%3E%3C/p%3E

 Oil  http:/www.freedigitalphotos.net/images/view_photog.php?photogid=681%22%3EImage:%20m_bartosch%20/%20FreeDigitalPhotos.net%3C/a%3E%3C/p%3E

Honey  http:/www.freedigitalphotos.net/images/view_photog.php?photogid=851%22%3EImage:%20Danilo%20Rizzuti%20/%20FreeDigitalPhotos.net%3C/a%3E%3C/p%3E

Salt  http:/www.freedigitalphotos.net/images/view_photog.php?photogid=345%22%3EImage:%20Carlos%20Porto%20/%20FreeDigitalPhotos.net%3C/a%3E%3C/p%3E

 Eggs  http:/www.freedigitalphotos.net/images/view_photog.php?photogid=1758%22%3EImage:%20Rawich%20/%20FreeDigitalPhotos.net%3C/a%3E%3C/p%3E


Proviso:


Nothing in this blog constitutes medical advice.  You should consult your own physician before making any dietary changes.  Statements in this blog may or may not be congruent with current USDA or FDA guidance.


Homemade Bread Recipe–Pantry Paratus Style

Bread in Oven

 Pantry Paratus bread with infused olive oil

Pantry Paratus Style


This is my personal homemade bread recipe; I hope you enjoy it.  I use this dough for many purposes as it is the base for herbed breads, rolls, hamburger buns, stuffed loaves—YUM. 

 Bread in Norpro Nonstick Pans

I have worked with this recipe for bread over the years and am confident with it.  It also continues to evolve from time to time.   Get creative, and leave a comment below telling me what you have tried and how you have modified it to fit your family’s needs.  If you need a high altitude version click here.

If you avoid all soy, skip the lecithin.  Use it if you want to give your bread a longer shelf life or if you have had problems with the bread being too crumbly in the past (and you had difficulty using it for sandwiches).   If you want to skip the soy but troubleshoot crumbly bread, consider grinding flax seed and letting it soak in a tablespoon of water for a minute–it will serve well as a binder.

Recipe for Whole Wheat Bread

 Yields:  three loaves in 10’’ pans

  • 4 cups warm water (leftover water from boiling potatoes is great)
  • 3 tablespoons yeast
  • ½ cup flax seed, ground (optional)
  • 3 tablespoons lecithin (optional; if omitted, consider 3rd egg as a binder)
  • ¼ cup gluten (recommended but optional)
  • 2 tablespoons salt
  • 14-17 cups hard red or hard white flour (I use 15 cups at 3,000 ft altitude, average weather)
  • 1 cup olive oil
  • 1 cup honey
  • 2-3 eggs
  • Sesame seeds (optional)

Pull out all ingredients and have them handy to speed up the process and cut down on the mess.

 I Crack my eggs into a separate bowl, stir, and let them warm to room temperature for best results.


  Step 1: Add yeast to warm water (approx. 110-115 degrees) and proof to ensure the yeast is viable.  Add oil and honey (oil allows the honey to pour easily from your measuring cup).  Let this sit until you see bubbling yeast activity. 

 Step 2:  Stir in flax, gluten, lecithin, salt, and eggs. 

 Step 3:   Add flour.  If you want to proof your flour (to lower the Phytic acid content) do this now by only adding 5-10 cups of the flour, stirring, and letting it sit as desired.  Otherwise, add all the flour you can still stir.  I recommend that you mill flour fresh for highest nutritional values.

 Step 4: Oil or flour your work surface.  Dump your flour out onto the table, adding the rest of the flour.  Remember to oil your hands to eliminate sticking as you knead the dough. 

 Step 5: Knead the dough approximately 10-12 minutes (I sing through “The Lord’s Prayer” twice), or until the dough is soft to the touch, firm and yet still pliable.  Avoid adding too much flour during the kneading process—it is a common mistake that can make your bread dry. 

 Step 6: Place the dough back into the bowl and cover.  Let sit for one hour.  If you have a cold kitchen, remove the trays from your Excalibur dehydrator and proof the bread in there at approximately 80°.

 Step 7: Punch down your dough to release the gases.  Then form into loaves with the seam down and place into the greased or floured bread pans.  Lightly oil and add seeds if desired.

 Step 8: Preheat your oven to 350 degrees. 

 Step 9: Cover your loaves again and let them sit for 15-30 minutes longer (not necessary at higher altitudes). 

 Step 10: Bake for approximately 30 minutes.  Check for even browning and rotate if needed (every oven is different).  If they brown too quickly, cover with foil for the first half of baking.  

 I also did a separate blog entry to give the why every ingredient appears in the wheat bread recipe, some science behind the reactions and what happens if you omit or substitute an ingredient.  Bread baking is so much fun, I hope that you enjoy it as much as I do.

For best nutrition results, use a whole wheat bread recipe like this one to ensure that you are getting the healthiest results.  Flour that you mill at home has superior nutrition to the dead flour that you buy on the shelf at the grocery store. 

Bread in Oven
Bread in Oven

High altitude tip:  I thought that I knew how to bake bread until I tried it at my best friend’s house in Colorado Springs.  If your altitude is anything higher than approximately 2,000 ft, you might find you need to add more moisture to your bread dough, adjust your rise time, and adjust your cooking time. Try this high altitude bread recipe variant.

If you would like to see a video of this bread recipe, simply sign up for our news letter and you will receive a video link in your email walking you through step by step.  I recently had tasted someone’s second loaf of bread (ever) that she made after watching my video-and it came out great! 

If anyone modifies this specific recipe, or if you have another bread recipe altogether,  please leave a comment.  I would love to hear what works for you!


Bread with Frontier Sesame Seeds


Enjoy!

 Chaya